Dehaze Using Generic Slider Adjustments.
Apr 3, 2021 12:29:04 #

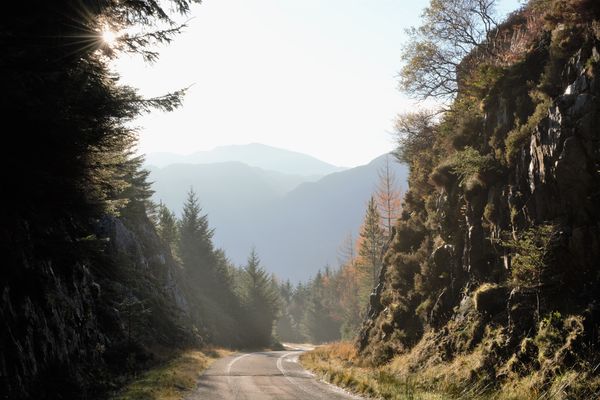
Where dehaze is concerned, the ultimate generic method is to use generic sliders. Dehaze tools work if you have them, but apart from that, if they can't be applied to selections then it's global-only adjustments, which can be limiting and in some cases downright problematic. Most editors have the ability to apply generic slider adjustments to selections.
In this thread the subject is dehaze being applied specifically to skies, but it's worth noting that if ground level mistiness or haze is a problem it can be reduced using the same techniques.
The reason why dehaze improves skies is because most skies have a significant element of haze, even if the rest of the scene appears to be haze-free. We're used to seeing skies that are soft where detail, contrast and colour are concerned and we don't usually think of it as haziness. But most skies can be improved with a bit of dehaze.
Contrast is the main generic adjustment that can be used for dehaze. However, too much contrast can cause dark areas to become too pronounced and solid, which is often not a good thing for skies, even in cases where a dramatic, stormy look is desired.
Clarity is another generic adjustment that can be used to dehaze but it has to be used with caution because it can easily cause a harsh look, which may not be what's wanted, especially where skies are concerned. Clarity can also cause diffuse haloing, which is usually an undesirable effect. Too much Contrast can also cause harshness but it's more easily mitigated. Clarity adjustments are best left to the end and used for minor tweaking only.
Haze, like mist, can be bright, dark or a patchy mixture of the two. One of the most effective adjustments for treating haze is lowering the Highlights, especially if the haziness is accompanied by bright glare. An overall reduction in Brightness (or Exposure or whatever your editor refers to it as) can be effective, but reducing it too much can result in the darks becoming too dark. In some cases that can be too limiting, or problematic in some other way.
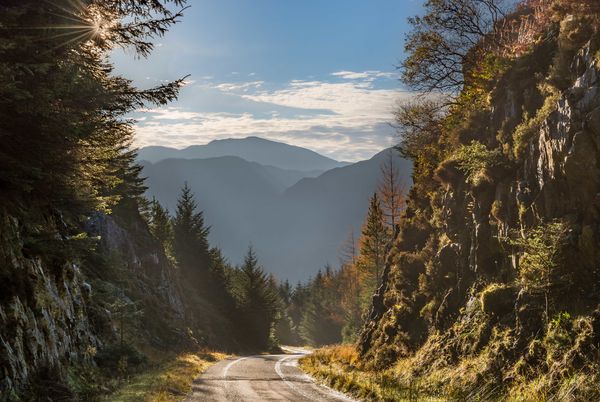
As a general rule, if the darks are becoming too dark the problem can sometimes be mitigated by lifting the Blacks and/or the Shadows a little. However, in the case of the Shadows slider, its effect usually extends into the lower end of the mid tones, which means that lifting the shadows too much can aggravate haze.
In contrast to these problems, most scenes benefit from some highlight reduction, and if you want to push it, the unwanted effects are usually only moderately undesirable, especially if you're also adding more contrast.
If you have a close look at haze in a landscape shot taken on a bright, sunny day you'll see that it usually has a pronounced blue tint. The same thing applies to haze in the sky although it's less obvious there because we're used to seeing skies that are blue. Whether haze is seen against a landscape or is part of the sky, it can be reduced by darkening blue (by using the HSL tool or whatever your editor's equivalent is). Darkening colours strengthens them so the darkening usually has to be accompanied by a reduction in saturation for that colour. However, if the colour has to be desaturated to the point where it looks washed out, the darkening is too extreme and needs to be reduced. These points will apply even if the sky has been selected for local adjustments because darkening blue can result in the clear blue parts of a sky becoming too dark, heavy and solid. The right combination of darkening and desaturating will avoid that problem.
As a dehaze technique, darkening and desaturating blue should be seen as providing only moderate improvements since pushing these adjustments causes the undesirable effects just mentioned. The same points also apply to haze seen against a landscape on a bright day. Haze can rob what's behind it of colour and if you take away the blue, what's behind it can be left colourless, so you may want to leave most of the blue in that situation.
If your editor allows only global colour adjustments you may find that other parts of the image are being adversely affected by your colour adjustments. For example adjusting the colour blue will usually affect any water in the shot. It's also worth mentioning that it's not the colour blue itself that's the problem - you're simply using blue to make targeted adjustments to reduce the haze. After making those adjustments you may have the opportunity to restore some (if not all) of the blue. That can be done using various means such as an Adjustments brush or Split Toning.
.
In this thread the subject is dehaze being applied specifically to skies, but it's worth noting that if ground level mistiness or haze is a problem it can be reduced using the same techniques.
The reason why dehaze improves skies is because most skies have a significant element of haze, even if the rest of the scene appears to be haze-free. We're used to seeing skies that are soft where detail, contrast and colour are concerned and we don't usually think of it as haziness. But most skies can be improved with a bit of dehaze.
Contrast is the main generic adjustment that can be used for dehaze. However, too much contrast can cause dark areas to become too pronounced and solid, which is often not a good thing for skies, even in cases where a dramatic, stormy look is desired.
Clarity is another generic adjustment that can be used to dehaze but it has to be used with caution because it can easily cause a harsh look, which may not be what's wanted, especially where skies are concerned. Clarity can also cause diffuse haloing, which is usually an undesirable effect. Too much Contrast can also cause harshness but it's more easily mitigated. Clarity adjustments are best left to the end and used for minor tweaking only.
Haze, like mist, can be bright, dark or a patchy mixture of the two. One of the most effective adjustments for treating haze is lowering the Highlights, especially if the haziness is accompanied by bright glare. An overall reduction in Brightness (or Exposure or whatever your editor refers to it as) can be effective, but reducing it too much can result in the darks becoming too dark. In some cases that can be too limiting, or problematic in some other way.
As a general rule, if the darks are becoming too dark the problem can sometimes be mitigated by lifting the Blacks and/or the Shadows a little. However, in the case of the Shadows slider, its effect usually extends into the lower end of the mid tones, which means that lifting the shadows too much can aggravate haze.
In contrast to these problems, most scenes benefit from some highlight reduction, and if you want to push it, the unwanted effects are usually only moderately undesirable, especially if you're also adding more contrast.
If you have a close look at haze in a landscape shot taken on a bright, sunny day you'll see that it usually has a pronounced blue tint. The same thing applies to haze in the sky although it's less obvious there because we're used to seeing skies that are blue. Whether haze is seen against a landscape or is part of the sky, it can be reduced by darkening blue (by using the HSL tool or whatever your editor's equivalent is). Darkening colours strengthens them so the darkening usually has to be accompanied by a reduction in saturation for that colour. However, if the colour has to be desaturated to the point where it looks washed out, the darkening is too extreme and needs to be reduced. These points will apply even if the sky has been selected for local adjustments because darkening blue can result in the clear blue parts of a sky becoming too dark, heavy and solid. The right combination of darkening and desaturating will avoid that problem.
As a dehaze technique, darkening and desaturating blue should be seen as providing only moderate improvements since pushing these adjustments causes the undesirable effects just mentioned. The same points also apply to haze seen against a landscape on a bright day. Haze can rob what's behind it of colour and if you take away the blue, what's behind it can be left colourless, so you may want to leave most of the blue in that situation.
If your editor allows only global colour adjustments you may find that other parts of the image are being adversely affected by your colour adjustments. For example adjusting the colour blue will usually affect any water in the shot. It's also worth mentioning that it's not the colour blue itself that's the problem - you're simply using blue to make targeted adjustments to reduce the haze. After making those adjustments you may have the opportunity to restore some (if not all) of the blue. That can be done using various means such as an Adjustments brush or Split Toning.
.
Apr 3, 2021 13:39:41 #

Apr 3, 2021 13:43:02 #
Apr 3, 2021 15:39:46 #
twosummers
Loc: Melbourne Australia or Lincolnshire England
Great advice - here's my attempt. Sky not right is it?
Apr 3, 2021 15:57:43 #
twosummers wrote:
...Sky not right is it?
Not quite, but I had the raw to work with, not a small jpeg. Glad you found the thread helpful.
Apr 3, 2021 16:25:50 #
twosummers
Loc: Melbourne Australia or Lincolnshire England
R.G. wrote:
Not quite, but I had the raw to work with, not a small jpeg. Glad you found the thread helpful.
Brilliant thanks - I don't think there was any sky detail in the jpeg to be fair. Good advice
Apr 4, 2021 06:21:34 #
Apr 4, 2021 07:35:40 #

Apr 4, 2021 08:31:16 #
Great info RG!
You're pointing out the diffs between each setting and how they affect the whole pic
and each other (setting) within a pic is great information.
Thanks,
JimmyT Sends
Bravo Zulu

Edit: Should this info be included in the Rongnongno UHH tutorials?
You're pointing out the diffs between each setting and how they affect the whole pic
and each other (setting) within a pic is great information.
Thanks,
JimmyT Sends
Bravo Zulu
Edit: Should this info be included in the Rongnongno UHH tutorials?
Apr 4, 2021 09:37:37 #
Apr 4, 2021 09:52:42 #
Jimmy T wrote:
Great info RG!
You're pointing out the diffs between each setting and how they affect the whole pic
and each other (setting) within a pic is great information.
Thanks.....
You're pointing out the diffs between each setting and how they affect the whole pic
and each other (setting) within a pic is great information.
Thanks.....
Thank you Jimmy. Dehaze itself is generic because it's an extreme example of adding vividness and clarity, so learning how to deal with haze teaches basic stuff.
Jimmy T wrote:
Edit: Should this info be included in the Rongnongno UHH tutorials?
This thread is one of the tutorials in RGG's new Index listing. If titles aren't self-explanatory he gives them a more self-descriptive title. This thread is under "Using Slider Adjustments (Lightroom)".
Apr 5, 2021 11:00:42 #

You put a lot of thought and time into this. It is an excellent discussion of these tools. Thanks for doing it. In your example, the clouds still seem a little blown out. Keep this discussions coming.
Apr 5, 2021 11:10:39 #
abc1234 wrote:
You put a lot of thought and time into this....
Sometimes the process of condensing and crystallising what you know then putting it down in writing can be very instrumental in clarifying ones own understanding of a subject. I highly recommend it
 .
.When it comes to finding examples in my own archives, I usually find that I have lots of near misses. The posted example is as good a fit as I can hope for
.Apr 5, 2021 11:16:19 #
R.G. wrote:
Sometimes the process of condensing and crystallis... (show quote)
Teaching which is what your are really doing does make you better at what you do. Nothing like putting it on paper.
Apr 5, 2021 11:28:26 #
abc1234 wrote:
Teaching which is what your are really doing does make you better at what you do. Nothing like putting it on paper.
True
.
If you want to reply, then register here. Registration is free and your account is created instantly, so you can post right away.