The Easy Way To Unzip an Orange
Jan 12, 2021 06:17:13 #
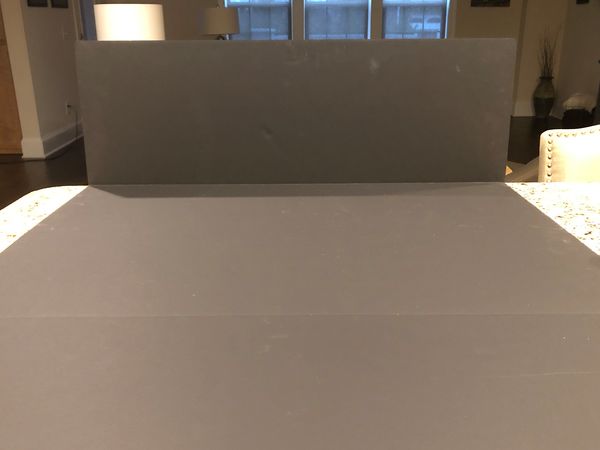
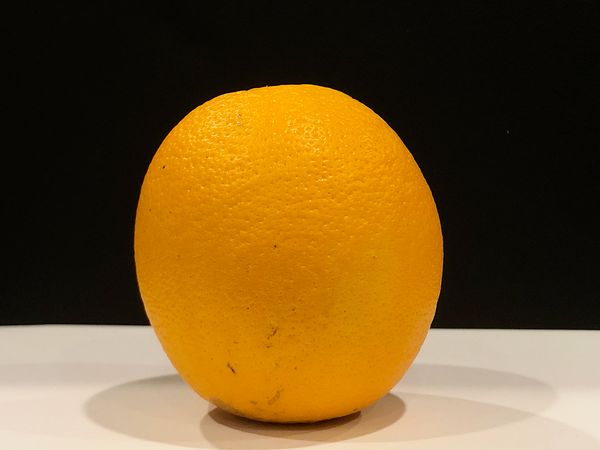
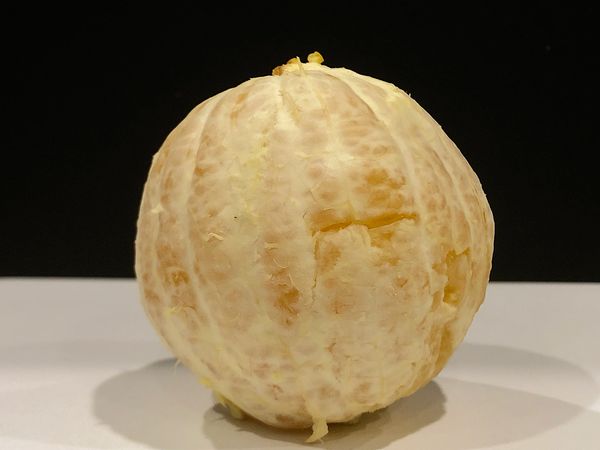
It's been awhile since I've unzipped anything so I decided to do another conceptual unzipping of an orange. I used my IPhone 8+ to take these images. First I placed a Black poster board on our bar. I then placed a white sheet of printer paper down on
poster board. Next, I took a shot of an orange. Then another shot of the orange after
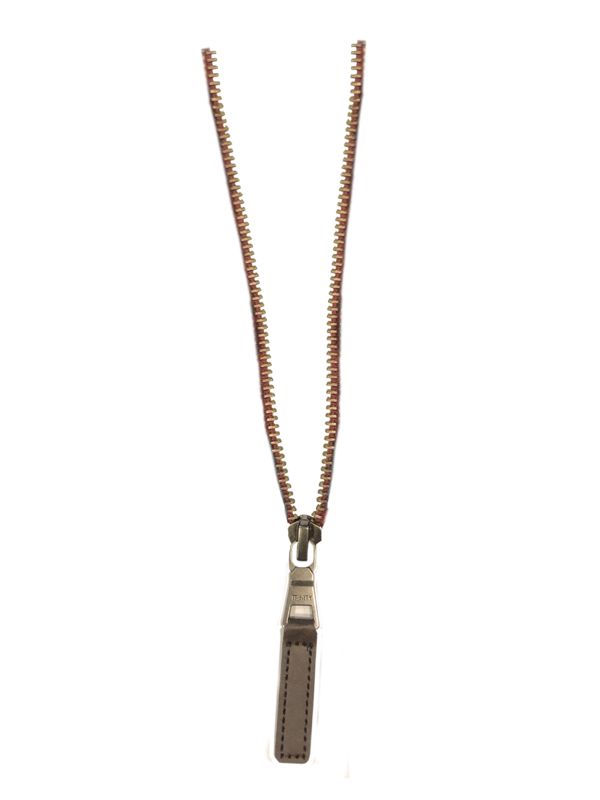
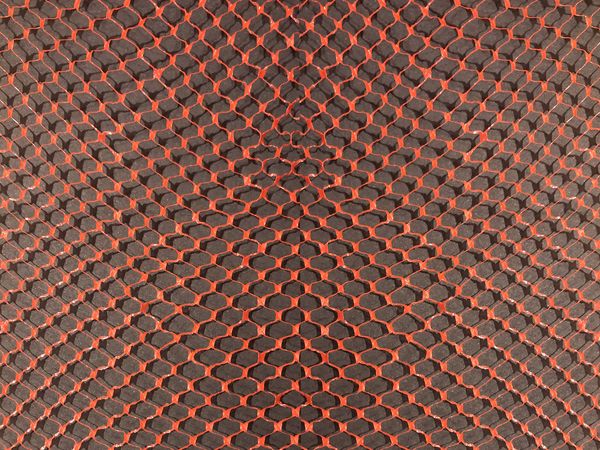
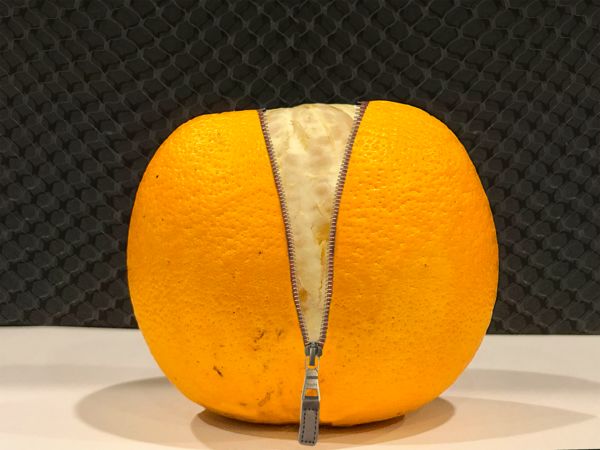
it had been peeled. I also took a shot of the bag the oranges came in. I thought maybe I would use the bag as some sort of texture for the image. Next I took a shot of a zipper on one of my sweaters. Now comes the fun part. Assembling all the parts into the finished image. I cut out the zipper from the sweater. I split the orange into two halfs and then used the warp tool to spread the orange apart. Next, I layered the zipper along the lines of the cut edges of the orange peel, using the warp tool to position it in place. I then placed the peeled orange on a layer underneath the original orange and position it in place. Finally, I used a portion of the orange bag to add a little bit of interest to the black poster board. Once added, I changed the blend mode layer of the bag to luminosity just to just show the highlights and shadows without the color of the bag. The last image is the finished image. All of the edits were down inside of Photoshop CC. Once you learn the technique, you can unzip just about anything. This is the 4th image I've done in the past. I've unzipped a lightbulb, a vintage phone, and even unzipped my head.
poster board. Next, I took a shot of an orange. Then another shot of the orange after
it had been peeled. I also took a shot of the bag the oranges came in. I thought maybe I would use the bag as some sort of texture for the image. Next I took a shot of a zipper on one of my sweaters. Now comes the fun part. Assembling all the parts into the finished image. I cut out the zipper from the sweater. I split the orange into two halfs and then used the warp tool to spread the orange apart. Next, I layered the zipper along the lines of the cut edges of the orange peel, using the warp tool to position it in place. I then placed the peeled orange on a layer underneath the original orange and position it in place. Finally, I used a portion of the orange bag to add a little bit of interest to the black poster board. Once added, I changed the blend mode layer of the bag to luminosity just to just show the highlights and shadows without the color of the bag. The last image is the finished image. All of the edits were down inside of Photoshop CC. Once you learn the technique, you can unzip just about anything. This is the 4th image I've done in the past. I've unzipped a lightbulb, a vintage phone, and even unzipped my head.

Jan 12, 2021 06:57:10 #

Jan 12, 2021 07:23:49 #

I like the textured background which goes along with the orange peel texture. Simple components combined into a complex, altho straight forward story... Children will believe it is real.
Jan 12, 2021 08:02:38 #
Jan 12, 2021 08:56:50 #

Fantastic result, delightful exercise! I'll add this "unzip" tutorial to our list here:
https://www.uglyhedgehog.com/t-645056-1.html
.
https://www.uglyhedgehog.com/t-645056-1.html
.
Jan 12, 2021 09:20:37 #

Jan 12, 2021 10:43:06 #

Fstop12 wrote:
It's been awhile since I've unzipped anything so I... (show quote)
Mad Photoshop skills!!!! Excellent concept and execution in every way. I think everyone here would love to see your other zipper images. Can you share them with us?
Jan 12, 2021 13:26:55 #
BrentHarder wrote:
Mad Photoshop skills!!!! Excellent concept and execution in every way. I think everyone here would love to see your other zipper images. Can you share them with us?
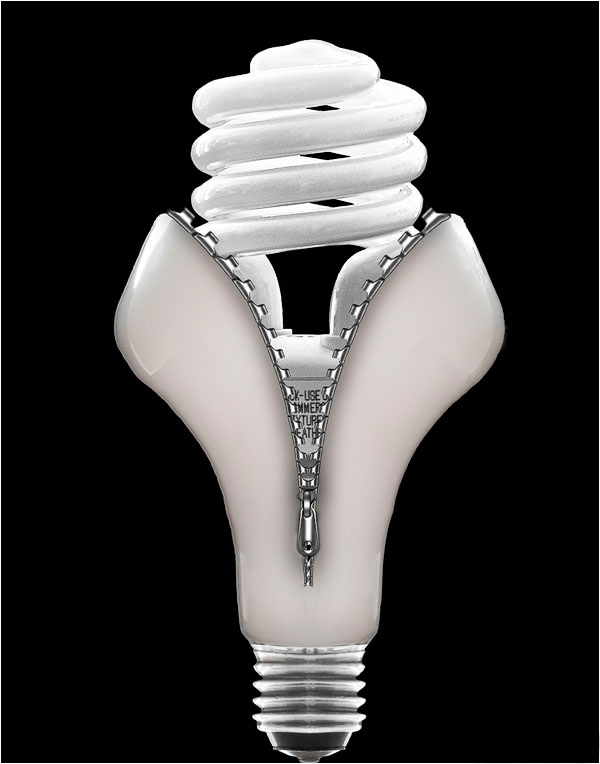
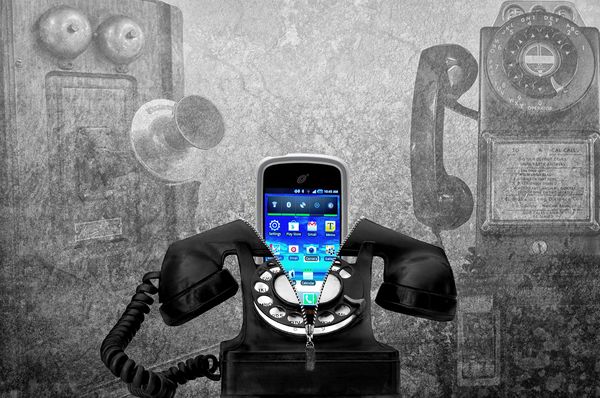
The first one is titled Evolution of a Lightbulb. This was my very first attempt at this technique in 2012. The next one is titled Evolution of Phone Technology. All of the images used in this composite belong to me. One was shot in Florida, one shot in Arizona and 3 in Louisville Ky.
Jan 12, 2021 15:44:15 #

Jan 12, 2021 18:12:40 #


Jan 13, 2021 06:19:35 #
Jan 13, 2021 07:24:42 #
Sad that few among us can afford such an elaborate studio made of foam board a desk lamp and junk laying around the house. Never should we say we have nothing to photograph because the weather is bad, we can do Table-Top-Photography. Fstop prods us with a fun game of mixing images to give an image with reality dissonance.
This post would be an excellent one to flame interest in school students. This work does not require that they have Photoshop, free and inexpensive programs will do the layers dance.
The general student lesson plan, Fstop's intro says it all. With a typical teasing teen's devious mind, they would be motivated to quickly understand layers rather than falling asleep while being lectured ... they would have a goal.
Jan 13, 2021 09:09:03 #
Jan 13, 2021 09:44:17 #

Jan 13, 2021 10:41:16 #
StanMac
Loc: Tennessee
Fstop12 wrote:
It's been awhile since I've unzipped anything so I... (show quote)
Neat idea and excellent execution! I wish all oranges came with a zipper!
Stan
If you want to reply, then register here. Registration is free and your account is created instantly, so you can post right away.