Blue Light Special
Jul 28, 2020 22:18:47 #
Hello one and all,
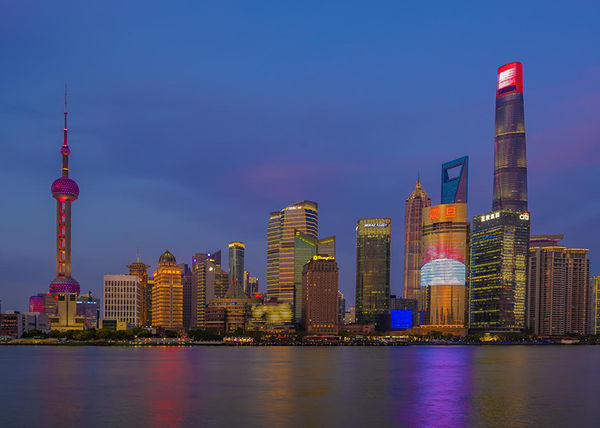
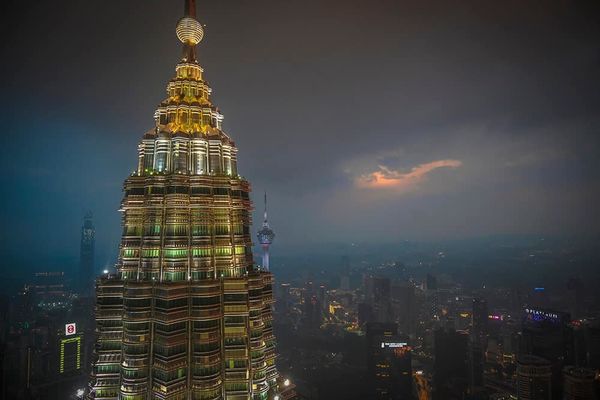
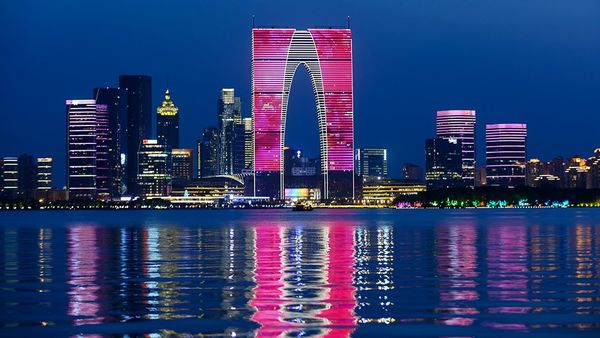
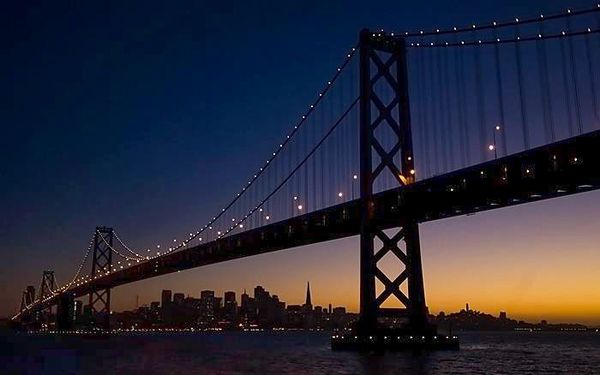
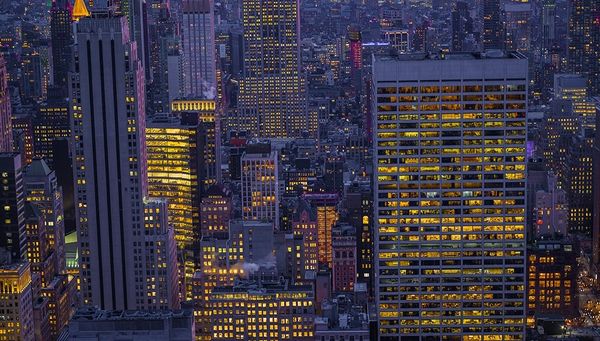
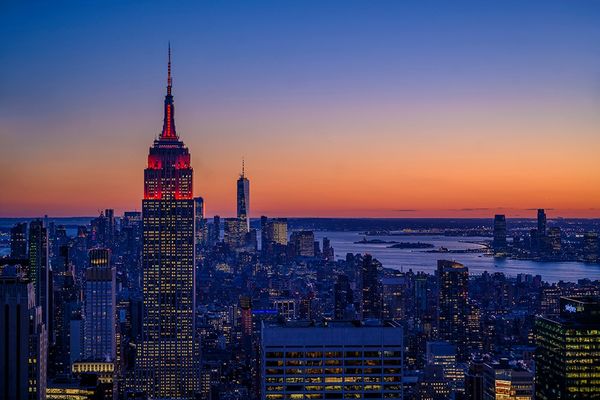
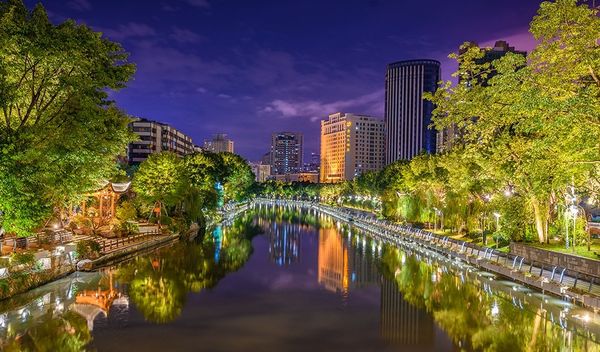
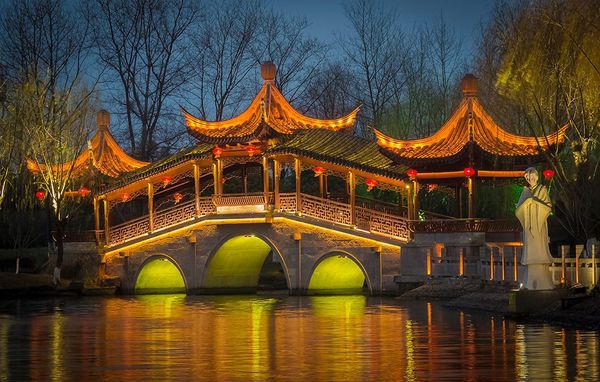
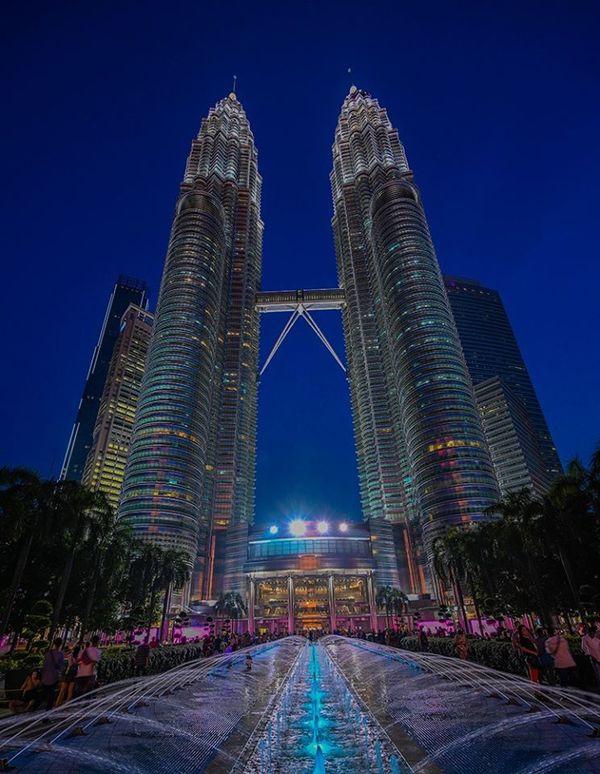
I am Mark Lent, and I teach photography at a university in Suzhou, China and previously wrote for Popular Photography & Imaging Magazine. This section looks kinda fun, and this is my first post in it, and I am going to show you the simple way to shoot pretty night time photos. I have always heard this referred to as "Blue Hour" light. It is after/before "Golden hour", which is better known and is the 2 hours after sunrise and two hours before sunset, when the light has a golden hue. Blue hour is just after sunset or just before sunrise, but only lasts a short time, maybe 20-30 minutes. So, the idea is to plan. Know where you are going to shoot and the lens you plan to use before you go. You will need:
A camera that allow adjustments of shutter speeds and ISO- any camera that can do this is fine, even a cell phone with app software that allows you to change shutter speeds and aperture.
A tripod. You can do it without, but it limits what specifically you can do with shutter speeds. Tripods will give you the benefit of maximum sharpness and flexibility.
Patience... It is important. You may not make the images you want your first time out, but keep at it and your work will improve.
Planning... Know where the sun will set, what time it will set (You can ask Google for the sunset time in any city in the world). Scout the location and conditions before your shoot to ensure what you want to do is workable.
Equipment... this will vary with each person. I shoot with a carbon fiber tripod, a Nikon Z7 and I bring lenses from 14mm to 500mm (and among them, every single "mm" between those two!), extra batteries and even a chair if you can. Standing for 20 minutes, waiting for the light to improve can be difficult if you have leg or knee joint issues. Comfort is important!
When I make these images, I typically choose a very low ISO, and on me Z7 that equates to about 25 ISO. This allows me to accomplish two things. First, it is a higher quality level- lower ISO's equate to less noise. Next, if you are shooting along a river or other waterway, it allows the movement in the water to be smoothed out and have a less choppy appearance because you're using a longer shutter speed. This is where the tripod comes into play. long exposures require a tripod for exceptional sharpness. In these images, I typically choose two stops from the "wide open" aperture. In my 24-70 F4 Nikkor Z series lens, this means an aperture of F8.
The trick to making these look good is to not let the sky get too black before you start shooting. When the lights come on, even if the sky and scene are bright, start shooting and every few minutes, shoot a few more frames. You'll be amazed at the difference in the scene in a matter of minutes and eventually with practice, you'll get the hang of shooting Blue Light images. If you will notice, in the images I have shot and show here, you see the detail in such things as the trees. It is actually pseudo-night, but night enough where all of the detail still shows and the lights are on. Best of luck to you and if you have questions, please message me here. Best of luck!
Mark Lent
Pixeldawg

Jul 28, 2020 22:38:26 #
Jul 28, 2020 22:41:17 #
NMGal wrote:
Beautiful photos and very informative.
Thank you and hope you enjoy!
Jul 28, 2020 23:15:39 #
Jul 28, 2020 23:39:11 #
Jul 29, 2020 00:17:11 #
kpmac wrote:
Beautiful work. Thanks for the narrative, too. Looking forward to more.
Thanks!
Jul 29, 2020 00:18:13 #
Iron Sight wrote:
Techniques to try. 🌝 Thanks.
When you do, let me know how it goes, please? In Utah, you should have plenty of good scenery for this.
Jul 29, 2020 01:33:52 #

Jul 29, 2020 02:11:31 #
Jul 29, 2020 06:12:21 #
david vt
Loc: Vermont
Nice shots. I recognize several of the shots from my travels. Thanks for explaining your process
Jul 29, 2020 06:57:04 #


Jul 29, 2020 07:53:10 #
Jul 29, 2020 08:34:50 #

Jul 29, 2020 09:37:24 #

Excellent presentation, thanks!
Perhaps Photo Analysis could be utilized as a place for teaching outside of the Wild West of main discussion forum. I see that Wallen's topic about shooting fireworks remained, though if you read the section guidelines here, the original purpose is a bit different. Analysis is one of the oldest sections on UHH and is managed by UHH owner, Admin.
I refreshed my memory about your last topic in main discussion (February), where you said you were leaving UHH. Good to see you are back with a different "agenda" 😊
Jul 29, 2020 09:58:01 #
Charlie157
Loc: San Diego, CA
Great photos, I especially like the 4th photo. Thanks for the information. Will try to retain it.
If you want to reply, then register here. Registration is free and your account is created instantly, so you can post right away.