Mandala
Mar 26, 2020 11:29:47 #

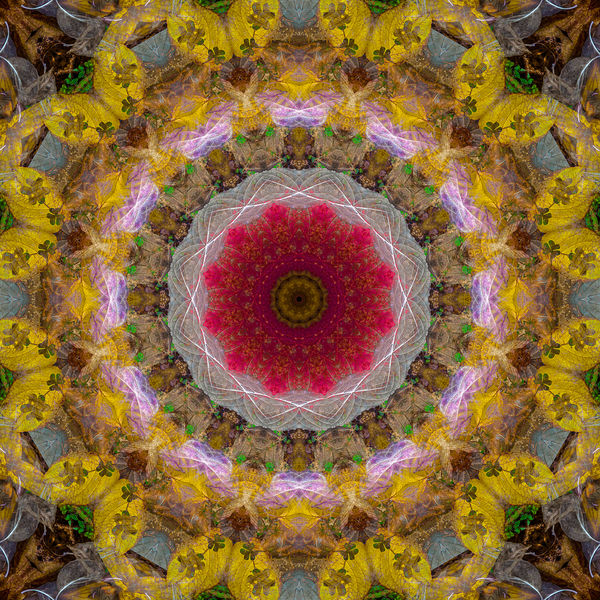
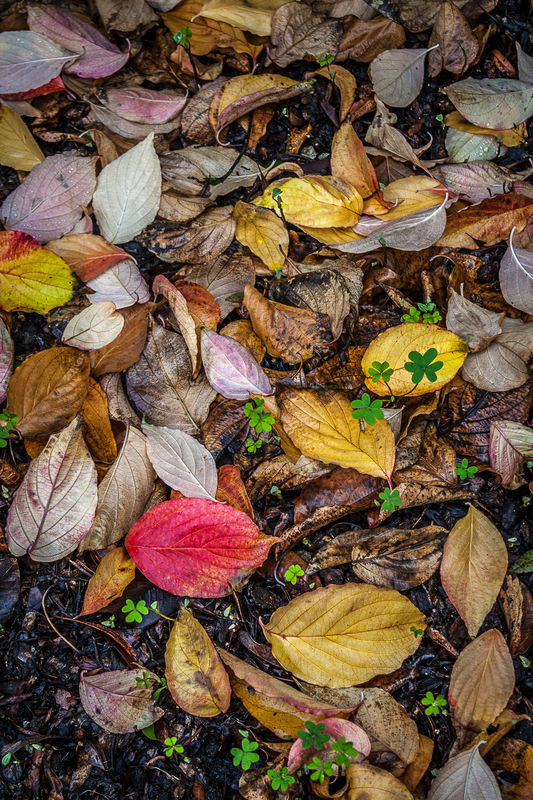
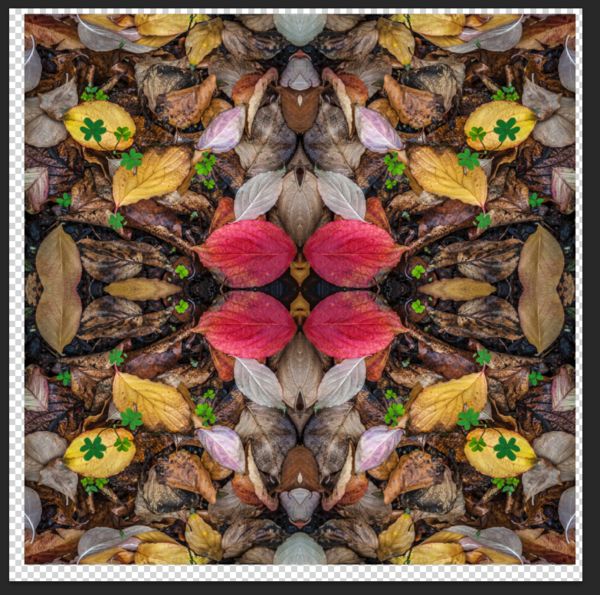
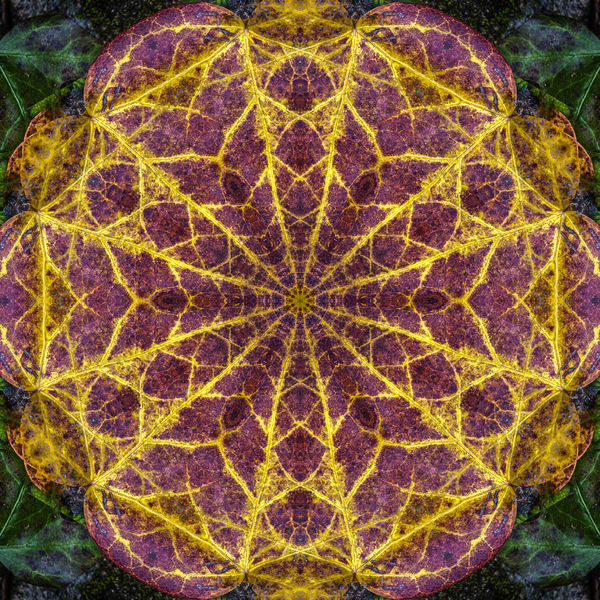
Feeling a tiny bit stir-crazy, so I've been playing with PS. I started with a photo of fallen leaves and ended up with this.
Mar 26, 2020 11:33:25 #

htbrown wrote:
Feeling a tiny bit stir-crazy, so I've been playing with PS. I started with a photo of fallen leaves and ended up with this.
Creative. I like it!
Mar 26, 2020 11:34:29 #

Ohhh, very pretty! Can you give us a brief overview of how you accomplished? I try to encourage the learning/teaching aspect in PP Forum, though it's OK to just "show" as well 
Thanks much!
Linda, section manager
Thanks much!
Linda, section manager
Mar 26, 2020 11:35:52 #
Nice one. We had quite a few members last year who experimented with creating mandalas and swirlies from their original images. It was a lot of fun and very creative.
Mar 26, 2020 13:06:10 #

Mar 26, 2020 13:17:15 #
Linda From Maine wrote:
Ohhh, very pretty! Can you give us a brief overview of how you accomplished? I try to encourage the learning/teaching aspect in PP Forum, though it's OK to just "show" as well
Thanks much!
Linda, section manager
Thanks much!
Linda, section manager
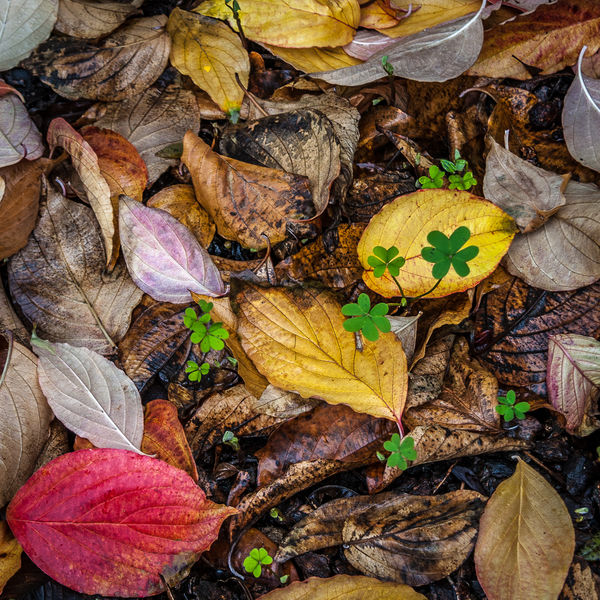
It's pretty simple. I picked an image with bright colors and contrast, and then cropped it to a square shape. I put the red leaf in the corner because I wanted red in the center, but you can use any corner as the center. This was in LR, but there is no reason it couldn't have been in PS.
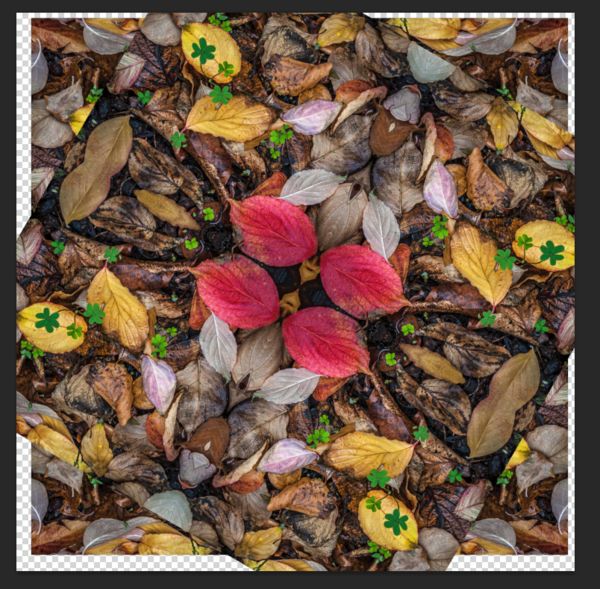
- Open the square image in PS and convert to a smart object. If starting from LR, pick 'open as snark object.' It's important it's a smart object before the next step, at least in my old version of PS.
- Change the canvas size to a little more than twice the dimensions of the image. You can give yourself some room, as the excess will get cropped away.
- Move the image to one corner. It doesn't matter which corner, but I started with the upper right, so the following assumes that.
- Duplicate the layer, and select Edit->Transform->Flip Horizontal
- Move the new image left until its right edge is just on the left edge of the prior image.
- Duplicate the layer again, and select Edit->Transform->Flip Vertical
- Move the image down until its top edge is just on the lower edge of the prior image.
- Duplicate the image yet again, and select Edit->Transform->Flip Horizontal
- Move the image right to complete the square you're building
- Select Layer->Merge Layers
You should now have an image similar to the third one below
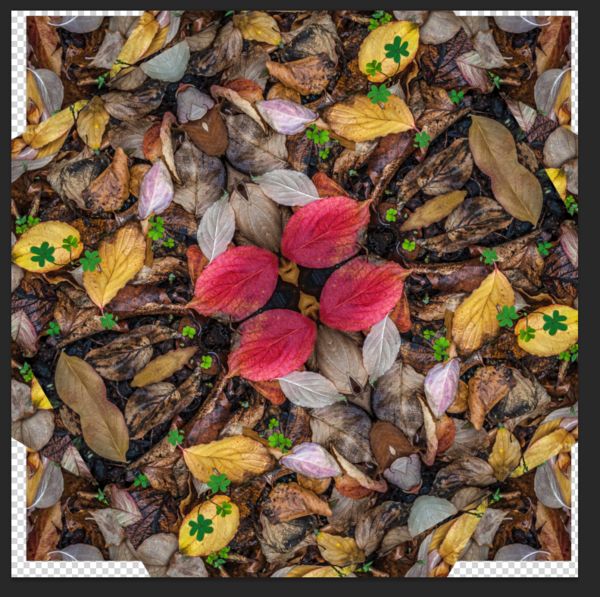
Decide on your rotation. For this image, I used 30 degrees, but 45 degrees works well too, and you need fewer layers
Repeat the following:
- Duplicate the base layer
- Select Edit->Transform->Rotate.
- Rotate the image however many degrees. On my version of PS you have to drag it to the desired angle, but on newer versions you can enter the angle with the keyboard.
Repeat the above for
30, 60, 90, -60, -30 degrees -OR-
45, 90, -45 degrees
(and really, you can do it for any increment, but the more layers you do, the closer to just a circle you'll get)
The fourth image below shows the first rotated layer, the fifth with all rotated layers.
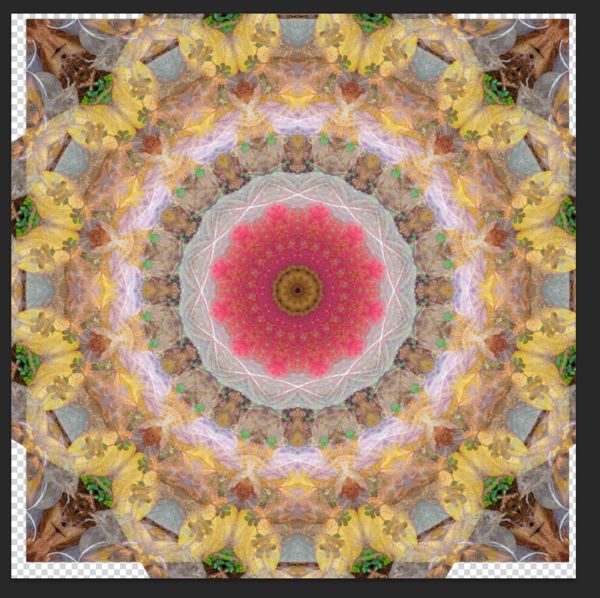
Now select all layers except the bottom layer. Change the layer mode from normal to lighten. What you get now will look like the last image below.
All that's left is to crop it, then adjust color, brightness, and saturation to taste.
.
The image I chose
Cropped square
The new base layer
one layer rotated
five layers rotated
five layers lightened
Mar 26, 2020 13:31:04 #
Thank you so much for your time in putting this together! I've added a link to the tutorials section of PP Forum Guidelines. Among other things, I didn't know what "mandala" meant. Google is my buddy!
Mar 26, 2020 14:04:41 #
Linda From Maine wrote:
Thank you so much for your time in putting this together! I've added a link to the tutorials section of PP Forum Guidelines. Among other things, I didn't know what "mandala" meant. Google is my buddy!
No problem. One thing we all got right now is time...
Coming of age on the left coast in the sixties, I can't remember when I didn't know what a mandala was.
 Perhaps I should have called it a kaleidoscope.
Mar 27, 2020 09:14:05 #
Very interesting and not a waste of time at all. Thanks for the detailed instructions too. I like the kaleidoscope reference. I have had more than one of those magical little tubes. I spent many hours amazing myself with the beauty of geometry. 😁
Mar 27, 2020 10:42:30 #
Mar 27, 2020 12:48:53 #
Here's one more. Instead of using four (0, 45, -45, 90) or six (0, 30, -30, 60, -60, 90) layers, it only uses three (0, 60, -60).
You can still see the natural origins of the image, which may or may not be desirable, depending on what you're after.
I call it the Spiderweb.
You can still see the natural origins of the image, which may or may not be desirable, depending on what you're after.
I call it the Spiderweb.
Mar 27, 2020 13:02:40 #
htbrown wrote:
Oh yes, I think seeing the "origins" could be desirable in cases. Thanks for the additional idea!Here's one more. Instead of using four (0, 45, -45, 90) or six (0, 30, -30, 60, -60, 90) layers, it only uses three (0, 60, -60).
You can still see the natural origins of the image, which may or may not be desirable, depending on what you're after.
I call it the Spiderweb.
You can still see the natural origins of the image, which may or may not be desirable, depending on what you're after.
I call it the Spiderweb.
Mar 28, 2020 00:15:33 #
calla
Loc: California
htbrown wrote:
Feeling a tiny bit stir-crazy, so I've been playing with PS. I started with a photo of fallen leaves and ended up with this.
WOW!!! Very nice!
If you want to reply, then register here. Registration is free and your account is created instantly, so you can post right away.