Ugly Hedgehog - Photography Forum
Home Active Topics Newest Pictures Search Login Register
Photo Contests, Challenges, Periodicals
Challenge: "SunStars" March 26-28 2020
Page <prev 2 of 27 next> last>>
Mar 26, 2020 09:31:51   #
photophile Loc: Lakewood, Ohio, USA
 
Fred Ann wrote:
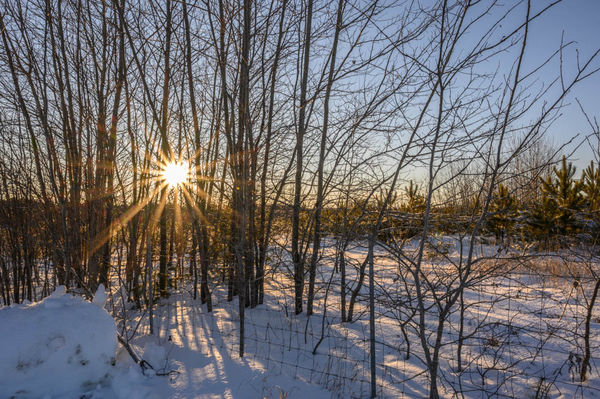
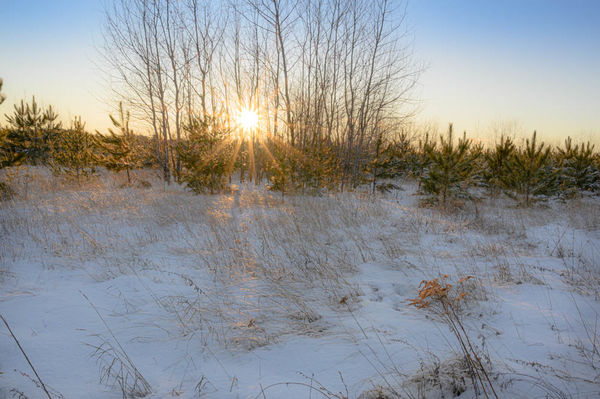
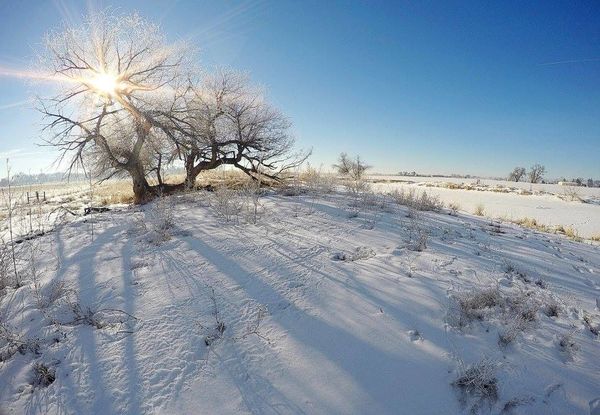
A couple of sun stars from a few summers ago.
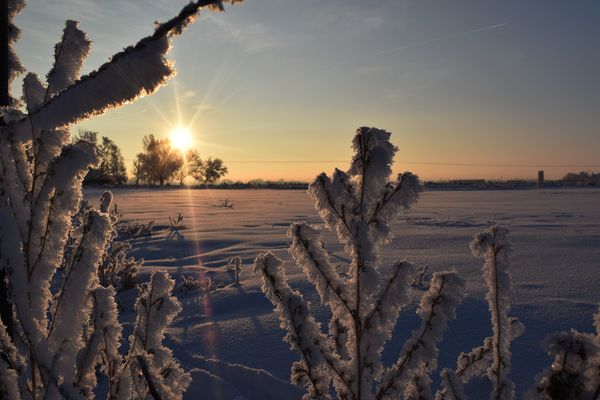
Just one more, not very pointy, but taken just passing by the Quebec bridge one day.
and one more taken at night, not a star but probably a street light seen just below the moon, I call it a night light star.


Nice ones Fred Ann.

Reply
Mar 26, 2020 09:32:32   #
photophile Loc: Lakewood, Ohio, USA
 
Photogirl17 wrote:
"Sunstar How to"


1) Small Apertures – generally speaking, you’ll have to use a small aperture, something like f16 or f22 to make fully-formed crisp sun stars. Wider apertures like f2.8 or f5.6 simply don’t cut it. The starburst is caused by light passing through a small aperture and being diffracted (or spread out) across the aperture blades in the lens. The more blades and the less curved they are the better the star. Not all lenses are created equally.

2) Hard Edge Obstruction – Although you can make a nice star when shooting the sun high in the sky, you will get the best results (i.e. small size with minimal flare) when you play peek-a-boo with the light source. To do this position the camera so the sun (or other light source) is mostly obscured by some compositional element in your frame – something like a clean horizon, edge of a tree, rock outcrop or building, harder and/or smoother edges yield the best results.

3) High Fidelity Light – In addition to obscuring the light source, I find it’s best to use whats called high-fidelity light, namely light that is pure and clean. When the light is being filtered through high clouds, atmospheric haze or fog the resulting sunstars tend to be muddy and lack clarity.

4) Use Live View to Preview – Once you've settled on your composition and are ready to shoot, using Live View in conjunction with the depth of field preview button (sorry Nikon people) to preview how your sunstar will look as well as get a sense for how much flare is being produced. You may be surprised to see how much a little shift in camera position (up/down, left/right) can change the size and shape of your sunstar, as well as how much resulting flare you’ve got in the frame. You can also use this method when choosing your aperture as you’ll see exactly what the sunstar will look like. You may not need to stop all the way down to f22 to get the desired effect.

5) Not all Lenses are Equal – Unfortunately this is one area where the gear really does make the difference. Not all lenses make sunstars or handle flare equally. Generally speaking, the higher quality “pro” level glass make better, more defined sunstars than “consumer” level lenses.


Here is a Link to a Pretty good Video as well..
https://youtu.be/OpPI2AVFS4w

I'm doing this Challenge because It's something I've been trying to learn myself. and I thought some of you might want to learn as well..

The weather Here has been pretty yucky, so I haven't been able to get out as much as I'd like Of course this Viral state of affairs hasn't helped either, I'm hoping to try a bit more using artificial Light..
"Sunstar How to" br br br 1) Small Ape... (show quote)


An attractive start Lesley.

Reply
Mar 26, 2020 09:34:00   #
photophile Loc: Lakewood, Ohio, USA
 
Transbuff1985 wrote:
Thank you - remember this one - This is the one you processed for me last spring!!
Almost got it.


Pretty!

Reply
 
 
Mar 26, 2020 09:35:08   #
photophile Loc: Lakewood, Ohio, USA
 
CindyHouk wrote:
Thanks for the explanation and I enjoy trying to get the SunStars....I have gotten lucky a few times and here is one of a sunstar and one of a moonstar.


Attractive images.

Reply
Mar 26, 2020 09:36:16   #
photophile Loc: Lakewood, Ohio, USA
 
Dr.Nikon wrote:
Well .., here are a few from my archives ...1/2 dome moon rise .... (moon rise )
And 2 from the Glacier Point hike ...a sun star


Reply
Mar 26, 2020 09:37:07   #
photophile Loc: Lakewood, Ohio, USA
 
Resqu2 wrote:
Spur of the moment sitting in a drive through. Saw the flag and opened the sunroof and just snapped. Didn’t even have time to check my settings.


Reply
Mar 26, 2020 09:49:12   #
PAToGraphy Loc: Portland ME area
 
Some sunstars


(Download)


(Download)


(Download)

Reply
 
 
Mar 26, 2020 09:56:40   #
photophile Loc: Lakewood, Ohio, USA
 
PAToGraphy wrote:
Some sunstars


Nice ones Pat.

Reply
Mar 26, 2020 10:07:34   #
Lorima Loc: Colorado
 
Photogirl17 wrote:
"Sunstar How to"


1) Small Apertures – generally speaking, you’ll have to use a small aperture, something like f16 or f22 to make fully-formed crisp sun stars. Wider apertures like f2.8 or f5.6 simply don’t cut it. The starburst is caused by light passing through a small aperture and being diffracted (or spread out) across the aperture blades in the lens. The more blades and the less curved they are the better the star. Not all lenses are created equally.

2) Hard Edge Obstruction – Although you can make a nice star when shooting the sun high in the sky, you will get the best results (i.e. small size with minimal flare) when you play peek-a-boo with the light source. To do this position the camera so the sun (or other light source) is mostly obscured by some compositional element in your frame – something like a clean horizon, edge of a tree, rock outcrop or building, harder and/or smoother edges yield the best results.

3) High Fidelity Light – In addition to obscuring the light source, I find it’s best to use whats called high-fidelity light, namely light that is pure and clean. When the light is being filtered through high clouds, atmospheric haze or fog the resulting sunstars tend to be muddy and lack clarity.

4) Use Live View to Preview – Once you've settled on your composition and are ready to shoot, using Live View in conjunction with the depth of field preview button (sorry Nikon people) to preview how your sunstar will look as well as get a sense for how much flare is being produced. You may be surprised to see how much a little shift in camera position (up/down, left/right) can change the size and shape of your sunstar, as well as how much resulting flare you’ve got in the frame. You can also use this method when choosing your aperture as you’ll see exactly what the sunstar will look like. You may not need to stop all the way down to f22 to get the desired effect.

5) Not all Lenses are Equal – Unfortunately this is one area where the gear really does make the difference. Not all lenses make sunstars or handle flare equally. Generally speaking, the higher quality “pro” level glass make better, more defined sunstars than “consumer” level lenses.


Here is a Link to a Pretty good Video as well..
https://youtu.be/OpPI2AVFS4w

I'm doing this Challenge because It's something I've been trying to learn myself. and I thought some of you might want to learn as well..

The weather Here has been pretty yucky, so I haven't been able to get out as much as I'd like Of course this Viral state of affairs hasn't helped either, I'm hoping to try a bit more using artificial Light..
"Sunstar How to" br br br 1) Small Ape... (show quote)


This is from my archives as its very cloudy today.


(Download)

Reply
Mar 26, 2020 10:18:04   #
Lorima Loc: Colorado
 
Here is one from the other morning.


(Download)

Reply
Mar 26, 2020 10:22:53   #
CindyHouk Loc: Nw MT
 
judy juul wrote:
Blue one is really lovely, Cindy!


Thanks Judy...that's my driveway on a very very cold winter night!

Reply
 
 
Mar 26, 2020 10:24:10   #
Fred Ann Loc: New Brunswick, Canada
 
Roadrunner wrote:
I am smiling, Ann.


I thought of you when I posted it, and assumed you would like it .We
had probably left Vaudrieul around 5 a.m. that day, getting an early start heading home.Thank you for your comment.

Reply
Mar 26, 2020 11:08:47   #
Fred Ann Loc: New Brunswick, Canada
 
photophile wrote:
Nice ones Fred Ann.


Thank you. muchly.

Reply
Mar 26, 2020 11:41:20   #
Rolk Loc: South Central PA
 
Photogirl17 wrote:
"Sunstar How to"


1) Small Apertures – generally speaking, you’ll have to use a small aperture, something like f16 or f22 to make fully-formed crisp sun stars. Wider apertures like f2.8 or f5.6 simply don’t cut it. The starburst is caused by light passing through a small aperture and being diffracted (or spread out) across the aperture blades in the lens. The more blades and the less curved they are the better the star. Not all lenses are created equally.

2) Hard Edge Obstruction – Although you can make a nice star when shooting the sun high in the sky, you will get the best results (i.e. small size with minimal flare) when you play peek-a-boo with the light source. To do this position the camera so the sun (or other light source) is mostly obscured by some compositional element in your frame – something like a clean horizon, edge of a tree, rock outcrop or building, harder and/or smoother edges yield the best results.

3) High Fidelity Light – In addition to obscuring the light source, I find it’s best to use whats called high-fidelity light, namely light that is pure and clean. When the light is being filtered through high clouds, atmospheric haze or fog the resulting sunstars tend to be muddy and lack clarity.

4) Use Live View to Preview – Once you've settled on your composition and are ready to shoot, using Live View in conjunction with the depth of field preview button (sorry Nikon people) to preview how your sunstar will look as well as get a sense for how much flare is being produced. You may be surprised to see how much a little shift in camera position (up/down, left/right) can change the size and shape of your sunstar, as well as how much resulting flare you’ve got in the frame. You can also use this method when choosing your aperture as you’ll see exactly what the sunstar will look like. You may not need to stop all the way down to f22 to get the desired effect.

5) Not all Lenses are Equal – Unfortunately this is one area where the gear really does make the difference. Not all lenses make sunstars or handle flare equally. Generally speaking, the higher quality “pro” level glass make better, more defined sunstars than “consumer” level lenses.


Here is a Link to a Pretty good Video as well..
https://youtu.be/OpPI2AVFS4w

I'm doing this Challenge because It's something I've been trying to learn myself. and I thought some of you might want to learn as well..

The weather Here has been pretty yucky, so I haven't been able to get out as much as I'd like Of course this Viral state of affairs hasn't helped either, I'm hoping to try a bit more using artificial Light..
"Sunstar How to" br br br 1) Small Ape... (show quote)


Great start, Lesley. I like all of these images.

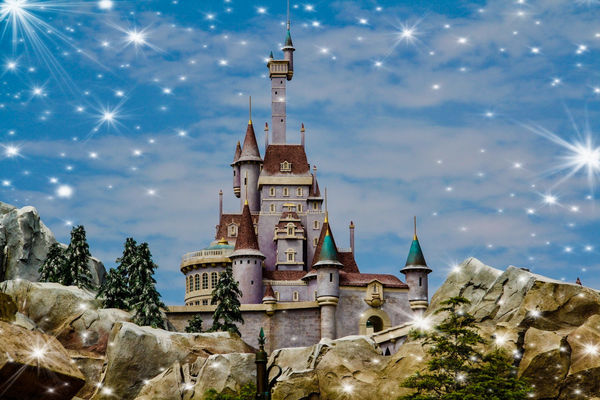
The weather forecast for our area over the next three days calls for overcast, so I'm pretty sure I won't be able to capture anything "new," although I do want to get better at this particular skill.

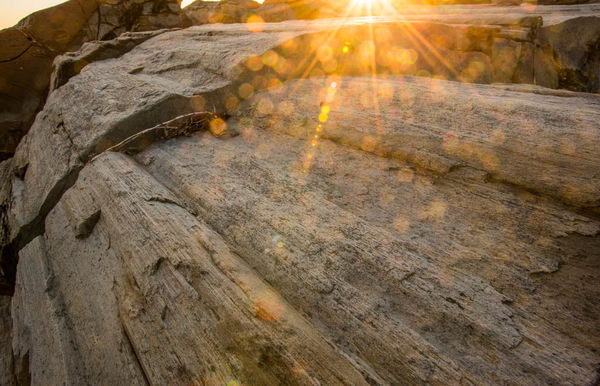
That means for now, I have two options; first, cull all my archives for images that inadvertently caught a sunstar, or two, "doctor" an existing image, like the one below...lol

Tim


(Download)

Reply
Mar 26, 2020 11:42:29   #
Rolk Loc: South Central PA
 
Dr.Nikon wrote:
Well .., here are a few from my archives ...1/2 dome moon rise .... (moon rise )
And 2 from the Glacier Point hike ...a sun star


Good ones, Dr. Nikon. Pg 1

Tim

Reply
Page <prev 2 of 27 next> last>>
If you want to reply, then register here. Registration is free and your account is created instantly, so you can post right away.
Photo Contests, Challenges, Periodicals
UglyHedgehog.com - Forum
Copyright 2011-2024 Ugly Hedgehog, Inc.