Before/After, Layered .tiff, "Stamp Layer" How To
Mar 13, 2020 16:26:07 #

This Tutorial is more of a suggestion on how to create Before/After topics than it is on how I processed this particular image. In effect, the photo may thought of as "for illustration purposes only".
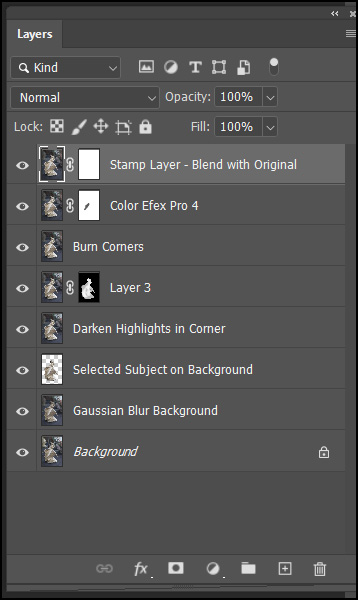
1. The Layer Stack. I used layered .tiff files and label my steps as I go along. I prefer .tiff files as they store all the layer information and can be used by other editing programs (Affinity photo, On1 Raw, and Corel PaintShop Pro, among others).
I label the layers which comes in handy if I ever want to reconstruct the image or edit it.
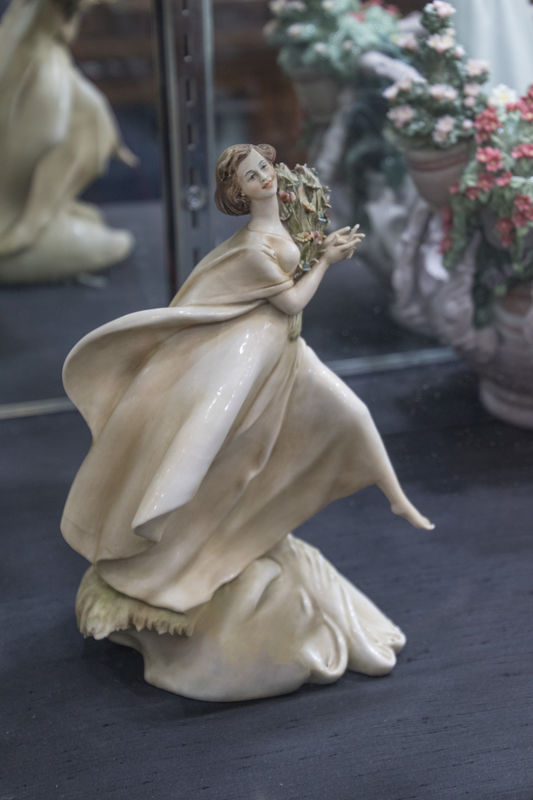
2. Background Layer. This is the default name that Photoshop assigns when one first opens an image (I usually don't rename it, but open create a Duplicate Layer almost immediately by using the menu items "Layer>Create Duplicate Layer" {when referring the menu options, I like to list the whole string with the "greater than" sign > between the phrases for continuity} and including them in parentheses).
The caption here is somewhat misleading as this image did not come Straight Out Of the Camera (SOOC), but first went though Lightroom CC for some Global tweaks before opening in PS CC 2020.
3. Select the Main Subject. I usually to this to differentiate the handling of the Main Subject and the Background, often using different methods and filters for each. I usually click on the one of the Selection Tools, then at the menu at top, choose "Select Subject". I then hit "Ctrl-J" which places the subject on a transparent background.
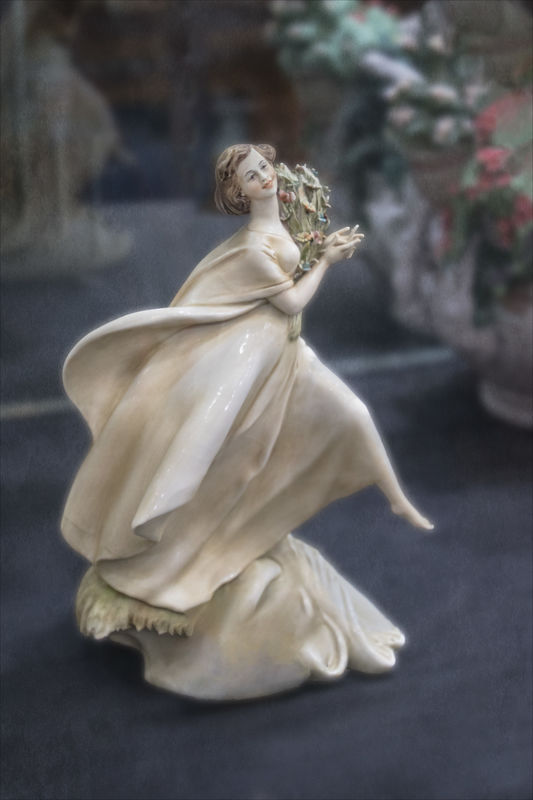
4. I then select a layer which is a duplicate of the original, and invoke a Gaussian Blur "Filter>Blur>Gaussian Blur", and blur it to the point where the background is somewhat recognizable but fades into the background.
5. I rearrange the layers so that the subject is placed above the blurred background.
6. I dodged the main subject in her own layer to lighten up her face and some of the folds in her gown, but then moved to the the background layer to darken the corners by burning.
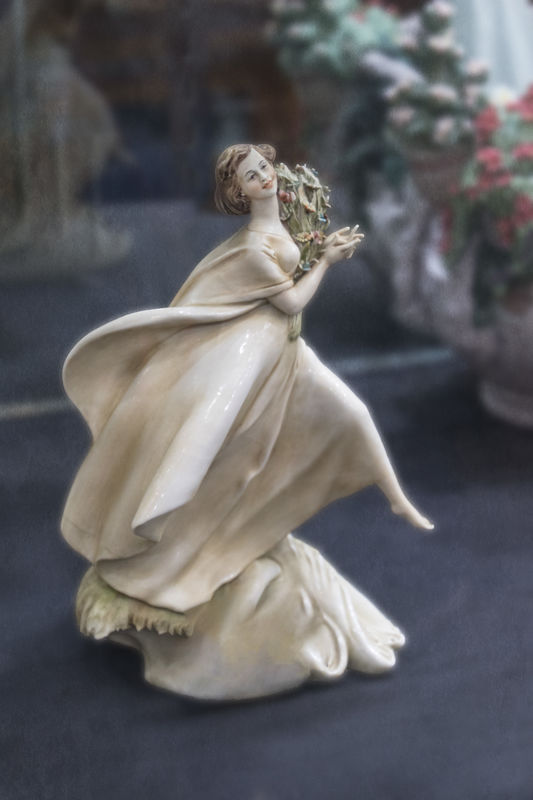
7. I created several Stamp Layers. A Stamp Layer is used to combine all the layers and filters into a single layer, which includes ALL the settings that have been applied before "Alt>Layer>Merge Visible". The key here is to press the Alt key before invoking the menu items - this preserves all the layer information below, but creates "Layer 2 (or 3, or 4 in descending order)". Then I started Color Efex Pro "Filter>Nik Collection>Color Efex Pro 4". Once in there, I used the [Pro Contrast] and [Lighten/Darken Center] presets. I often notate presets with Square Brackets. It is often helpful to tell the user exactly which presets one used to get a particular effect.
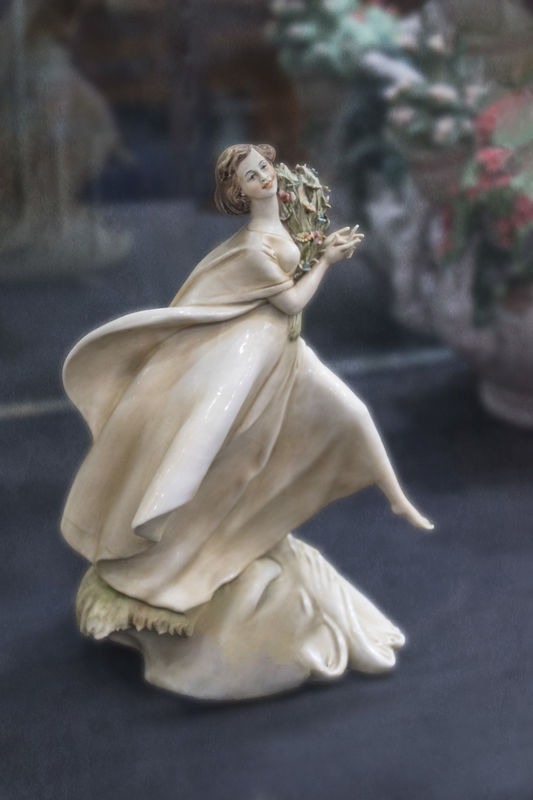
8. Finally, I created another Stamp Layer because I wanted to add back some detail that had been lost in translation from the Background Layer. To do this, I added a Masking Layer to my final Stamp Layer, deselected all the layers between it and the Background Layer, but left the Background Layer visible., the used the Brush tool, set to black, to paint over the diagonal fold in the subjects gown to pick up some light highlights and add them back into the image.
Once I was satisfied with the images appearance, I saved the .tiff file, then created a .jpg file which I used to upload to UHH.
The beauty of the layered .tiff file is that it comes in real handy when one wants to create a tutorial with lots of photos to illustrate the differences between steps. I deselect all the layers expect the Background, save off a .jpg file of that layer (naming it accordingly), then select the next layer and create another .jpg file with a different name to suggest what the layer was used for), and on up the line until I full set of images to support my text.
When writing the How To, I like to used numbered paragraphs with short descriptions of what is being depicted, and I use the caption blocks in the saved images to match them to the numbered paragraphs.
1. The Layer Stack. I used layered .tiff files and label my steps as I go along. I prefer .tiff files as they store all the layer information and can be used by other editing programs (Affinity photo, On1 Raw, and Corel PaintShop Pro, among others).
I label the layers which comes in handy if I ever want to reconstruct the image or edit it.
2. Background Layer. This is the default name that Photoshop assigns when one first opens an image (I usually don't rename it, but open create a Duplicate Layer almost immediately by using the menu items "Layer>Create Duplicate Layer" {when referring the menu options, I like to list the whole string with the "greater than" sign > between the phrases for continuity} and including them in parentheses).
The caption here is somewhat misleading as this image did not come Straight Out Of the Camera (SOOC), but first went though Lightroom CC for some Global tweaks before opening in PS CC 2020.
3. Select the Main Subject. I usually to this to differentiate the handling of the Main Subject and the Background, often using different methods and filters for each. I usually click on the one of the Selection Tools, then at the menu at top, choose "Select Subject". I then hit "Ctrl-J" which places the subject on a transparent background.
4. I then select a layer which is a duplicate of the original, and invoke a Gaussian Blur "Filter>Blur>Gaussian Blur", and blur it to the point where the background is somewhat recognizable but fades into the background.
5. I rearrange the layers so that the subject is placed above the blurred background.
6. I dodged the main subject in her own layer to lighten up her face and some of the folds in her gown, but then moved to the the background layer to darken the corners by burning.
7. I created several Stamp Layers. A Stamp Layer is used to combine all the layers and filters into a single layer, which includes ALL the settings that have been applied before "Alt>Layer>Merge Visible". The key here is to press the Alt key before invoking the menu items - this preserves all the layer information below, but creates "Layer 2 (or 3, or 4 in descending order)". Then I started Color Efex Pro "Filter>Nik Collection>Color Efex Pro 4". Once in there, I used the [Pro Contrast] and [Lighten/Darken Center] presets. I often notate presets with Square Brackets. It is often helpful to tell the user exactly which presets one used to get a particular effect.
8. Finally, I created another Stamp Layer because I wanted to add back some detail that had been lost in translation from the Background Layer. To do this, I added a Masking Layer to my final Stamp Layer, deselected all the layers between it and the Background Layer, but left the Background Layer visible., the used the Brush tool, set to black, to paint over the diagonal fold in the subjects gown to pick up some light highlights and add them back into the image.
Once I was satisfied with the images appearance, I saved the .tiff file, then created a .jpg file which I used to upload to UHH.
The beauty of the layered .tiff file is that it comes in real handy when one wants to create a tutorial with lots of photos to illustrate the differences between steps. I deselect all the layers expect the Background, save off a .jpg file of that layer (naming it accordingly), then select the next layer and create another .jpg file with a different name to suggest what the layer was used for), and on up the line until I full set of images to support my text.
When writing the How To, I like to used numbered paragraphs with short descriptions of what is being depicted, and I use the caption blocks in the saved images to match them to the numbered paragraphs.
1. Layer Stack
2. Background Layer (Original SOOC)
(Download)
3. Select Main Subject

(Download)
4. Gaussian Blur Background

(Download)
5. Main Subject on Blurred Background
(Download)
6. Dodge and Burn
(Download)
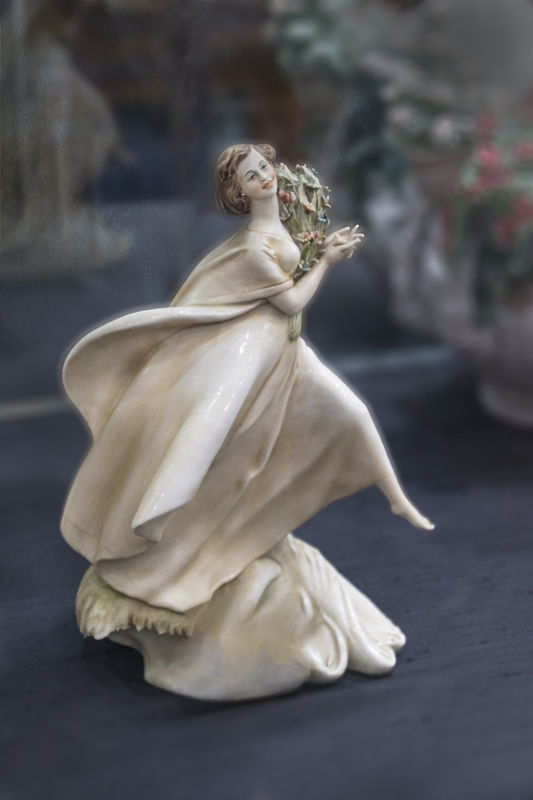
7. NIK Color Efex Pro [Pro Conrtast] and [Lighten/Darken Center]
![7. NIK Color Efex Pro [Pro Conrtast] and [Lighten...](https://static.uglyhedgehog.com/upload/2020/3/13/t1-558634-sylphid_colorefexpro.jpg)
(Download)
8. Blending Stamp Layer with Background to Recover Details
(Download)
Mar 13, 2020 19:03:03 #

The only issue that I see is that the background was uniformly blurred which isn't realistic. You can do a gradient blur so that the background close to the subject is in focus and the blur increases with distance (as it would if shot with a larger aperture). Your process is similar to mine - well thought out.
Mar 13, 2020 21:11:23 #
ecobin wrote:
The only issue that I see is that the background was uniformly blurred which isn't realistic. You can do a gradient blur so that the background close to the subject is in focus and the blur increases with distance (as it would if shot with a larger aperture). Your process is similar to mine - well thought out.
Yep, I like the idea of the graduated blur. I'll have to give it a try.
Mar 13, 2020 23:21:57 #
Per ecobin's suggestion to create a gradient blur, I used Topaz Lab's Lens Effects Filter, [Camera Tilt and Shift preset] on the background layer. This is the first time I have ever used this filter for this effect, but one can always learn new tricks if they're willing to do the work, and I'm pretty sure I will use this again in the future. There are other ways to create the effect, I'm sure, but this is one that immediately came to mind.
Mar 14, 2020 08:51:29 #
Mar 14, 2020 14:30:56 #
Thanks for the tutorial. I am going the have that between hunts for TP  I wondered how you do some of your stuff, thanks for showing us.
Jack
I wondered how you do some of your stuff, thanks for showing us.Jack
Mar 15, 2020 16:34:19 #
Curmudgeon wrote:
Thanks for the tutorial. I am going the have that between hunts for TP I wondered how you do some of your stuff, thanks for showing us.
Jack
I wondered how you do some of your stuff, thanks for showing us.Jack
Jack, there is a whole list of tutorials at https://www.uglyhedgehog.com/t-184368-1.html#10148446 It's very comprehensive and it would probably keep you occupied for days just reading through some of them.
If you want to reply, then register here. Registration is free and your account is created instantly, so you can post right away.