Silk Purses from Sows' Ears
Feb 4, 2020 08:12:19 #

Do you have a bad image you worked into something you liked? Share it here! Please post the before, the after, and a few basics of your workflow.
Take this opportunity to dig out an oops or a ho-hum and try something different - maybe you've never used textures or changed white balance for impact. Maybe you've never pushed the clarity slider to the left This thread is for experiment and play, while hopefully gaining new skills.
MinnieV will be co-hosting; welcome to all participants, from novice to expert.
Take this opportunity to dig out an oops or a ho-hum and try something different - maybe you've never used textures or changed white balance for impact. Maybe you've never pushed the clarity slider to the left
This thread is for experiment and play, while hopefully gaining new skills.MinnieV will be co-hosting; welcome to all participants, from novice to expert.
Feb 4, 2020 08:41:25 #
Just as an aside, I find that pushing the clarity to the left sometimes helps the scans of old family photos that come from my scanner with all sorts of blemishes. The texture slider in LR, also.
Feb 4, 2020 08:47:01 #

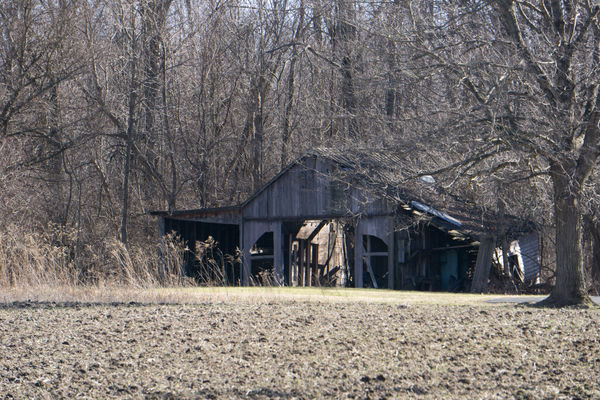
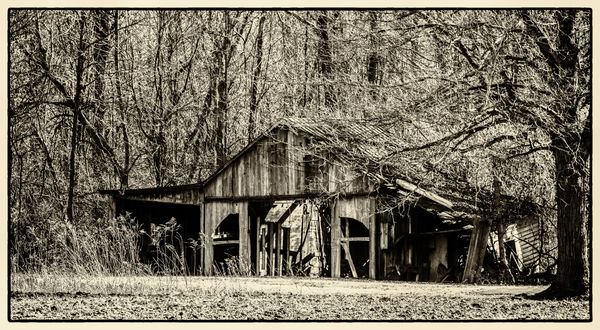
Here you go, Linda--I’ll be first. This is the photo I posted Sunday, before and after:
View the downloads--they’re sharper.
This one wasn’t much when I started, obviously. I began in LR and did what I could with the color shot before converting to black and white and re-editing.
Next, I moved to Luminar and played around with the intensity. Then, I moved to Nik SilverEfex and applied the toning and border. At that point I noticed the white spot on the roof and went back to Luminar to remove it. In my opinion, Luminar does a much better job of removing unwanted spots and objects than LR does. This took about ten-fiften minutes tops.
Feb 4, 2020 09:07:51 #
I'm just posting here to remind me to come back later after work and contribute. Linda, great topic once again!
Feb 4, 2020 09:10:09 #

jaymatt wrote:
Here you go, Linda--I’ll be first. This is the pho... (show quote)
Good job on the PPing.
Feb 4, 2020 09:19:08 #
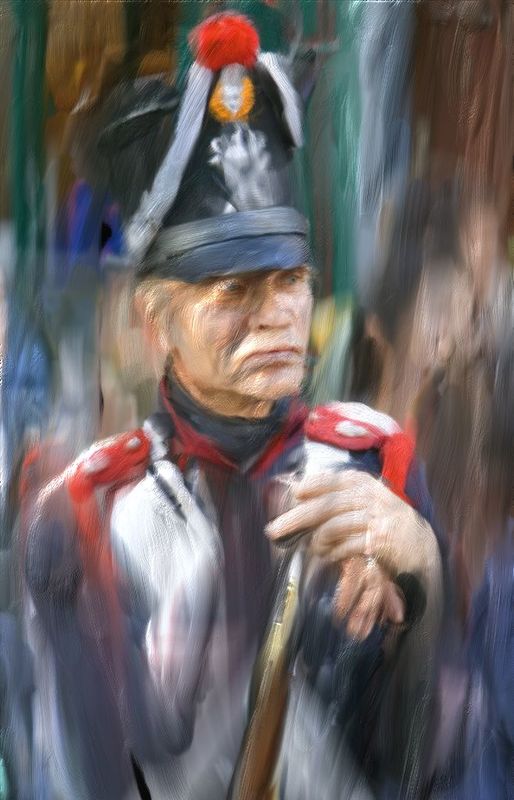
These are from the archives - A vacation snapshot from 2006.
#1 is the original without a lot of PPing from the raw file.
#2 has been PP'd, a year later, in Corel Painter using a modified, by me, oil (I think) clone brush to give it an "arty" look. I always used a tablet with Painter.
.
#1 is the original without a lot of PPing from the raw file.
#2 has been PP'd, a year later, in Corel Painter using a modified, by me, oil (I think) clone brush to give it an "arty" look. I always used a tablet with Painter.
.
Feb 4, 2020 09:24:04 #
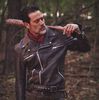
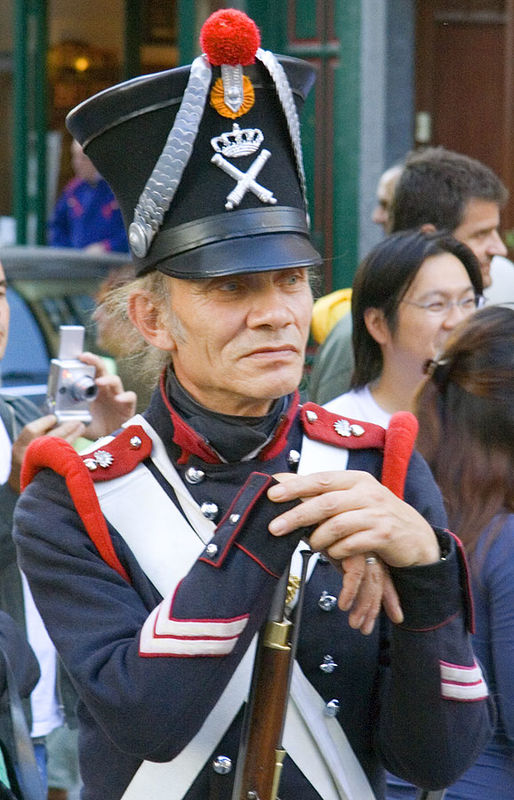
I'll show this in 3 pictures. Never sure when to stop.
1) Original
2) Brightened and opened up the picture
3) Blurred background + vignette + as I was about to post this just now added Clarity and sharpening.
Done using both Lightroom and Photoshop.
This will demonstrate what you can get out of a RAW file.👀
1) Original
2) Brightened and opened up the picture
3) Blurred background + vignette + as I was about to post this just now added Clarity and sharpening.
Done using both Lightroom and Photoshop.
This will demonstrate what you can get out of a RAW file.👀
Original shot
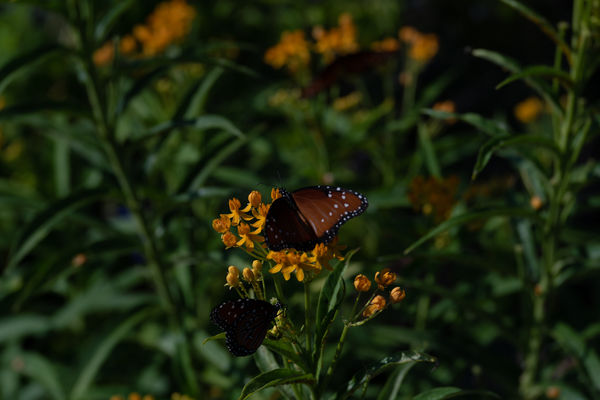
(Download)
Cleaned up brightened and opened shadows Lightroom
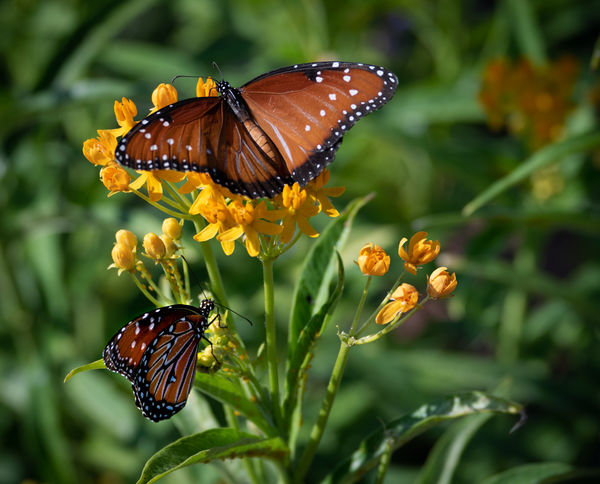
(Download)
Blurred background + vignette + Clarity and Sharpening
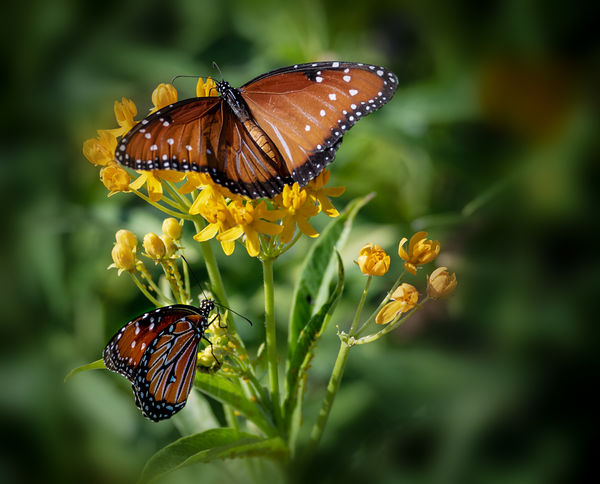
(Download)
Feb 4, 2020 09:27:10 #
Jim-Pops wrote:
I'll show this in 3 pictures. Never sure when to stop.
1) Original
2) Brightened and opened up the picture
3) Blurred background + vignette + as I was about to post this just now added Clarity and sharpening.
Done using both Lightroom and Photoshop.
1) Original
2) Brightened and opened up the picture
3) Blurred background + vignette + as I was about to post this just now added Clarity and sharpening.
Done using both Lightroom and Photoshop.
THat worked well.
Feb 4, 2020 09:32:58 #

DirtFarmer wrote:
Just as an aside, I find that pushing the clarity to the left sometimes helps the scans of old family photos that come from my scanner with all sorts of blemishes. The texture slider in LR, also.
Agree, can also help as a second de-noiser approach, to soften certain textures we apply as finishing effects, and to fiddle with skin for a variety of purposes.
Feb 4, 2020 09:36:06 #
jaymatt wrote:
Here you go, Linda--I’ll be first. This is the pho... (show quote)
Very good example. The original suffers some from uninteresting light (like what I have to shoot in 90% of the time where I live) but you did a great job of making it much more interesting in monochrome where you have more influence on managing light and tones.
I agree with you that Luminar does a better job on spots than Lightroom, but I would go further and say that almost anything does a better job on removals of stuff than Lightroom, which is very prone to give you crazy results no matter how you approach it.
Feb 4, 2020 09:38:20 #
RichardTaylor wrote:
These are from the archives - A vacation snapshot from 2006.
#1 is the original without a lot of PPing from the raw file.
#2 has been PP'd, a year later, in Corel Painter using a modified, by me, oil (I think) clone brush to give it an "arty" look. I always used a tablet with Painter.
.
#1 is the original without a lot of PPing from the raw file.
#2 has been PP'd, a year later, in Corel Painter using a modified, by me, oil (I think) clone brush to give it an "arty" look. I always used a tablet with Painter.
.
I think the original looks pretty good too! But the modified version is very appealing and artistic. I'm figuring you did this manually within Painter. Very well done. Nothing I've tried has come out nearly this nice.
Feb 4, 2020 09:42:31 #
Jim-Pops wrote:
I'll show this in 3 pictures. Never sure when to stop.
1) Original
2) Brightened and opened up the picture
3) Blurred background + vignette + as I was about to post this just now added Clarity and sharpening.
Done using both Lightroom and Photoshop.
This will demonstrate what you can get out of a RAW file.👀
1) Original
2) Brightened and opened up the picture
3) Blurred background + vignette + as I was about to post this just now added Clarity and sharpening.
Done using both Lightroom and Photoshop.
This will demonstrate what you can get out of a RAW file.👀
Thanks for showing this set, from beginning to end. And yes, I agree about the flexibility of raw files. I would have given up photography long ago if I hadn't discovered what raw is capable of, because I enjoy experimental editing, and it is far less fun to edit a jpg due to its early file breakdown when pushed hard.
You've done a beautiful job of recalibrating this capture and revealing its beauty. All "recovery" editing isn't about artistic styling. Some is about maximizing an image in a traditional way.
Feb 4, 2020 09:43:38 #
minniev wrote:
I think the original looks pretty good too! But the modified version is very appealing and artistic. I'm figuring you did this manually within Painter. Very well done. Nothing I've tried has come out nearly this nice.
I did. You really need a tablet (with a pressure stylus) with Painter. It has been years since I have used it.
Feb 4, 2020 09:43:51 #
Feb 4, 2020 10:09:44 #
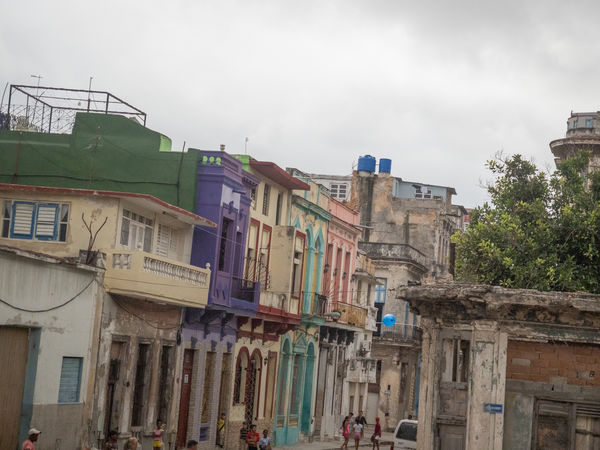
How many of us have been frustrated when traveling and trying to take photos through the crazy tinted and scratched windows of a lurching tour bus? It drives me crazy! Last fall in Havana I saw such interesting scenes but most captures were as awful as this one. Captive on the bus, I fired away, knowing I was getting nothing. When I got home, I took them into photoshop to turn them into artistic memories that helped me recall what it felt like to be in Havana.
This offering is on the artistic side, which is my favorite way to edit. After straightening, cropping, color/light/noise/contrast measures I duplicated the file, offset one layer with slightly reduced opacity to create a double exposure effect then masked the balloon and a few other things that I didn't want doubled. I flattened it, took it into Topaz Impressions for a paint effect. (I usually use one of the Degas presets to start and fiddle from there). Then I stretched the image vertically and pushed/pulled a bit with the liquify tool. I remasked the balloon to keep it from stretching. I can't explain my fixation on the balloon except to say it was what caught my eye as the bus roared through the city.
This offering is on the artistic side, which is my favorite way to edit. After straightening, cropping, color/light/noise/contrast measures I duplicated the file, offset one layer with slightly reduced opacity to create a double exposure effect then masked the balloon and a few other things that I didn't want doubled. I flattened it, took it into Topaz Impressions for a paint effect. (I usually use one of the Degas presets to start and fiddle from there). Then I stretched the image vertically and pushed/pulled a bit with the liquify tool. I remasked the balloon to keep it from stretching. I can't explain my fixation on the balloon except to say it was what caught my eye as the bus roared through the city.

If you want to reply, then register here. Registration is free and your account is created instantly, so you can post right away.