Removing dust using background blur and keep the background realistic
Dec 19, 2019 11:43:48 #

To save time I used the same file and kept the subject selection, cleanup and the background cut out.
I duplicated the background cut out.
I selected the lower cutout layer
Using the magic want tool (sample 3x3, Tolerance 3, smoothed transition, sample only contiguous pixels checked out) I selected the dust + and - to adjust over selection.
I duplicated the selection.
I selected the upper cutout.
Using lasso I selected the background loosely.
I applied a surface blur.
I used style to merge the lighter color from lower layer (0~255)
I created a level layer on top of the selection and set adjustment arrows to the right.
All minor dust artifacts are gone.
I created a background healing layer to remove major flaws using the healing tools
I grouped all into a group
Image 1 shows before
Image 2 shows the dust reduction before healing
Image 3 shows after healing
Image 4 shows the final result, it is more agreeable to look at than when using the previous method.
Comment: I modified the head selection. This can be improved.
.
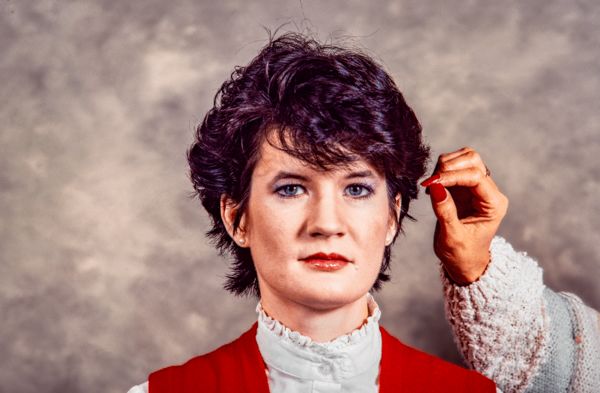
Original

(Download)
Dust reduction before healing

(Download)
Healed background

(Download)
The final result is more realistic the than the previous edit

(Download)
Dec 19, 2019 18:44:30 #
Final selection, much tighter and it does not bleed at all.
The next step is to merge it onto one single image in order to fix the highlights.
.
The next step is to merge it onto one single image in order to fix the highlights.
.
If you want to reply, then register here. Registration is free and your account is created instantly, so you can post right away.