Tutorial - Shih Tzu Dog Portrait with Textured Background
Sep 17, 2019 21:53:53 #

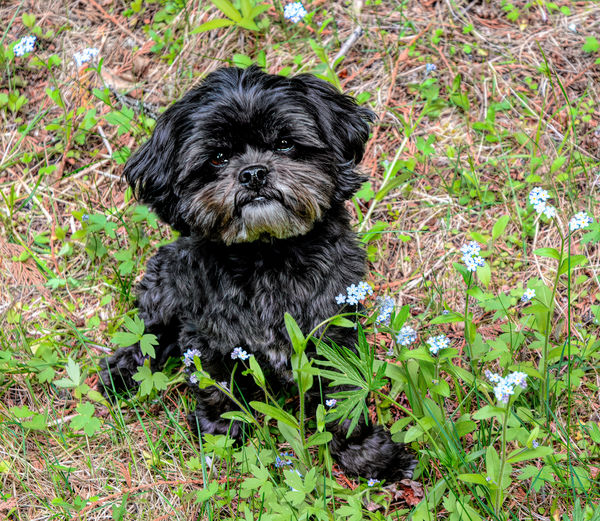
This is a collaboration with Tommy Strat and his Shih Tzu, Rudy. A few weeks ago, Tommy had remarked that he wished I could make a portrait of his dog. I asked him to forward me an image of his puppy and that I would edit it in the same manner as I do my Dog Show portraits. He agreed, and after seeing the final image, permitted me to use the image however I saw fit. I haven't done a tutorial in quite a while, and thought this would be the perfect opportunity to get back into the game. This one will be a different in that I will include a different "Reply" for each step of the transformation, instead of typing it all into one section.
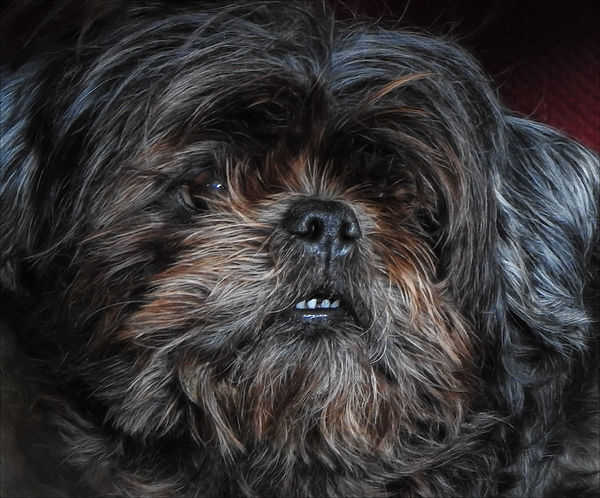
1. Original Image, Rudy
1. Original Image, Rudy
Sep 17, 2019 21:55:42 #
2. Removed distractions. Got rid of blues, aquas and greens in the dog's face.
I used PS CC 2019 to remove the grass and flowers; I used the Lasso tool to create a selection around the area I wanted to erase, then used Edit>Fill with Contents set to "Content-Aware" with Color Adaptation box checked, Blending Mode: Normal. I find this gives me better control than the Spot Healing Brush tool. I used the Clone Stamp tool to fill in some hairline in the dog's beard. I then used Filter>Camera Raw Filter and used the HSL Adjustments tab to decrease the Saturation levels on Blue, Aqua, and Green, moving the sliders as far left as they would go. This removed some stray colors from the dog's face.
.

Sep 17, 2019 21:57:25 #
3. Created Mask to isolate dog to a transparent background using Topaz Remask 5
There are a number of ways to Mask an image to a transparent background layer. In Photoshop, one can make a selection around the dog, then click on Ctrl-J. This will save the selected area to another layer, with a transparent background.
While I have used that method many times in the past, I have rediscovered the benefits of using a Masking Filter. In my case, I use Topaz Remask 5 which can be called from the PS Filters Menu, and will save the layer in the Layers Stack when it's done. Topaz Remask opens with the image all in green (signifies Keep/Selected). One uses a blue outline brush to outline the part of the image you want to keep. You can change the size of the blue brush to be wider if you have trouble making detailed selection. Once the dog is outlined in blue, click on the red FILLS icon, then click anywhere on the background outside of the blue lines. Red signifies Remove/Transparent. Now one can access adjustments which will refine the mask if needed. At the conclusion, press the OK button in the bottom right corner. This will save the masked area to a new layer with a transparent background.
.

Sep 17, 2019 21:59:10 #
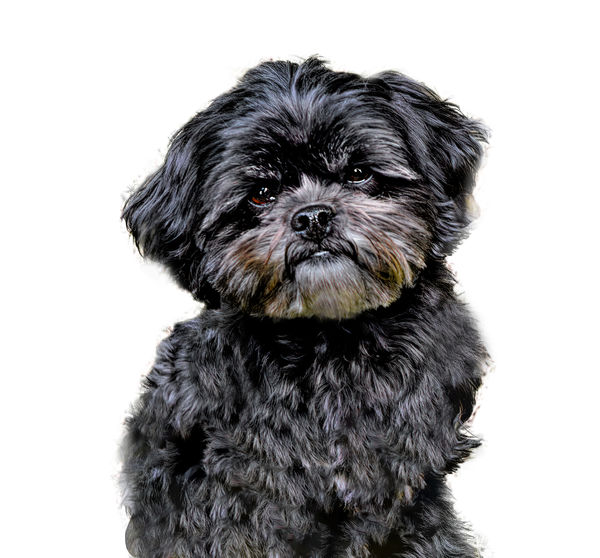
4. Masked image of Rudy on a transparent layer
A .jpg file won't show transparency, so the preview here renders the background as white. Don't worry, for the rest of this tutorial, it really IS transparent. By reviewing this layer, one can determine if they got the selection correct, or may have to go back one step and refine it. The hazy edges around some of the edges reflect a lower opacity that will blend in with background color more easily, rather than a sharp edge. That is good.
.
Sep 17, 2019 22:01:12 #
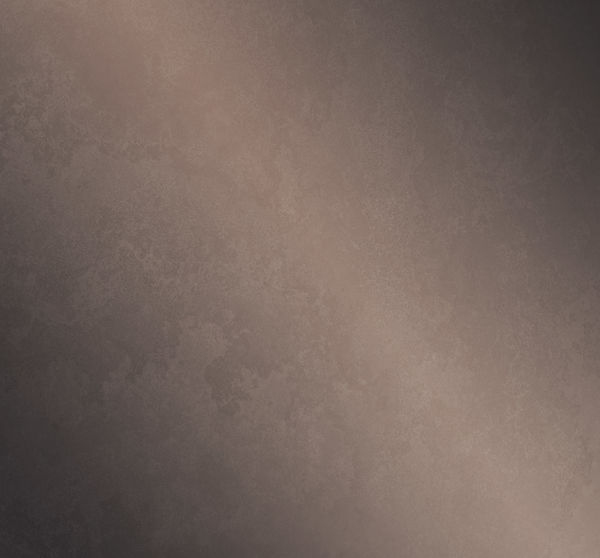
5. Gradient Background with Texture
5.1 - Create a New Layer that will hold the Textured Gradient Background. To get the layer, click on the Background Layer to make it Active, then execute Layer>New>Layer. I named this Layer "Gradient Background"
5.2 - Choose colors to be used as a starting point for the colors of the background. These colors are best selected from within the image itself, so as to closely match the hues and tones of the original. I selected the Top Layer with the dog only, then used the Eyedropper tool and selected a light color from a patch above the dog's eye and a darker, brownish color from his coat. Later, I used the Foreground/Background color picker to adjust the colors to my liking
5.3 - Select the Background Gradient Layer to make it active. For this background, I chose to use the Gradient Tool, [Mirrored Image preset], then dragged a diagonal line from just in front of the dog's ear down and left to under its jaw. This created a diagonal line behind the dog and wide enough to highlight some of its coat. By keeping the Top Layer visible, you can see where the background will appear, and perhaps delete your original gradient attempt if necessary and try again. It normally takes me 3 or 4 tries before I'm happy with the result.
5.4 - Click on the Gradient Background layer and Execute Filter>Anthropics>Smart Photo Editor. Select the [Grungy Texture 007 preset] and decrease the Opacity to about 40%. The click on File>Save and Close.
5.5. - In the Layers panel of PS, click and drag the Gradient Background Layer so that it is right under the Masked Dog image. Once it is in place, one should see the dog's face with the gradient background behind it.
.
Sep 17, 2019 22:02:51 #
6. Blend Foreground (Dog) and Background layers
Add a Layer Mask on the Top Layer (Dog Image) (make sure the Dog Image is selected, then click on the icon under the picture that is a dark rectangle with a white circle in the center labeled "Add Layer Mask". When done, you will see a new white rectangle to the right of the Dog Image. This is your masking layer).
Now use the Paint Brush tool, set to Black, to paint over the edges of the dog where it meets the background. This will blend the two layers together, smoothing the edges. I start out at about 23% Opacity, with a fairly small brush, and move the opacity up to about 80 if I need to obliterate more of the original and cover it with background gradient.
.
Sep 17, 2019 22:04:31 #
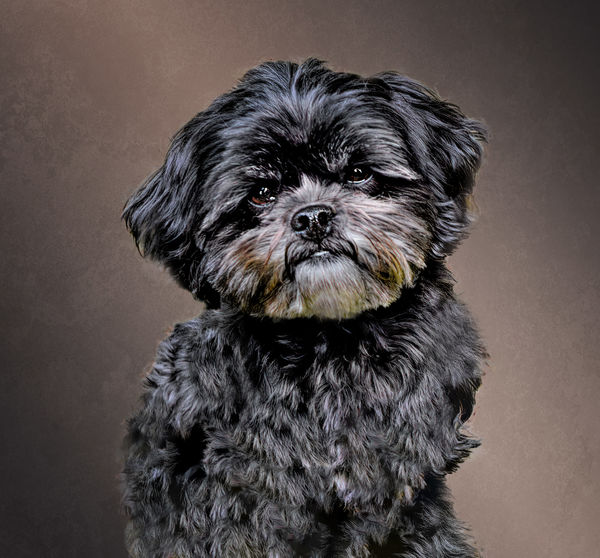
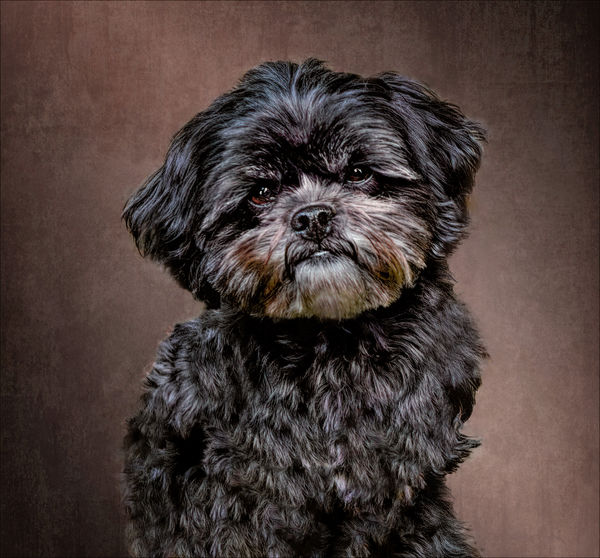
7. Final Touches, edit color and lighting
I am partial to On1 Develop for making lighting and color changes, especially using "Local" controls so I brush in changes only where I want them, then change the opacity of the changes on the fly so they blend in well with the original. I usually use different layers to lighten; darken; sharpen; and contrast sections. In particular, I lightened areas around the eyes and under the chin.
I used PS Camera Raw Filter to lower the Clarity settings, making the image a bit softer (and more puppy-like)
In this particular image, I invoked a layer of Topaz Restyle and used a [Fashion>Chestnut Coating] preset to adjust the colors.
** When Tommy first saw an image of my dog, Duncan, he remarked that they looked like twins with different mothers. Duncan's a bit older (now 13) than Rudy. **
.
Sep 17, 2019 22:31:06 #
Nice job, Bob. The background really makes Rudy stand out.
will
will
Sep 17, 2019 23:36:11 #
Ruby seems to think getting a portrait is serious business.
But the results are worth it.
But the results are worth it.
Sep 18, 2019 08:19:16 #

aaaa ha ! Now we are back to the Creative Tutoring Bob I so much have admired.
Sep 18, 2019 08:52:35 #
Thanks so much, Bob. I'm going to go over your tutorial carefully. Maybe I can learn something! Your PP skills are legendary.
Rowedean
Rowedean
Sep 18, 2019 10:35:22 #

Thanks, Bob. I can't imageine being able to do that masking. My hands are WAY too spastic!
Sep 18, 2019 11:36:58 #
Bob - your results are nothing short of wondrous! I now have a professional-quality portrait of Rudy, and a "road map" of processing that I can use in the future! I appreciate the collaborative effort and thank you for the time you spent making my Rudy look like the superstar he is! 
Sep 18, 2019 13:40:42 #
Thank you for the tutorial there is a lot of good information there I didn't know. I have been doing my subject isolation at pixel level in PS I am going to have to try Remask. I had just about given up on this forum, now I'm glad I subscribed. Thank you.
Sep 18, 2019 13:46:26 #
Curmudgeon wrote:
Thank you for the tutorial there is a lot of good information there I didn't know. I have been doing my subject isolation at pixel level in PS I am going to have to try Remask. I had just about given up on this forum, now I'm glad I subscribed. Thank you.
You're welcome, Jack. Years ago, I was one of the moderators of the Post Processing Digital Images forum, and I realized how many folks were looking for some general guidance.
Bob sends ..... Keep smiling!
If you want to reply, then register here. Registration is free and your account is created instantly, so you can post right away.