Haze Removal - Affinity and Lightroom
This topic is locked to prevent further replies.
Apr 11, 2019 09:32:25 #

If you are using Affinity Photo perhaps you have used this filter to remove haze but, did you know this filter can improve the quality of the sky in your photography? I was totally unaware of this till I watched a video by Serif, the British software developer that makes this product.
This filter was intended to clear haze in pictures but it does a great job adding structure to an otherwise dull sky like those we usually encounter during cloudy, low contrast days.
Modifying the sky to make a more interesting photograph has saved more than one of my images. Perhaps many of you using Affinity Photo have not taken advantage of the use of this filter. The procedure to do this is simple but you must remember to click Apply when done with the filter so that you can keep your changes. It is also a great idea to duplicate the background layer. Affinity automatically creates a layer to almost all the changes we make to a file but not to this filter. If necessary the filter can be reused but in my experience using the filter once and allowing the preset strength do the job is more than enough. If a modification to the strength of the filter is necessary simply play with the strength parameter. There is also a parameter to make exposure corrections that I have found very useful.
To use this feature you need a TIFF or JPEG file, it will not work with RAW images. Duplicate the background layer if you wish, I always do. In the upper tab of the editor toward the left side you will find Filters, click on it and a window will open. Select the Haze Removal filter and click on it to open the filter. Make sure you have the background layer or its copy selected or the filter will not work. The filter will begin to process the image automatically using the preset strength. Usually that is enough to make a good modification of the sky but you can increase or reduce the strength of the filter if so you desire. The Exposure correction parameter is used to darken or brighten the sky at will.
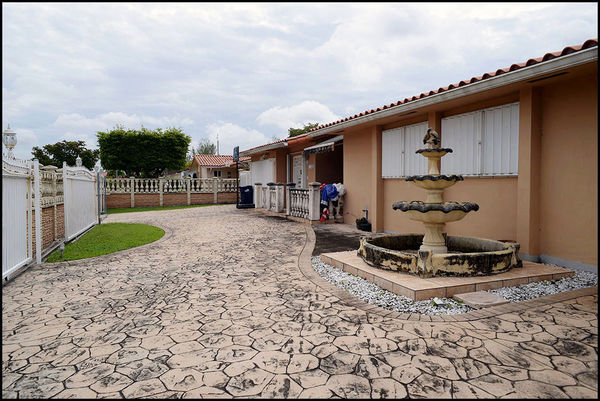
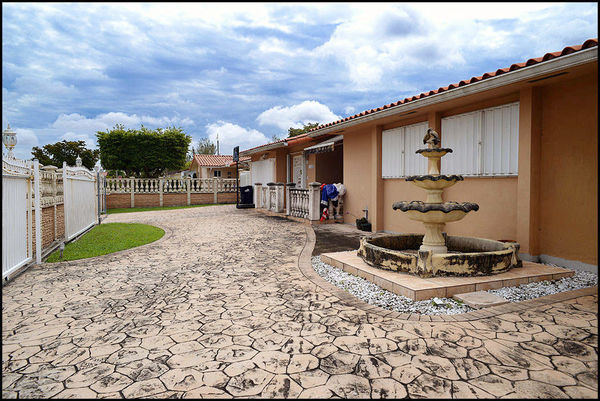
Here is the original image I made using my D610 with the 24mm f2.8 AIS lens. Look at the uninteresting dull sky. The second image is the result of using the filter.
I use this filter often. I hope its use will improve your images like it has done to mine.
This filter was intended to clear haze in pictures but it does a great job adding structure to an otherwise dull sky like those we usually encounter during cloudy, low contrast days.
Modifying the sky to make a more interesting photograph has saved more than one of my images. Perhaps many of you using Affinity Photo have not taken advantage of the use of this filter. The procedure to do this is simple but you must remember to click Apply when done with the filter so that you can keep your changes. It is also a great idea to duplicate the background layer. Affinity automatically creates a layer to almost all the changes we make to a file but not to this filter. If necessary the filter can be reused but in my experience using the filter once and allowing the preset strength do the job is more than enough. If a modification to the strength of the filter is necessary simply play with the strength parameter. There is also a parameter to make exposure corrections that I have found very useful.
To use this feature you need a TIFF or JPEG file, it will not work with RAW images. Duplicate the background layer if you wish, I always do. In the upper tab of the editor toward the left side you will find Filters, click on it and a window will open. Select the Haze Removal filter and click on it to open the filter. Make sure you have the background layer or its copy selected or the filter will not work. The filter will begin to process the image automatically using the preset strength. Usually that is enough to make a good modification of the sky but you can increase or reduce the strength of the filter if so you desire. The Exposure correction parameter is used to darken or brighten the sky at will.
Here is the original image I made using my D610 with the 24mm f2.8 AIS lens. Look at the uninteresting dull sky. The second image is the result of using the filter.
I use this filter often. I hope its use will improve your images like it has done to mine.
Apr 11, 2019 17:19:35 #
If your software doesn't have a haze removal slider you can try to use curves and raise the black level. A haze generally adds light over the entire scene, so raising the level that the software interprets as black will compensate for that haze.
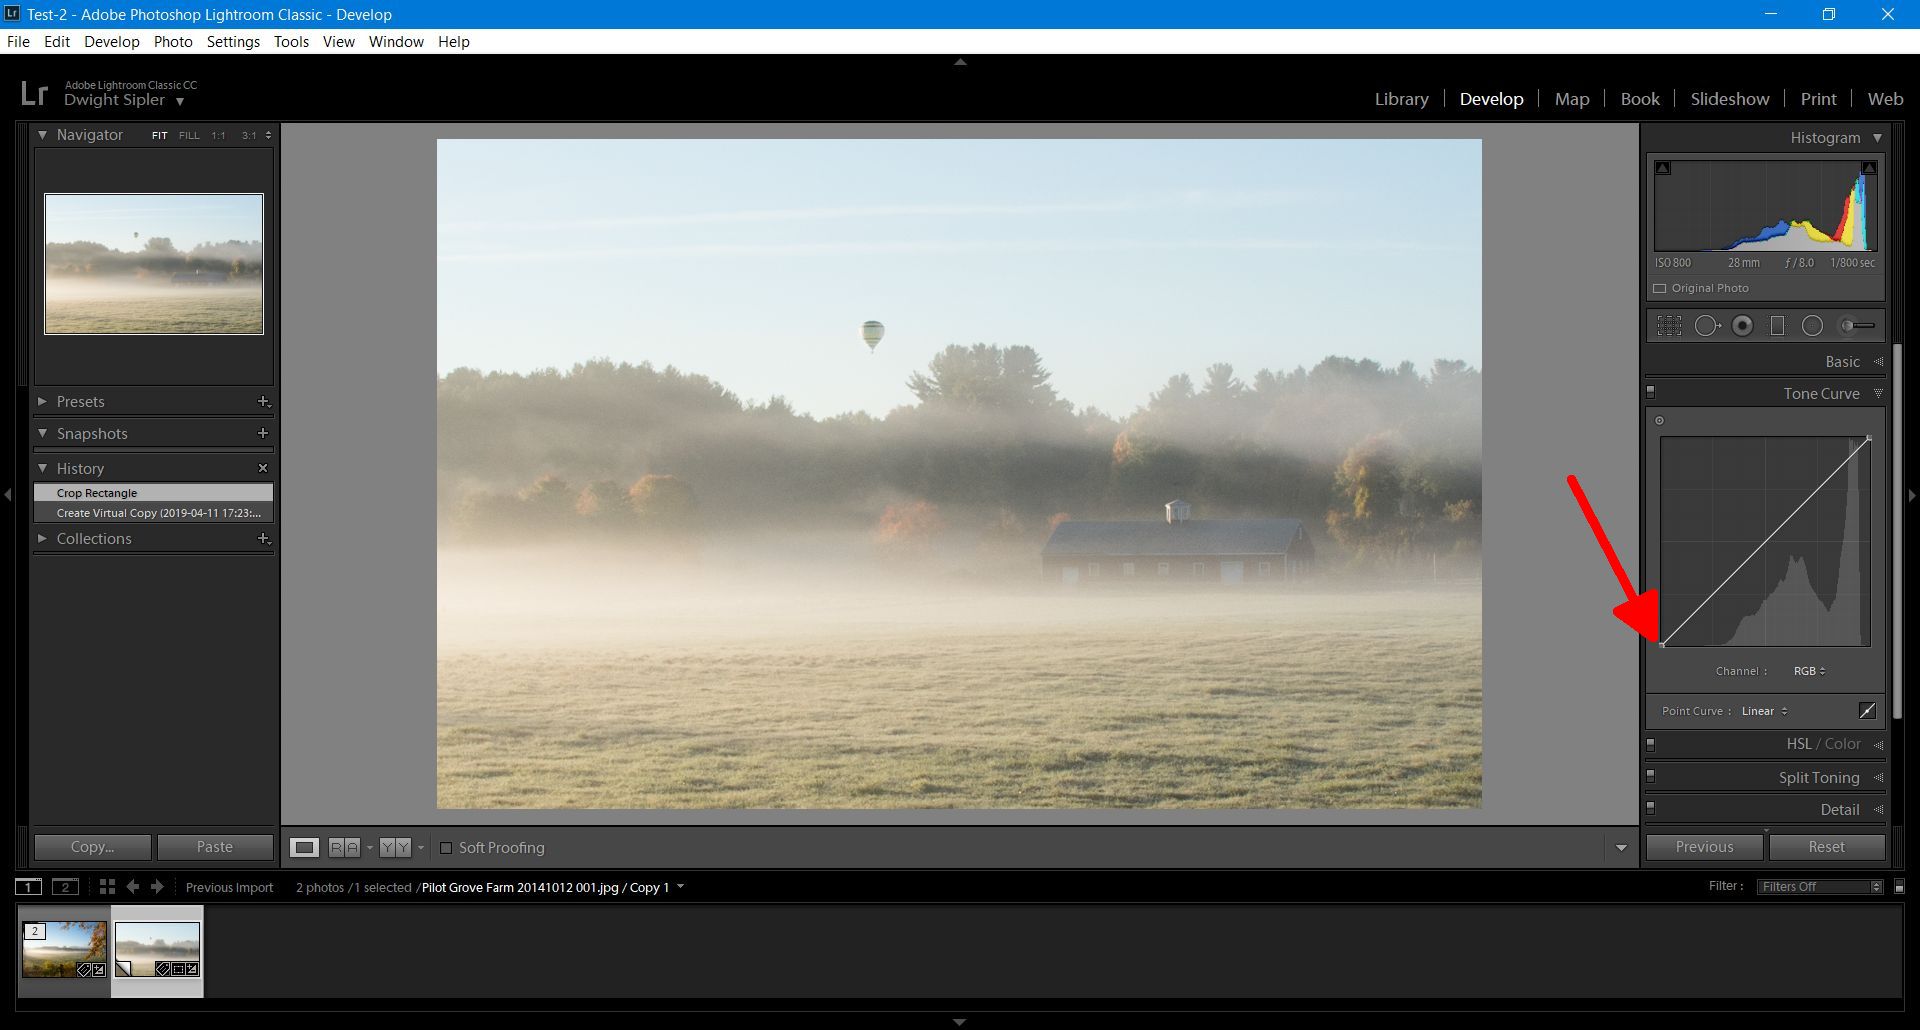
Here is a photo with some haze in Lightroom. You are looking in the develop module. The curves are shown by the arrow.

Clicking on the curves gives you the curves panel. The normal image is defined by the curve. Note that the haze causes the image histogram to drop to zero to the right of the bottom left corner, which represents the black point.
There's a small dot at the lower left corner. CLick on that and push it to the right. That will raise the level that is considered black, so it will reduce the haze.
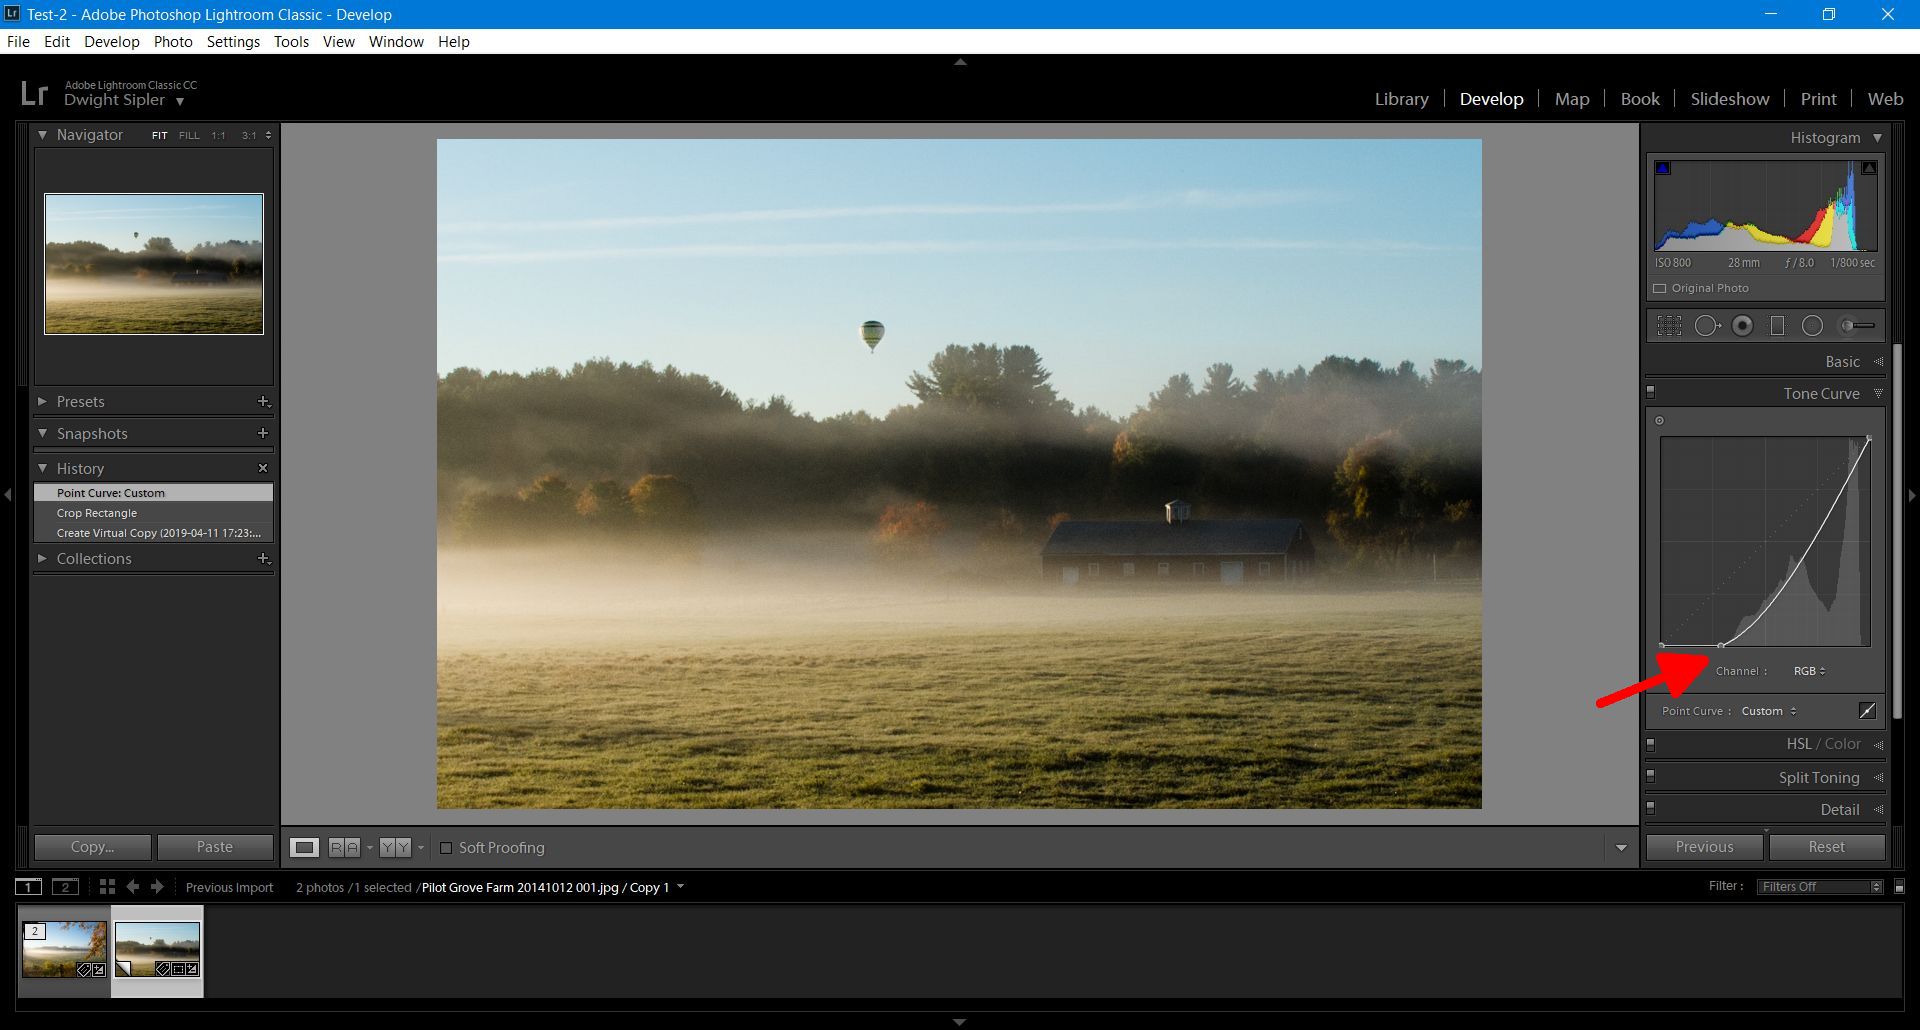
That approximates the haze slider in other software. The black level is not the only thing that the haze slider changes, so it's not an exact match but if you don't have a haze slider in your software try this.
Here is a photo with some haze in Lightroom. You are looking in the develop module. The curves are shown by the arrow.
Clicking on the curves gives you the curves panel. The normal image is defined by the curve. Note that the haze causes the image histogram to drop to zero to the right of the bottom left corner, which represents the black point.
There's a small dot at the lower left corner. CLick on that and push it to the right. That will raise the level that is considered black, so it will reduce the haze.
That approximates the haze slider in other software. The black level is not the only thing that the haze slider changes, so it's not an exact match but if you don't have a haze slider in your software try this.
If you want to reply, then register here. Registration is free and your account is created instantly, so you can post right away.