Formula for cutting mats the "traditional" way
This topic is locked to prevent further replies.
Mar 28, 2019 10:56:19 #

In an older topic, UHH member abc1234 mentioned he would share information regarding offset of images within a mat (pre-cut are generally the same width all around). I remember "way back when" being taught to leave more width at the bottom.
Attached are two files from abc1234 with that information. Just click the download buttons. The first is a pdf and the second an excel file.
Many thanks to Bob for this information!
Attached are two files from abc1234 with that information. Just click the download buttons. The first is a pdf and the second an excel file.
Many thanks to Bob for this information!
Mar 28, 2019 11:44:01 #
N97972
Loc: Chelan County, Washington
Thank you, the knowledge base here is phenomenal !
Pete Karp
Cashmere
Pete Karp
Cashmere
Mar 28, 2019 11:47:22 #

Mar 28, 2019 17:30:45 #

Mar 29, 2019 07:56:24 #

Mar 29, 2019 08:28:48 #

When I took a framing course, the reason for the extra width at the bottom, we were taught, was that long, long ago, when painted portraits were framed in heavy, wide and thick frames, they were also hung fairly high on the walls; in a corridor or smallish room, one could not step back further and had to look up, and because of the size of the frame could not see the bottom of the painting itself. A wider mat at the bottom only, was the solution.
Mar 29, 2019 09:02:29 #

Morning Star wrote:
When I took a framing course, the reason for the extra width at the bottom, we were taught, was that long, long ago, when painted portraits were framed in heavy, wide and thick frames, they were also hung fairly high on the walls; in a corridor or smallish room, one could not step back further and had to look up, and because of the size of the frame could not see the bottom of the painting itself. A wider mat at the bottom only, was the solution.
Very, very interesting. I have checked old framed portraits painted by my great-grand mother... it makes sense. Thank you for that info.
Mar 29, 2019 13:25:07 #

Linda,
Thank you for the link to the tutorials -- I had no idea. Terrific.
Jack
Thank you for the link to the tutorials -- I had no idea. Terrific.
Jack
Mar 30, 2019 10:43:22 #

I've done my own matting for many years and was taught by a framer who had been in business for decades before. She encouraged the "same width on all 4 sides" theory. The "weighted bottom" was sometimes used for artists who wanted to put their signature or the title of the artwork on the mat instead of on the artwork. (That was a fad for awhile.) Another purpose for uneven mat widths was to make a particular image fit into a standard sized frame. It became so common that it was the "normal" look. Since I make my own frames, I can build a frame to any dimension and am not limited by "standard" sizes. Not everyone does that, so I do understand that need.
But having said all of that, I still prefer the same size all around to the weighted look.
But having said all of that, I still prefer the same size all around to the weighted look.
Mar 30, 2019 11:12:16 #
AzPicLady wrote:
Thanks very much for this viewpoint, Kathy, and to all who commented. Thanks again to abc1234 for providing the documents to start this discussion.I've done my own matting for many years and was ta... (show quote)
Mar 30, 2019 14:20:59 #

I am pleased to hear about this thread- thanks, Linda! I'll tell you why.
As some of you know, my day job is in commercial and portrait photography but sometimes I think we should call our studio "Mattes R Us" or perhaps "Frames R Us". I'll explain. We often "joke" that if God forbid we ever had a fire, we have so much wood (frames) and matte board in the stock room that the entire neighborhood would burn down! NO SMOKING IS ALLOWED!
I started off in the wedding and portrait business and back in the day professional work never left the studio in an envelope or worse, a polyethylene (plastic) bag with a cardboard stiffener. All our photographs were delivered in folders, usually with an intrinsic matte, leather folios- with mattes, an album- usually with mattes or a picture frame, oftentimes with liners or mattes. The final presentation was always important as well as the method of display. Even my commercial clients, nowadays, are impressed when I deliver a display print handsomely matted, mounted and/or framed.
Nowadays, what with so many photographers confining their output to screen images, there seems to be a dearth of information on printing and various methods of finishing, matting, framing, and decorative display. The Post Processing Section is a good place for these discussions in that, just like the work we do in our post-processing hardware and software, the final presentation of our work has an important effect on the aesthetics.
When I first started my own business, I had little space for storage of supplies, matte cutting, or actually joining molding for picture framing. Except for stocking pre-cut mattes and stock folders and pre-manufactured frames, I had to align myself with a good outsourced framing shop to handle that aspect of my business. I was fortunate enough to find a "framer" who was himself an artist and a fine craftsman and I soon discovered that matting and picture framing is an art, skill, and craft in itself. I even took a few seminars and courses to bone up on the craft.
I fully understand that there is a "purist" culture about mattes and folks oftentimes refer to standards set up by museums, galleries, and rules pertaining to photo competitions. People pontificate about WHITE, others about gray and of course, the antithesis of white which is BLACK. Most of us, however, are not curating museums or managing galleries or running print competitions and perhaps are missing out on many creative opportunities to display and decorate with our photography in different ways.
Not every photograph requires a border or a matte. Some can be presented in a frame or a FLUSH mount of some type where the image "BLEEDS" to the edges. Once a matte is involved, however, think of it this way; it becomes part of the composition. It can help lead the viewer's eye to the motif of the image or become a distraction. In some instances, the matte can add NEGATIVE SPACE" or place the image in the more powerful 1/3 of the total format.
You can create a compound matte, that is two or more mattes that are "stacked" up. The main outside matte can be a neutral color or shade and the sub-mattes can serve as a "pinstripe" or color or tone that picks up on or compliments one of the colors in the image. There is also a specialize skill of matte-carving where certain designs can be added to a matting/framing concept.
There are matte boards with a colored core so that when it is bevel-cut or carved, the core is exposed and becomes a pinstripe liner or other decorate aspect.
Another technique uses fillets, those are very thin wooden versions of the main wooden picture frame. These are joined to the inner edges of the matte for a very elegant presentation.
The tutorial submitted by the OP is very valuable. It explains the basic method of preparing a matte. Basically, all that is required a good sharp matte knife, a pencil, ruler and a streetside guide- and of course, patience and a steady hand. If you do lots of this kind of work, there are some really handy matte cutting equipment that makes life easier and production faster. There are cutters that enable circular and elliptical cuts as well.
The Savage Company (savageuniversla.com) manufactures a wide variety of matte boards and related supplies- they also supply a line of pre-cut mattes in standard sizes if you don't have the time or space to cut your own mattes but still want to try some of these presentations.
There is also the aspect of matting and picture framing that has to do with the preservation of our images. There are archival acid-free materials and special methodologies for mounting prints and glazing picture frames. There are even specific methods for securing mattes and prints in frames and actually hanging frames on the wall.
I really can't predict how much interest there will be, on this forum, about these kinds of presentations. If there is some enthusiasm, I would be glad to write up a few ideas. What do y'all think about related subjects like dry mounting, lamination, print finished with lacquers and textures?
Mar 30, 2019 14:35:07 #
E.L.. Shapiro wrote:
As always, Ed, your years of commercial experience have translated to interesting and valuable information for UHH members!I am pleased to hear about this thread- thanks, Li... (show quote)
I love the idea of a series on the topics you mentioned, but I am not sure about participation aside from those who have commented in this topic. When I acquired moderator control, I checked PP Forum's recent history. 2018 saw between 16 and 20 topics per month, while main discussion forum posts that in a single day. In the past two months we have had more interest, for which I'm very grateful. But the topics are far-ranging, something for everyone
 and some of the most popular are challenges to test participants' processing skills.
If you have the time and would enjoy sharing a series, you would be very welcome to proceed and I will get the word out!
Mar 30, 2019 15:15:55 #

E.L.. Shapiro wrote:
I am pleased to hear about this thread- thanks, Li... (show quote)
And THAT'S the reason for not making mats a big deal for fine art/photography. In the fine art world, the image is supposed to not need "help" or changing. If the mat "becomes part of the composition," the image is either weak to start with, or degraded.
However, if the photography/art is DECORATIVE, not "Fine," then a colored, "creative" matting and framing is often used.
It is good to know your audience, and mat accordingly.
By the way, here is the real reason why you might want to weight the mat at the bottom: https://www.archivalmethods.com/blog/matting-part-4-centered-weighted-mats/. Once again, as with a neutral mat, such weighting is not necessary, but it is good to know why you might want to.
Mar 30, 2019 21:34:43 #
artBob wrote:
And THAT'S the reason for not making mats a big de... (show quote)
If you read into my post, I did recognize the "purist" approach or as you put if "fine art" method of matting. I know about that weight thing- about the border at the bottom and I love the link you supplied- I saved it in my computer for reference and training.
I mentioned that the matte or treatment becomes part of the composition in that if it is distracting or somehow directs the viewer's eye away from the motif of the image the treatment becomes counterproductive. I did not say that a weak image needs colorful matting to strengthen it. It is more likely that an inappropriate matte or frame tends to weaken a strong image by serving as a distraction. Not everyone is an aficionado of fine art- they might not always zero in and analyze minute details- they may never get in close enough- they see the entire piece. Hopefully, the entire piece as a unit looks coherent and harmonious and makes the right impression and sends the right message.
Meanwhile, as y'all know- I never call myself an artist- I am a COMMERCIAL photograher!
Funny thing- In my younger days, I decided to enroll in photography classes in a college that specialized in fine art and also offered programs in commercial art and photography. There was a horribly snobbish culture there whereby the FINE art faculty and students tended to look down upon the commercial department. Although I was always commercially oriented, I wanted to sit in some some of the fine art classes to learn some of the history and principles and study the work of the old master -especially the Flemish painters-in my book Vermeer ROCKS! The attitude among many of the folks there was that commercial art was a form of prostitution and that commercializing on artistic savvy for MONEY was less than ethical. Made me sick- so I quit, lost my student draft deferment, enlisted in the army and went to Viet Nam. That'll teach me to get upset!
I have seen museum exhibits of painting by Gainsborough, and many of the Dutch Masters in what I assume are in their original very ornate frames. The frames seem to meld very nicely with the themes and subject matter of the art. Are those paintings NOT FINE art?
Anyway, for the purpose of this forum and section, I would just like to see folks get off their screens, make a few fine prints and enjoy and display their photography. Everyone is glued to there monitors and keyboards, It's a wonder everyone don't have eyesight issues and carpal tunnel syndrome. Viewing nice big prints on the wall is good for the health!
Mar 31, 2019 07:44:17 #
E.L.. Shapiro wrote:
I used to print a lot more than I have in past four years. One fun way I came up with to display matted pics "temporarily" was on an upside down section of ceiling molding I found at Habitat for Humanity's resale store. The groove in the wood kept the mats from slipping off....Anyway, for the purpose of this forum and section, I would just like to see folks get off their screens, make a few fine prints and enjoy and display their photography...
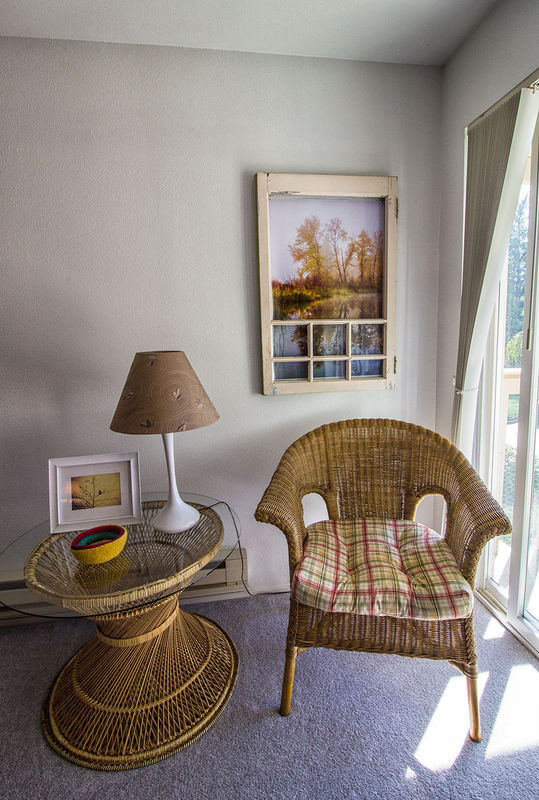
Quite some time ago I posted a topic about "framing on a budget." At Habitat you can find fantastic old windows to use. The below is actually not from there, but it's similar to what you might see. This one fits a 20x30 poster almost perfectly. The photo displayed below was highly Topaz'd

If you want to reply, then register here. Registration is free and your account is created instantly, so you can post right away.