post processing suggestions
Mar 27, 2019 16:05:59 #

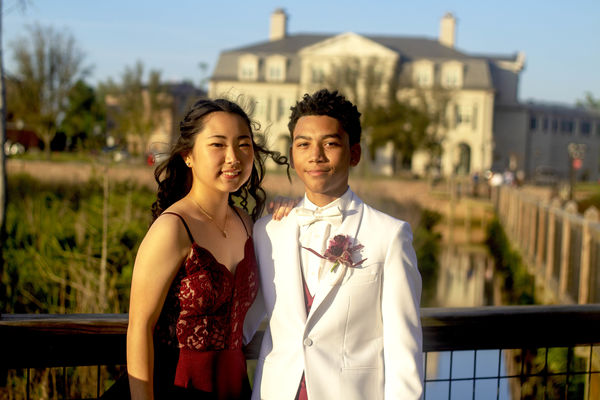
Hello everyone, newbie here needing help with post processing of this image before i tear my hair out. problems i need to fix are:
1. flying stray hairs of the female subject (top,lower left & right side). whats the easiest way to get rid of it. clone tool giving me a tough job
2. highlights- how can i tone down the highlights especially from the exposure on the faces and lighten up the shadows especially on the right side of the male subject?
is any of these changes fixable or have i ruined it with the current exposure altogether??
thanks in advance
Mar 27, 2019 16:10:16 #

Mar 27, 2019 16:19:00 #
There are a number of free editors that allow you to do the tasks you mention.
Vaughan K.
Vaughan K.
Mar 27, 2019 16:52:21 #
Mar 27, 2019 17:00:23 #
Lots of videos on Youtube to do what you want using LR/PS. Clone, spot healing......
Vaughan K.
Vaughan K.
Mar 27, 2019 17:19:58 #
In Lightroom you could use the Adjustment Brush on the faces and tone down the highlights. As far as the hair, you could try the Adjustment Brush on the hair and reduce the sharpness in the painted area to 100 - that'd probably make it less noticeable.
Mar 28, 2019 06:31:28 #
It sounds like your software may not have been completed in this area if you are having trouble. It happens a lot. Don't forget to reduce the size of the brush if it's not cooperating.
Look at videos on "refine edge" after you make a selection. Don't forget to reduce the size of brush if it's not cooperating.
For your education in post processing, it's interesting to understand just how small a pixel is in relationship to how big your photo is on the screen.
Good Luck
Look at videos on "refine edge" after you make a selection. Don't forget to reduce the size of brush if it's not cooperating.
For your education in post processing, it's interesting to understand just how small a pixel is in relationship to how big your photo is on the screen.
Good Luck
Mar 28, 2019 07:47:48 #

Hi Meg. Since Admin moved your topic from Analysis to PP Forum, I cleaned up the "flow" a little, including re-positioning your photo to the opening. You had said that your PSD file wouldn't load, so I wanted to mention that files must be 20 MB or smaller for UHH. Anything other than a jpg or tif will not display the thumbnail view, though a "download" link will show.
A couple of suggestions have been offered on using the clone tool, and mention of "spot healing" - another tool to study and practice. Adjustment brush for selective lightening was mentioned.
Please let us know if these work for you, and if not, explain in detail what roadblocks you're facing. Online videos may be a good avenue to pursue to get you started. Here's another article on selecting hair:
https://www.photoshopessentials.com/photo-editing/selecting-hair/
.
Mar 28, 2019 10:22:23 #

Some random thoughts. Since you already have LR, save your time and do not look at other programs. For reasonably well exposed pictures, you should be able to do over 90% of your editing in it. PS for the rest. You would use your time better to learn LR than sample other programs. Shoot raw if you not already doing so; it makes a world of difference. Your white balance may be off. I know this was a late afternoon shot with naturally warm lighting but I suspect your picture might be too warm. Also, that light tends to be very contrasty and using a fill flash or reflector on the dark side of the faces may have helped.
In any event, keep shooting and coming back here for help.
In any event, keep shooting and coming back here for help.
Mar 28, 2019 10:24:42 #
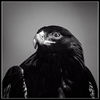
MegTee -- I hope you don't mind, but I experimented with your photo, in an attempt to determine the best way to achieve what you want.
First, with the hair. This part is somewhat tedious. I had to use a combination of things to get this far. One of the things that can work is content-aware fill, but ONLY if you establish little, independent zones. You can't do it all at once. Look at that big, windblown tuft of hair. It covers an area of that has different backgrounds. Use the clone tool to section off areas of that tuft of hair, making sure that each area does not have a background that has too many tones. I think I made three areas. You can select one of the areas, using the lasso, then go to Edit-Fill, and set the fill type to content-aware. This will give you a pretty good start. Then, you can use the normal tools you would use, to get rid of little wisps of single hairs.
When you get something you like, the background might be a tiny bit patchy. Create a clone stamp, so that you can apply a Gaussian blur filter on the patchy section. You only have to apply the blur to a section (use the lasso to select). You can blend this new layer on top of the old layer, to smooth out that blur, even further.
By this time, you ought to have something you like. Then, you can concentrate on removing the shadows on the faces. I did this by using a luminosity mask -- one of the dark ones. I posted a tutorial, just a couple of days ago, on using luminosity masks. I modified the mask, in a manner similar to the description, in that tutorial.
Here is the end result. The hair could probably be a bit better, but it all depends upon how big the print would be.
Mar 28, 2019 12:11:12 #
Anvil wrote:
MegTee -- I hope you don't mind, but I experimente... (show quote)
Hello Anvil, thank you for the feedback and edit. i still have a lot to learn on post processing. been bouncing back and forth on where is best to expend learning energy, PS or LR? i guess am better off being a master of one first before moving unto the other but i need to know which one will give me the most versatility?
i appreciate the edited work,will also try suggested edits and see which works
Mar 28, 2019 12:14:10 #
abc1234 wrote:
Some random thoughts. Since you already have LR, ... (show quote)
Thank you so much for your insight. i've actually been confused about which of the programs to focus on to get the most editing benefits. i always shoot raw. yes it was a very sunny day and i did the shoot with no assistant to help with holding the reflector even though i had it with me so i had to wing it. I was told if you shoot in raw then you dont have to worry much about your cameras WB as that can be fixed in PS?
Mar 28, 2019 12:15:33 #
Linda From Maine wrote:
Hi Meg. Since Admin moved your topic from Analysis... (show quote)
Thank you Linda, i appreciate the guidelines and the link you sent is helping some. you're awesome!!
Mar 28, 2019 12:28:05 #

The flying stray hairs, shadows and highlights aren't the total spoilers that you may think they are. Don't worry if you don't manage to sort the problem to perfection. Trying to do that may produce worse results than settling for a partial fix that reduces their impact.
Mar 28, 2019 12:49:57 #

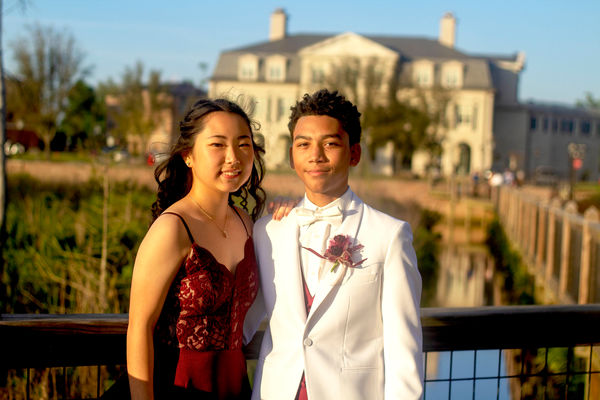
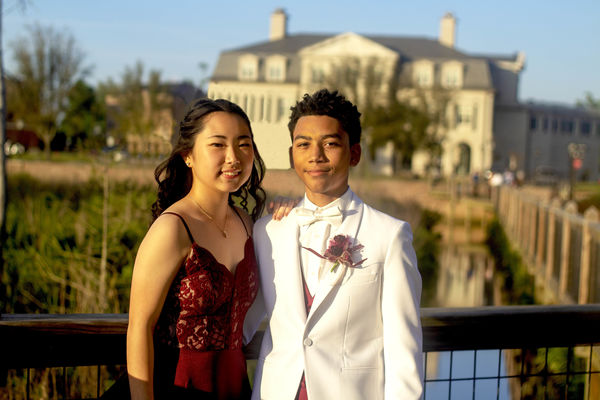
No question that your image is blown out, so very limited what you can do with it. Here's an attempt to balance the contrast a bit and get rid of your fly-away hair with the clone tool.
If you want to reply, then register here. Registration is free and your account is created instantly, so you can post right away.