Challenge: Free Sunday - December 30, 2018
Dec 30, 2018 08:23:55 #
Dec 30, 2018 08:31:55 #

cmc4214 wrote:
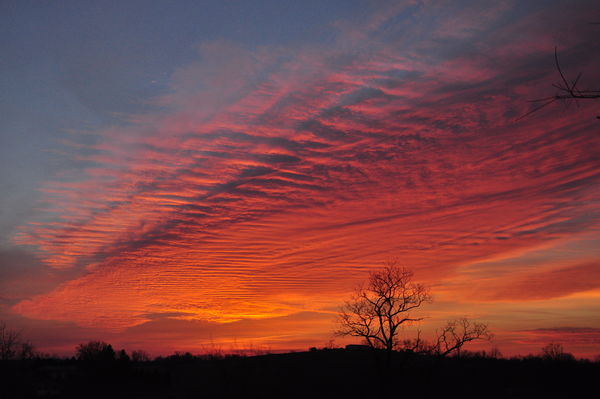
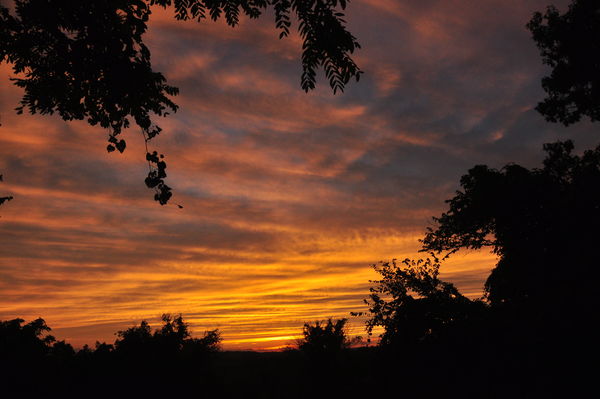
From early spring this year. Southwestern Pennsylvania sunrise(s)
Lovely.
Dec 30, 2018 08:44:09 #
Dec 30, 2018 08:54:11 #
JANUARY CALENDAR
I haven't downloaded the January calendar yet because it was mostly blanks. I do know: Monday -Wednesday (starting tomorrow) is "Your Best SHots of 2018" with Photogirl. Thursday thru Saturday is "White Balance" with me. Last I knew, only one other spot had been filled.
PLEASE FOLKS, send PMs to Photogirl17(I hope I have her screen name right...) with some dates, topics you would be willing to host
Dec 30, 2018 09:04:05 #
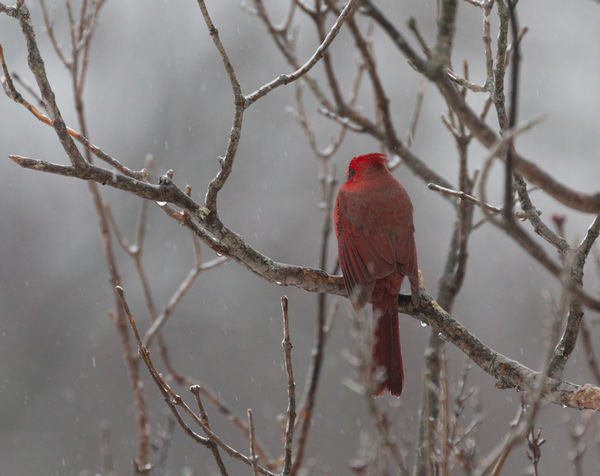
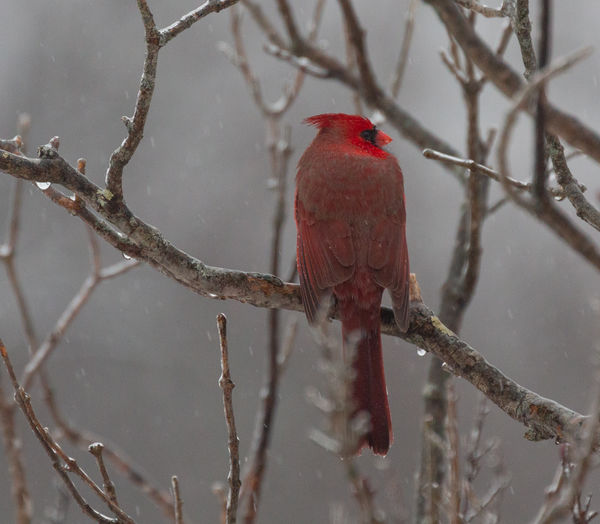
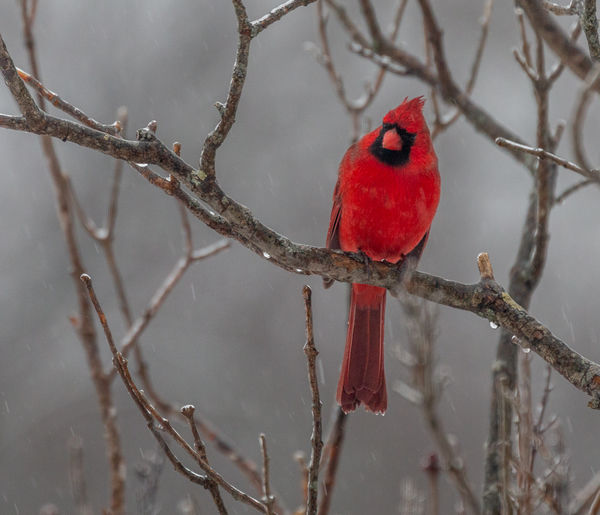
This is my wet cardinal...when you download, you see the details and rain drops

Dec 30, 2018 09:04:57 #
@Steve Demott - thanks for the PS info. Have saved it. Just now trying to get used to PS
Dec 30, 2018 09:34:12 #

HardworkingGal wrote:
Untouched except a crop...hope the New Year gives me the confidence and patience to learn post....and bestows Happiness & Health to all my fellow HOGS. Happy New Year!
HardworkingGal really nice photo of a tough ol cat

Dec 30, 2018 09:34:51 #
Dec 30, 2018 09:40:14 #
Dec 30, 2018 09:42:10 #
Dec 30, 2018 09:43:20 #
William wrote:
UHH has changed directions of many
directions of thoughts we found UHH
directions of thoughts we found UHH
William

Dec 30, 2018 09:45:10 #
RichardQ wrote:
Here's another of my 70-year-long trips down memory lane. This September, 1948(!) view of my honeymoon hotel was taken in Berchtesgaden, in the Bavarian Alps. The quaint but oddly fetching enthusiastic gardening approach probably would have been spectacular in color, but the medium-format color negative films of the time were horribly unreliable.
RichardQ Well done
Dec 30, 2018 09:46:38 #
MichaelEBM wrote:
How Californians celebrate Christmas. (The day of Christmas Eve at San Clemente Beach in Southern California.) Captured on my iPhone SE.
MichaelEBM
Dec 30, 2018 09:48:48 #
Roadrunner wrote:
Again more in which includes the St. Lawrence River east of Québec City
Jim I really like the barns

Dec 30, 2018 09:50:32 #
SueScott wrote:
Here are some natural monotone shots taken in the early morning hours after a snow storm. The only thing done to them was a bit of brightening to hi-light the snow - I used a flash on the first two.
MichaelEBM I really like #2 wonderfully moody
If you want to reply, then register here. Registration is free and your account is created instantly, so you can post right away.