Converting Color to B&W
Dec 6, 2018 08:58:01 #
Tomcat5133
Loc: Gladwyne PA
E.L.. Shapiro wrote:
There are may ways and many reasons to convert a c... (show quote)
My apology I neglected to post the b&w version I created. I got stuck on converting legacy images.
Dec 6, 2018 09:39:31 #
bpulv
Loc: Buena Park, CA
waynetgreen wrote:
Greetings,
I occasionally convert color to BW using Photoshop remove color or desaturate. Results are acceptable but just wondering if there is a distinct advantage to using the monochrome setting in the camera vs post process? Better grey scale maybe? I know I could do some side by side comparisons, but I truly enjoy the comments and expertise of the collective group.
Thanks
Don't use monochrome settings in the camera. You should always shoot in color and edit the picture in color before conversion to black and white. Once the picture looks right in color, the very last step in Photoshop should be to make a layer to convert the picture to black and white. That will both provide you with the best black and white full tone print and allow you to switch between color and black and white if necessary at a later date. If you print your pictures (B&W or color), be sure to limit the black and white points on the histogram in Photoshop to 8 and 244.
Dec 6, 2018 09:40:38 #
Tomcat5133
Loc: Gladwyne PA
WF2B wrote:
Tom, I am having a little trouble trying to understand what your three photos have to do with B&W.
My apology I am working on a B&W version of my studies and conversion work from legacy images.
Did not include. It is conversions I am experimenting with. Thanks for your patience.
Dec 6, 2018 11:14:03 #

waynetgreen wrote:
Greetings,
I occasionally convert color to BW using Photoshop remove color or desaturate. Results are acceptable but just wondering if there is a distinct advantage to using the monochrome setting in the camera vs post process? Better grey scale maybe? I know I could do some side by side comparisons, but I truly enjoy the comments and expertise of the collective group.
Thanks
I occasionally convert color to BW using Photoshop remove color or desaturate. Results are acceptable but just wondering if there is a distinct advantage to using the monochrome setting in the camera vs post process? Better grey scale maybe? I know I could do some side by side comparisons, but I truly enjoy the comments and expertise of the collective group.
Thanks
So the conclusion seems to be that the OP's issue involving any advantage to using the monochrome setting in the camera vs post process has a flaw. They are not mutually exclusive if shooting RAW. You can use the setting and convert in PP using some of the techniques discussed here.
Dec 6, 2018 17:35:18 #

For years I followed the conventional wisdom shooting raw in color and converting to B&W using software and applying filters (red, yellow and green) to my converted color photos. Now, I still shoot raw but I shoot in Acros (B&W) which is a Fuji film simulation on my XT2. The reason that I shoot in B&W is that I can see texture and tonal gradations better in B&W then when I shot color and converted. I believe that there are two schools of thought and experience when shooting or converting to B&W. For me, my B&W shots are better when I shoot in black and white then they were when I converted color photos.
Dec 6, 2018 17:53:48 #
Linda From Maine wrote:
Shoot in color, convert in a robust editor
I agree with converting in post, BUT, if you know you are going to convert, and if you have a EVF, change your camera to B&W mode. This will let you see the light and shot in B&W in the VF. The raw file will be in color and you can convert it on your own or with Lightroom presets specific to your camera.
Of course if you know you are going for B&W, shoot Tri-X or HP5.
Dec 8, 2018 07:41:30 #
Tom Daniels wrote:
My apology I am working on a B&W version of my studies and conversion work from legacy images.
Did not include. It is conversions I am experimenting with. Thanks for your patience.
Did not include. It is conversions I am experimenting with. Thanks for your patience.
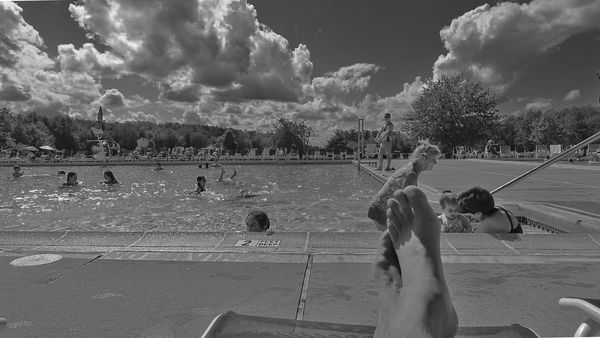
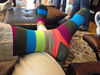
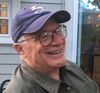
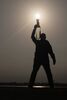
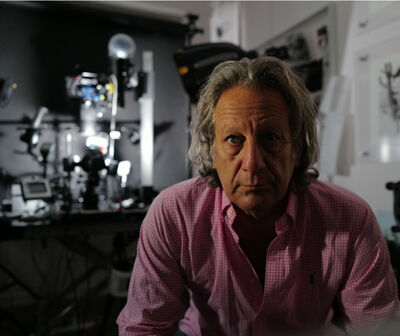
I like that photo. Wish you'd posted a high-res version.
"B&W" means B&W film or monocrhome sensor. Anything else is decolorized/d
You know, like Ted Turner's version of Citizen Kane is colorzed.
Dec 8, 2018 12:57:56 #

Bipod wrote:
I like that photo. Wish you'd posted a high-res version.
"B&W" means B&W film or monocrhome sensor. Anything else is decolorized/d
You know, like Ted Turner's version of Citizen Kane is colorzed.
"B&W" means B&W film or monocrhome sensor. Anything else is decolorized/d
You know, like Ted Turner's version of Citizen Kane is colorzed.
Its closer to technicolor where 3 black & white film strips are exposed to monochromatic light which is produced by being passed through three colored filters. Color is really an illusion and with digital a series of measurements and math.
Dec 9, 2018 23:47:26 #
Linda From Maine wrote:
Shoot in color, convert in a robust editor (I use ... (show quote)

Love these shots. The second one is truly inspired. ?Alan
Dec 10, 2018 02:19:31 #
Compared to BW, shooting in color gives you more choices afterwards. Better still if you know how to work with RAW. When converting colored images in Photoshop to BW, do not use desaturate. Instead, go to Image/Adjustment/Black & White (Alt+Shift+Ctrl+B in Windows PC). With the available sliders, you can control how each color will render in your final image. Experiment :-) , Just remember to save it as a different file first before doing anything so you do not lose your original file. Below is a sample of a colored image converted into BW in Photoshop.

Jul 31, 2022 02:00:23 #
Jul 31, 2022 02:23:03 #
Orphoto
Loc: Oregon
[quote=Wallen]If you want to shoot black & white, it would be better to set your camera to black & white instead of desaturating the color in post.
Wallen, restrain your enthusiasm. This discussion is 4 YEARS OLD.
Wallen, restrain your enthusiasm. This discussion is 4 YEARS OLD.
Jul 31, 2022 02:25:55 #
[quote=Orphoto]

Wallen wrote:
If you want to shoot black & white, it would be better to set your camera to black & white instead of desaturating the color in post.
Wallen, restrain your enthusiasm. This discussion is 4 YEARS OLD.
Wallen, restrain your enthusiasm. This discussion is 4 YEARS OLD.
Jul 31, 2022 07:07:47 #
My two cents worth:
Shoot color then convert.
I used to use the recipe below. Really like the results. I still think it’s relevant, but Nik Silver Effects Pro is faster.
1. Open the image, assuming that its RAW, make your Lightroom or ACR adjustments;
2. Once the raw image is open in PS, select Lab Color under Mode;
3. Once open in Lab Mode, under your channels pallet, highlight the Lightness Channel;
4. Go back to Mode menu and select Gray scale, PS will ask you to discard other channels, click “Yes”;
5. Now hold your CTRL key and while holding your CTRL key, click the gray channel that should be highlighted in your channels pallet. You should now have the dancing ants at this time;
6. Now select Inverse in your Selection menu;
7. Convert back to RGB Mode under the Mode menu;
8. After converting to RGB, go to your layers pallet and at the bottom, click on create new adjustment layer (the B&W Circle);
9. Choose solid color and pick the color that you want if you want to add any color, if not, choose a neutral gray;
10. On the upper layers pallet, choose multiply and the adjust your opacity and curves;
11. Do your final processing and print.
Jul 31, 2022 09:35:29 #

If you want to reply, then register here. Registration is free and your account is created instantly, so you can post right away.