Three shots I would appreciate some feedback on
Dec 15, 2017 23:55:41 #

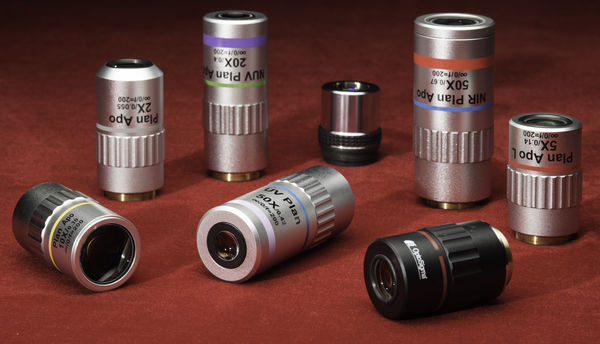
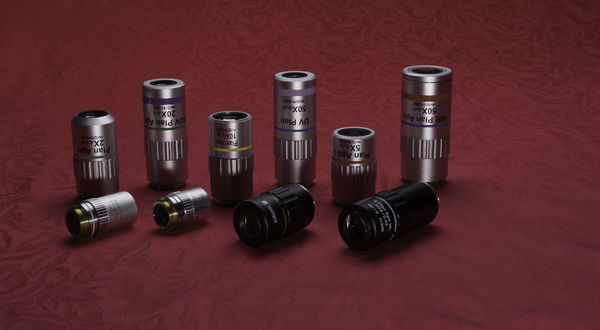
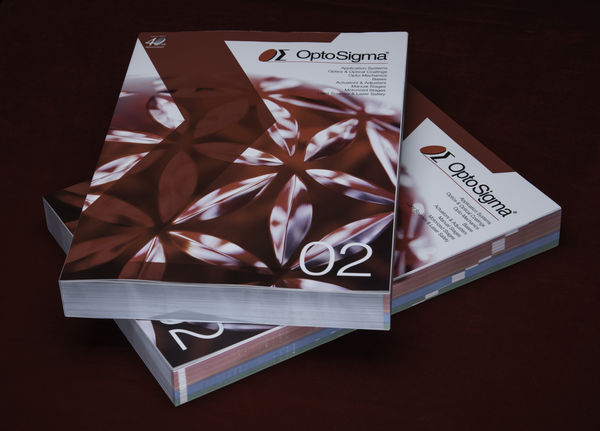
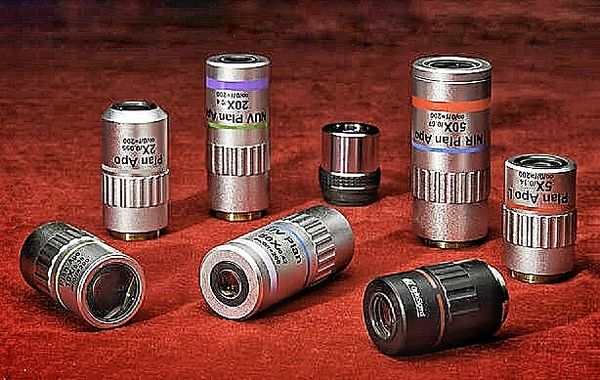
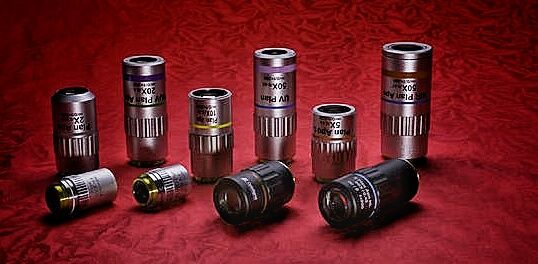
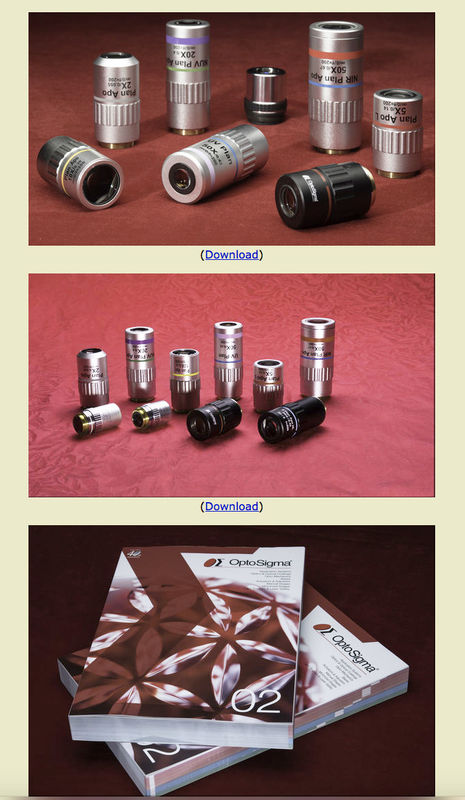
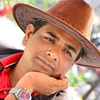
This was a last minute rushed shoot. We needed a photo of the microscope objectives and catalogs that we could print about 4 feet wide for trade show booth graphics. I like the placement of the objectives better in the first photo , but we needed space to the right for a fade to white and ran out of time shooting the second one. I like the top light better on the second when I moved the soft box back behind center instead of directly overhead in the first shot so it doesn't blow out the beveled edges. But with the top light back, I needed a second soft box to light the front? The mini soft box I had on the front was too hard, I think.
I'm normally the engineering manager at this company and take pictures for fun, so let me know how I did and where I can improve, please.
I'm normally the engineering manager at this company and take pictures for fun, so let me know how I did and where I can improve, please.
Dec 16, 2017 09:29:30 #
I agree with your assessment, photo 1 looks better than photo 2 (brighter), however I don't know if placement is a requirement, but as a reader I find the writing on the objectives which is upside down to be annoying and though technically it may be wrong I would have placed them so that the viewer could read the writing. As far as lighting on number 1 I think it looks good. Since I do not do product photography for a living I will not comment further.
claytonsummers wrote:
This was a last minute rushed shoot. We needed a ... (show quote)
Dec 16, 2017 16:21:34 #
Somewhat redundant but, - I think the lighting in #1 is much more pleasing and shows off the objects much better. However, for a sales display (?) the array is #2 is much better than #1. I too find the upside down printing disconcerting.
Dec 17, 2017 03:59:56 #
jdubu
Loc: San Jose, CA
Is there a reason for the burgundy background? It gives a colorcast on the subject and is competing with the objects. Too color forward and distracts from the details of your product.
If you need to have the burgundy, put it as a backdrop and light it from the sides. Use a piece of black shiny plexi as your table top and the backdrop will reflect off the plexi as seamless burgundy to your camera position (if the backlights are properly positioned). This will avoid having the color reflect onto the face of the cylinders.
I would also place some white foam core strips as reflectors behind and off to the sides of the product to give a highlight edge to them and thus separate them from the background.
Dec 17, 2017 17:46:54 #
Thanks everyone, your comments are very much appreciated and informative. I agree that positioning the lenses so the text is upright will be an improvement. Doing so will require some imagination and ingenuity (which is the fun part). The background was done to match up with other images we already had, but I do like and will try the black plexi and reflectors next time.
Dec 18, 2017 11:34:12 #

Some quick edits. I am OUT of my office so I will explain in my next post.
Dec 18, 2017 12:23:17 #
Hi Clay.,
Sorry for the poor quality, I am working out of town so I checked in here and did the edits on my Android phone- just to give you some ideas.
I added some space at the topof one of the shots for better composition. I brightened things up a bit and added some contrast and color saturation- the original files lacked a bit of shadow detail.
When photographing optical instruments and lenses, its good to show some of the glass elements and use a reflector to create some reflections in the lens surfaces.
The background is a bit distracting but it ain't too terrible! Sometimes, optical instruments are packaged in fancy boxes with plush liners- it's kinda old school but it makes for an elegant look. . Today's packaging is more high tech- so you might want to go with a rich blue, charcoal gray or perhaps some of that textured metal traction material that is used for industrial stairs and platforms- I get some of that material and spray it the desired color.
If you have to do this kinda shot frequently, you may want to make a standard setup with a small cyclorama backdrop. The best lighting would be a medium to large soft box elevated, by means of a boom stand or similar rig, directly over the set and slightly behind the subject. White or "silver" reflectors are used to redirect light onto the front of the products- this is you fill light source. Smaller silver reflectors can be used to illuminate the glass and create the aforementioned reflections. The soft box is feathered outward, toward the camera, so that the reflectors can pick up some of the beam. Use a deep lens shade or gobo to shield the lens form stray light.
Composition and placement: There are scientific instruments so you don't want too much of an "artsy" look- a more "clinical feel is better. A more dynamic composition, however, is more attractive to the eye, especially in a trade show environment. Perhaps a triangular placement of the objects or something with a symmetrical line.
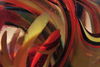
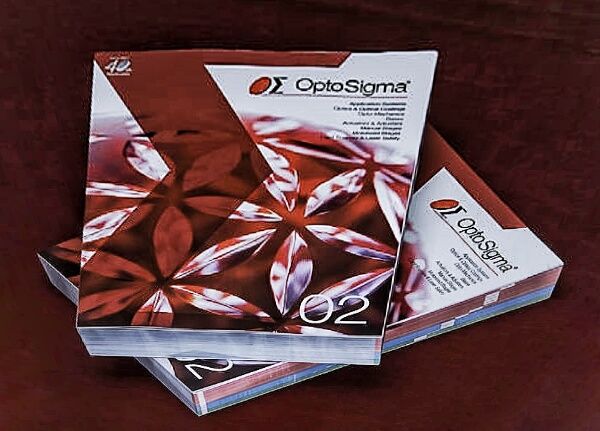
In you packaging shot, I altered the perspective- caused a bit of distortion to feature the logo and give a more dynamic feel to the shot. I also increased the contrast and saturation a bit.
After you shoot this kind of product, a bit of editing can be employed to tweak things up, add a bit more sharpness, darken the edges to bring the viewer's eye to the product and improve the composition.
I hope this helps- keep up the good work!
Sorry for the poor quality, I am working out of town so I checked in here and did the edits on my Android phone- just to give you some ideas.
I added some space at the topof one of the shots for better composition. I brightened things up a bit and added some contrast and color saturation- the original files lacked a bit of shadow detail.
When photographing optical instruments and lenses, its good to show some of the glass elements and use a reflector to create some reflections in the lens surfaces.
The background is a bit distracting but it ain't too terrible! Sometimes, optical instruments are packaged in fancy boxes with plush liners- it's kinda old school but it makes for an elegant look. . Today's packaging is more high tech- so you might want to go with a rich blue, charcoal gray or perhaps some of that textured metal traction material that is used for industrial stairs and platforms- I get some of that material and spray it the desired color.
If you have to do this kinda shot frequently, you may want to make a standard setup with a small cyclorama backdrop. The best lighting would be a medium to large soft box elevated, by means of a boom stand or similar rig, directly over the set and slightly behind the subject. White or "silver" reflectors are used to redirect light onto the front of the products- this is you fill light source. Smaller silver reflectors can be used to illuminate the glass and create the aforementioned reflections. The soft box is feathered outward, toward the camera, so that the reflectors can pick up some of the beam. Use a deep lens shade or gobo to shield the lens form stray light.
Composition and placement: There are scientific instruments so you don't want too much of an "artsy" look- a more "clinical feel is better. A more dynamic composition, however, is more attractive to the eye, especially in a trade show environment. Perhaps a triangular placement of the objects or something with a symmetrical line.
In you packaging shot, I altered the perspective- caused a bit of distortion to feature the logo and give a more dynamic feel to the shot. I also increased the contrast and saturation a bit.
After you shoot this kind of product, a bit of editing can be employed to tweak things up, add a bit more sharpness, darken the edges to bring the viewer's eye to the product and improve the composition.
I hope this helps- keep up the good work!
Dec 18, 2017 17:23:51 #
Here's the look I alluded to with that overhead lighting. This kind of lighting enables good separation even with dark subjects on a black background.
Feb 12, 2018 21:31:04 #
claytonsummers wrote:
This was a last minute rushed shoot. We needed a ... (show quote)
Initially I reduced the contrast and lightened your photos but not enough to lose the detail in the highlights. At least the highlights of the images are not burned out while more detail shows up.
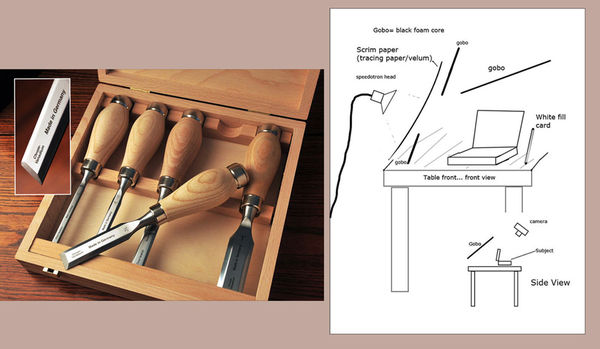
The real fix... proper lighting. Usually this type of product would be photographed on a "slick" type of background like plex or a smooth formica etc... The light source needs to be quite diffused with gobo cards to knock lite down on selected areas (mostly background). Additionally, small black round cards attached to wire or diffused material can be placed between the light source and particularly bright reflections to knock down the areas blown out and to keep detail. I'll make one suggestion... go to an engineering store and buy a roll of tracing velum (or a diffusion fabric sheet from a photo supply source) and hang it between your light source and the subject... use black cards to control light spill and to keep detail on your subjects. Large diffuse light sources can offer beautiful light while maintaining nice detail and soft transitioned reflection edges. Using gobo cards to control the light from such a source is part of the skill in lighting such shots.
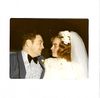
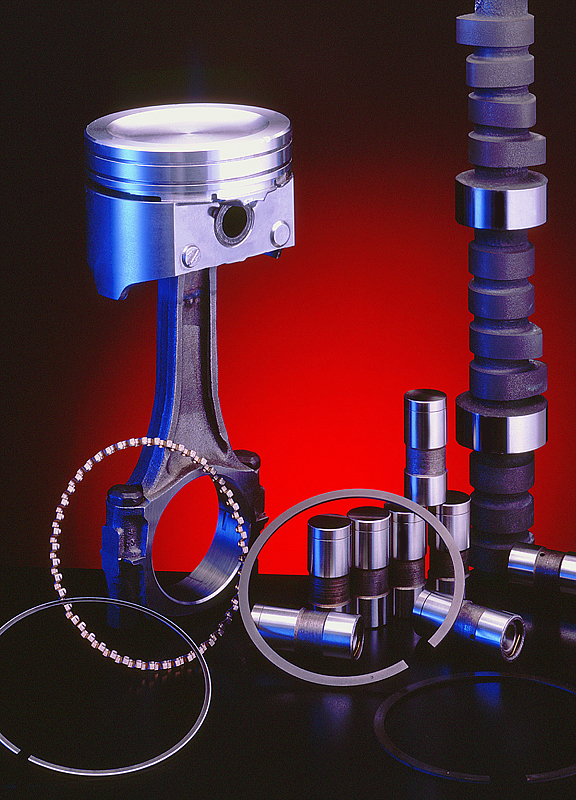
The attached photo here was a quick editorial shot for a engine parts company... you can see plenty of detail because of the soft light and this was shot with 4x5 transparency film and scanned later on. Mostly the priorities for this shot were nice composition and editorial atmosphere. Anyway, this shot allows you to see what can be seen with a diffused light source with shiny objects and dramatic contrast. The subjects in your shots will show much more detail with the proper diffuse light source with gobo cards to control the falloff and keeping the ratio between max highlights with detail and quarter tones with detail ... to a minimum.. ie., a compressed image.
Heres a link to a thread where I posted how to light shiny metal with wood working chisels after one of the members asked... on page 2... perhaps this will help. I explained some on the thread, the last photo here shows the
setup ...
http://www.uglyhedgehog.com/t-490236-1.html
Hope this helps.
R
Apr 11, 2018 02:12:07 #

If you want to reply, then register here. Registration is free and your account is created instantly, so you can post right away.