Color correction
Oct 26, 2017 00:51:40 #
i have photoshop cs6.
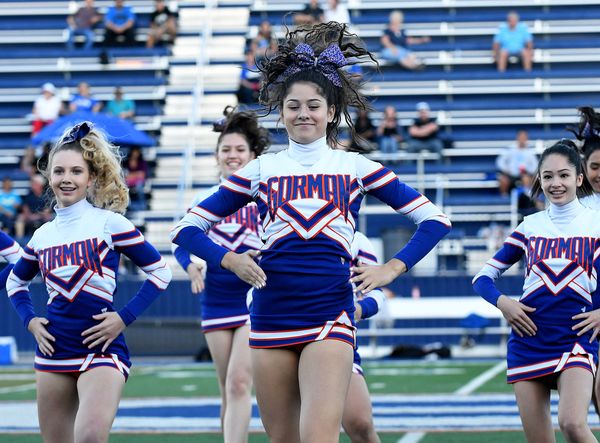
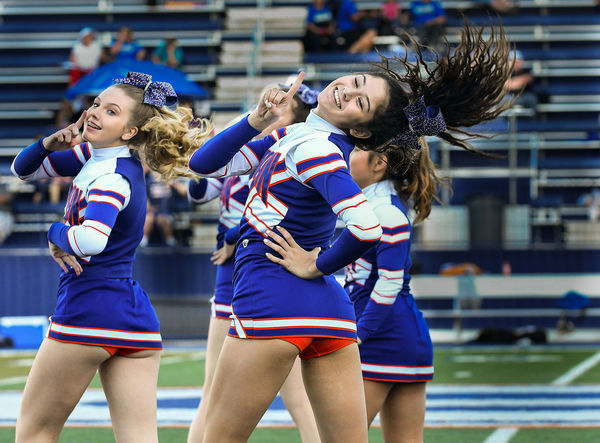
This photo is not the correct color. What can I do in Photoshop to correct this?
Thank you in advance for your advice and comments.
Jules
This photo is not the correct color. What can I do in Photoshop to correct this?
Thank you in advance for your advice and comments.
Jules

Oct 26, 2017 00:57:03 #
A quick way would be to use a curves adjustment layer. Choose blue in the pull down then pull the middle down to add yellow which will remove the strong blue cast. Adjust down until blue cast is neutralized. (Yellow is the opposite of blue). If you move the middle up it will add blue.
Oct 26, 2017 02:03:35 #
gmcase wrote:
A quick way would be to use a curves adjustment layer. Choose blue in the pull down then pull the middle down to add yellow which will remove the strong blue cast. Adjust down until blue cast is neutralized. (Yellow is the opposite of blue). If you move the middle up it will add blue.
Thank you, I will try this.
Oct 26, 2017 08:54:44 #
Jules Karney wrote:
i have photoshop cs6.
This photo is not the correct color. What can I do in Photoshop to correct this?
Thank you in advance for your advice and comments.
Jules
This photo is not the correct color. What can I do in Photoshop to correct this?
Thank you in advance for your advice and comments.
Jules
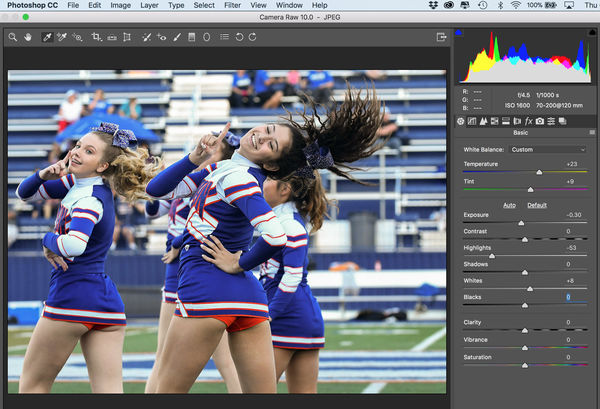
Here are some setting you can try using camera raw filter in Photoshop or in Lightroom main develop screen.
Oct 26, 2017 14:21:04 #
This is my take, and I have up loaded the XMP file to you can see exactly what I did in ACR. Look under the brush tool as well, as I felt the back ground was too busy and distracting from the subject. You could refine the brushing a bit.
Oct 26, 2017 16:59:55 #
jcdonelson wrote:
This is my take, and I have up loaded the XMP file to you can see exactly what I did in ACR. Look under the brush tool as well, as I felt the back ground was too busy and distracting from the subject. You could refine the brushing a bit.
Thanks nice job.
Oct 26, 2017 22:16:28 #
You need to NEVER shoot AWB. Any other appropriate WB, but never in AWB. I tried, but the color still leaves a lot to be desired.
Jules Karney wrote:
i have photoshop cs6.
This photo is not the correct color. What can I do in Photoshop to correct this?
Thank you in advance for your advice and comments.
Jules
This photo is not the correct color. What can I do in Photoshop to correct this?
Thank you in advance for your advice and comments.
Jules
Oct 27, 2017 07:31:11 #
Oct 27, 2017 10:04:50 #

Jules Karney wrote:
i have photoshop cs6.
This photo is not the correct color. What can I do in Photoshop to correct this?
Thank you in advance for your advice and comments.
Jules
This photo is not the correct color. What can I do in Photoshop to correct this?
Thank you in advance for your advice and comments.
Jules
This is quick try in PSE 14....Rich
Oct 27, 2017 11:33:33 #

I'm the least capable of doing this, but if it were mine, I'd start with the WB settings in LR or ACR. Did you shoot RAW? I haven't tried the trick suggested by gmcase, but I'm anxious to do so. I usually get too much yellow. Sometimes I go to the individual colour adjustments and simply play with the sliders there.
Oct 27, 2017 13:14:45 #

bigwolf40 wrote:
This is quick try in PSE 14....Rich
Sorry Rich, but your try isn't that good. See all the blue color cast on all the white parts of the girls outfits? Very over saturated too. This may be to your taste, but it's not likely to be to most other peoples tastes.
Oct 27, 2017 13:51:48 #

jcdonelson wrote:
Thats interesting. How should we set WB?
Go to B&H or Adorama web site and search for “white balance tools.” At least get a gray card, or a One Shot Digital Calibration Target. Custom white balance neutralizes color casts in JPEGs processed by the camera. If you save raw files, photograph the target, so you can get proper neutrals in Lightroom or other post-processing software, by using the click balance tool.
Oct 27, 2017 14:02:29 #
Hi Jules,
You can always uses curves or other color correction methods to manually adjust your color balance. However here are a few quick methods for auto white balancing your images in photoshop. There may be many other mthods, but this is how I do it when not doing white balance manually.
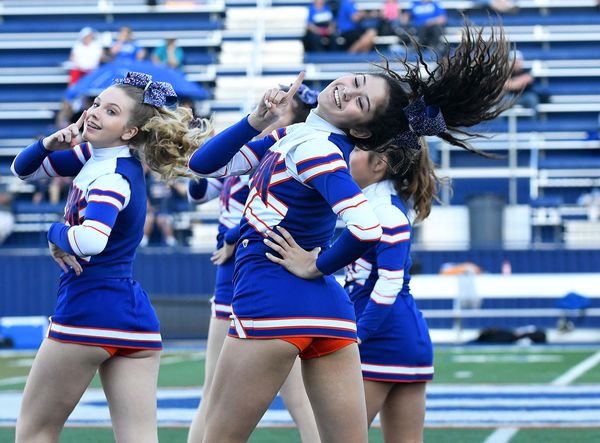
The first image is your original image.
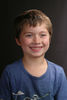
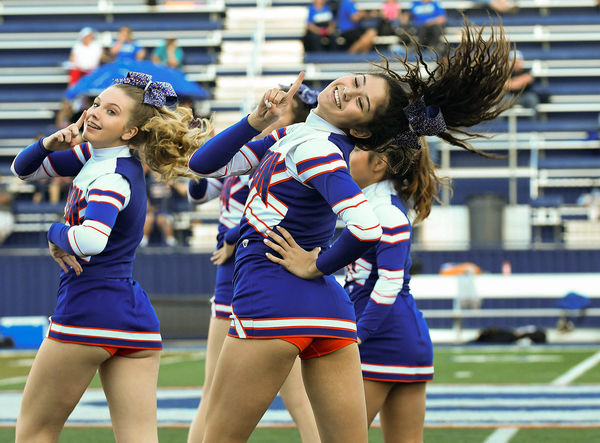
The second image used the auto feature in ACR. I selected "Auto" instead of the default "As Shot" in the White Balance adjustment. I also reduced the exposure slightly since some of the whites were blown out.
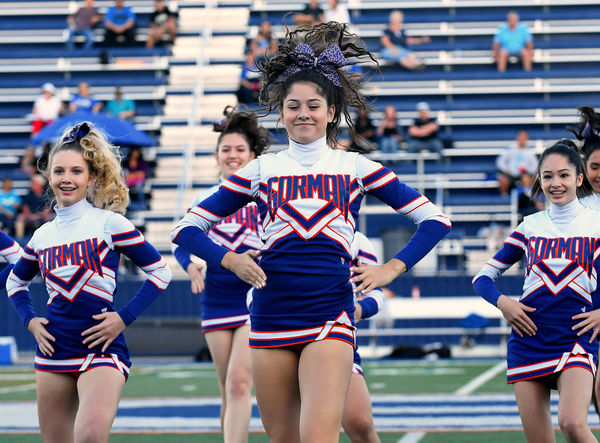
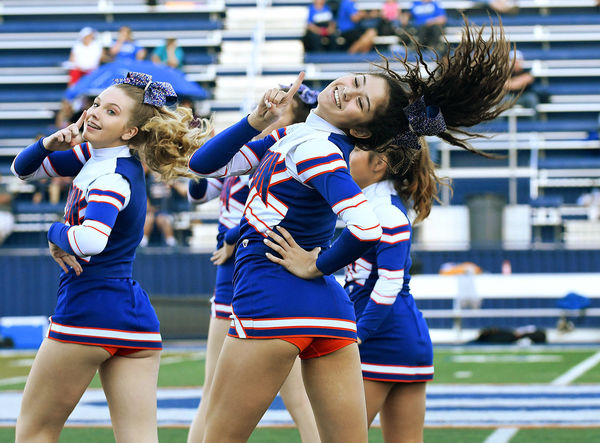
The third image uses an inversion method. Copy the image to a new layer. Invert the image and blur the image using the average blur. This is basically the color that's missing from your image that gives the total image a neutral (gray) cast. Select the blend mode for this layer to "overlay" or "soft light" to remove the color cast. For this image, I used "overlay".
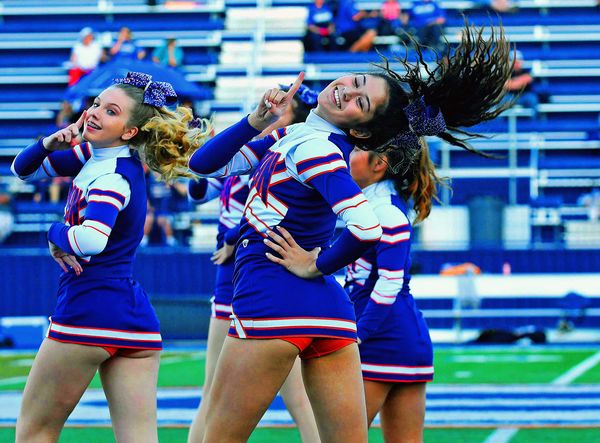
The fourth image uses the gray eye dropper in curves adjustment window. Create a new 50% gray fill layer above your image and select the difference blend mode. Find a black area on the image. Anywhere where the colors are the same (i.e. no difference between layers), the image will be black. Turn off the gray fill layer. Using the gray eyedropper from the curves adjustment window, select the gray area (black when the fill layer is on). Note: you can use the white and black eyedroppers to set your white and black points, but not necessary for white balance. With the gray eyedropper, I selected the center of the gray [trash can?] directly behind the girls.
It may sound complicated, but its really not. When you do it once, it's easy after that.
Here are examples of each method.
Hope this helps.
Mike
You can always uses curves or other color correction methods to manually adjust your color balance. However here are a few quick methods for auto white balancing your images in photoshop. There may be many other mthods, but this is how I do it when not doing white balance manually.
The first image is your original image.
The second image used the auto feature in ACR. I selected "Auto" instead of the default "As Shot" in the White Balance adjustment. I also reduced the exposure slightly since some of the whites were blown out.
The third image uses an inversion method. Copy the image to a new layer. Invert the image and blur the image using the average blur. This is basically the color that's missing from your image that gives the total image a neutral (gray) cast. Select the blend mode for this layer to "overlay" or "soft light" to remove the color cast. For this image, I used "overlay".
The fourth image uses the gray eye dropper in curves adjustment window. Create a new 50% gray fill layer above your image and select the difference blend mode. Find a black area on the image. Anywhere where the colors are the same (i.e. no difference between layers), the image will be black. Turn off the gray fill layer. Using the gray eyedropper from the curves adjustment window, select the gray area (black when the fill layer is on). Note: you can use the white and black eyedroppers to set your white and black points, but not necessary for white balance. With the gray eyedropper, I selected the center of the gray [trash can?] directly behind the girls.
It may sound complicated, but its really not. When you do it once, it's easy after that.
Here are examples of each method.
Hope this helps.
Mike
Jules Karney wrote:
i have photoshop cs6.
This photo is not the correct color. What can I do in Photoshop to correct this?
Thank you in advance for your advice and comments.
Jules
This photo is not the correct color. What can I do in Photoshop to correct this?
Thank you in advance for your advice and comments.
Jules


Oct 27, 2017 14:02:49 #
Or, just yank the temp and tint controls around till it looks right. That's all we did.
The problem with WB is as the subtitles of the lighting changes so does it.
I have all sort of WB gadgets, but in the end I just leave in AWB and tweak it later.
In reality often we don't want the true WB of the scene 'cause we don't like it.
A helpful tip for Jules ( who is a pro sports photog):
On a given shoot you probably find the same issue with several shots (as in this case). Fix it on the first one and save it as a LR preset, then you can just apply it to all of them.
Oct 27, 2017 14:12:00 #
SalvageDiver wrote:
Hi Jules,
You can always uses curves or other color correction methods to manually adjust your color balance. However here are a few quick methods for auto white balancing your images in photoshop. There may be many other mthods, but this is how I do it when not doing white balance manually.
.....
Mike
You can always uses curves or other color correction methods to manually adjust your color balance. However here are a few quick methods for auto white balancing your images in photoshop. There may be many other mthods, but this is how I do it when not doing white balance manually.
.....
Mike
Thanks, great info.
Nice! Very Nice.
If you want to reply, then register here. Registration is free and your account is created instantly, so you can post right away.