Documentation of boat work using a wide angle lens
Oct 14, 2017 14:27:18 #
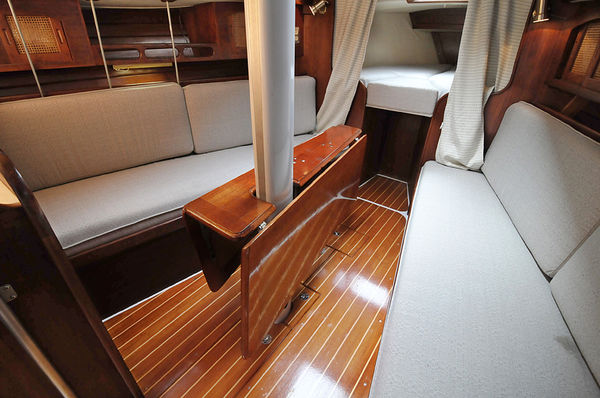
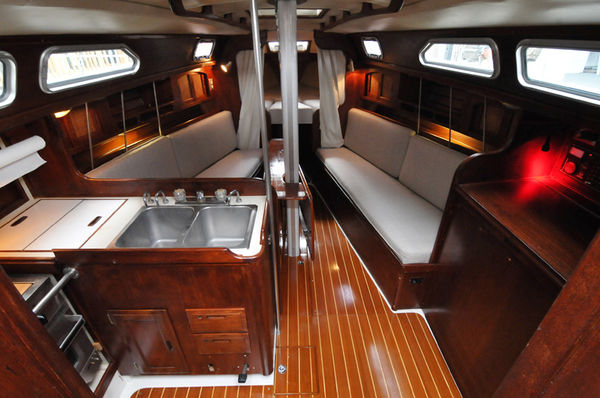
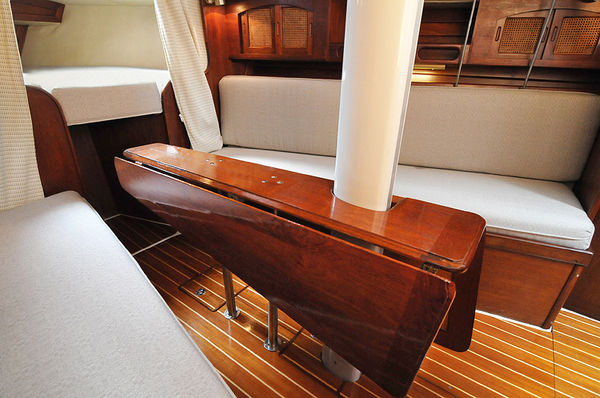
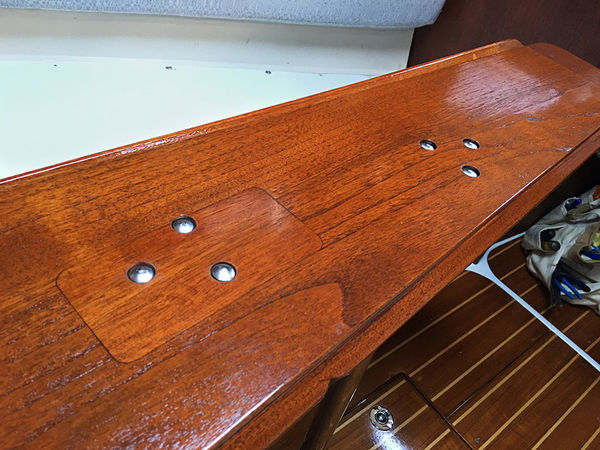
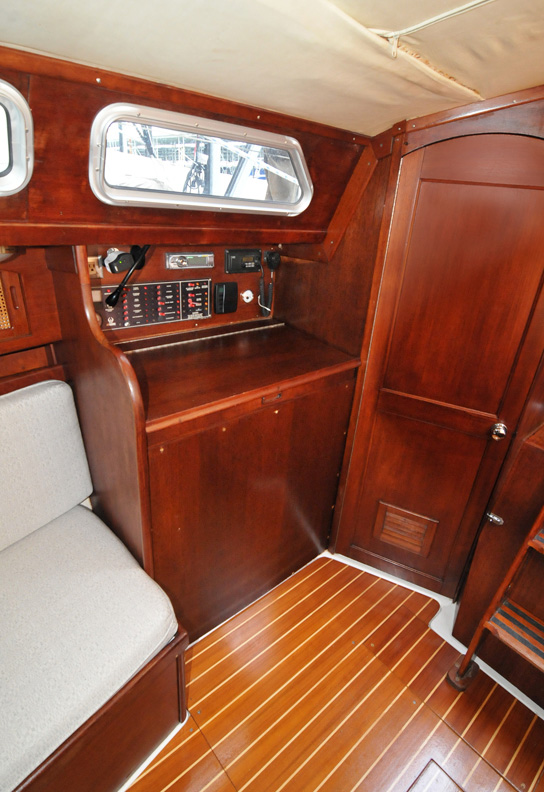
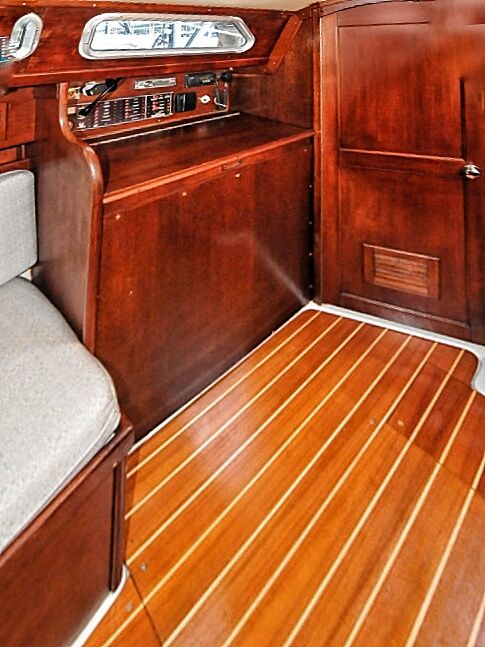
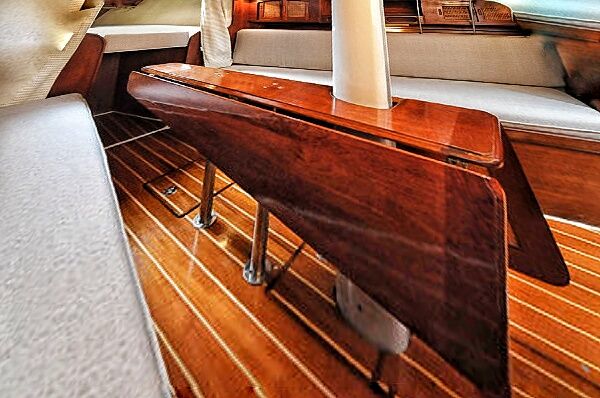
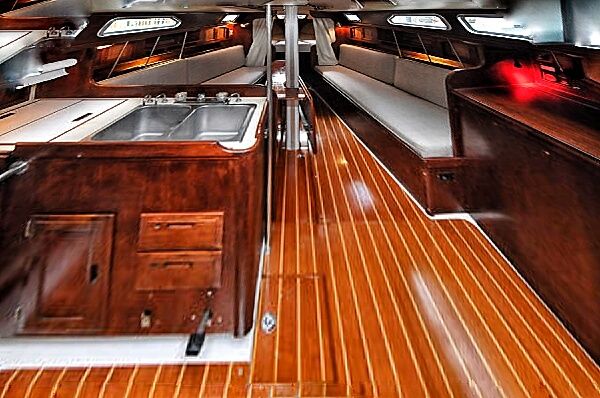
The following are photos using my 11-16mm wide angle lens for interior shots of a sailboat I had done extensive work on ... replacing the teak and holly floor (cabin sole), building a new navigation station, repairing the galley table top and replacing all the cabin ports (windows). This was similar to commercial photography I have done in the past... I thought I'd post these in this category. Between photography and boat repair I have documented most work that will add to my website for boat repair.
These shots were done on a cloudy day with the sun coming in and out. When necessary light was blocked from direct sun with foam core cards. The most common issue was sunlight entering the cabin top hatches... this was blocked or the shots were taken once the clouds covered the sun. I usually document the entire process of most repairs so I take many photos...many times with my 12 mb iPhone but these shots required an wide angle.
These shots were done on a cloudy day with the sun coming in and out. When necessary light was blocked from direct sun with foam core cards. The most common issue was sunlight entering the cabin top hatches... this was blocked or the shots were taken once the clouds covered the sun. I usually document the entire process of most repairs so I take many photos...many times with my 12 mb iPhone but these shots required an wide angle.
Oct 16, 2017 07:40:48 #

Good job of handling the available light and excellent detail in wood grain.
It's understandable that you needed to use your wide angle lens in such close quarters. As you are aware of, wide angle lenses can produce a great deal of distortion especially when shooting down from a high viewpoint. Converging horizontal lines are not problematic in that the lend depth ad space to the image. Converging vertical lines, however cause foreshortening and make details like doorways seem uneven. Back in the film era, some of theses issues were addresses by the use of large format view cameras with image management adjustments (swings and tilts) to correct for some of theses issues. Nowadays, with smaller and digital cameras, many of theses perspective adjustments can be made in editing.
I have done a few corrections on you images- with you permission, I will post them for you. You may want to consider doing this for your brochure.
Interestingly enough, there is an app for you i-phone that has quite a bit of editing capabilities including perspective control. I actually used it on your images. Check out the "SNAPSEED" app- it has many controls and it is a free app for Android based phones.
Nice job and thanks for posting!
Oct 16, 2017 13:33:28 #
Thanks for the "Snapspeed" tip... I use a iPhone. I didn't bother to correct converging lines in this case as these were mostly for my boat repair website www.brinkboatrepair.com. BTW, I supplied all photos on my website for boat repair.
In the past I used a 4x5 for lots of jewelry/product photography and some architecture. I used a Nikon tilt-shift lens in the past too, but mostly used my Toyo 4x5. You remind me, I still have a set of 12 " Riteway" film holders that I need to sell..
Anyway I need to mess with some of the newer perspective correction software but mostly I just use Photoshop.
Thanks for the comments.
RodB
Oct 16, 2017 15:21:38 #
Hey, Rod,
Did you want to see the edits? You may find them interesting!
Did you want to see the edits? You may find them interesting!
Oct 16, 2017 15:40:17 #
Oct 16, 2017 23:06:35 #

Oct 17, 2017 00:39:39 #
Thanks.... they do look better than I thought they would look... Next time.... Thanks for your efforts, I appreciate it.
RodB
RodB
Oct 18, 2017 12:14:05 #

E.L.. Shapiro wrote:
Good job of handling the available light and excel... (show quote)
Seems the latest version of snapseed is a downgrade on android
https://www.apk4fun.com/link/170490/a/
this is for the previous version
Oct 18, 2017 12:56:11 #
Works just fine. All the functions are there but the tools layout is different.
Oct 18, 2017 13:11:15 #
E.L.. Shapiro wrote:
Works just fine. All the functions are there but the tools layout is different.
Seemed by the reviews a lot of people disliked the new layout and interface and were disappointed with the changes.
Oct 21, 2017 11:57:27 #

RodB I appreciate your efforts here... You are obviously showcasing the quality of your stellar "boat repair"
That said many in the industry believe to have true commercial merit it is typically mandatory that the imagery be from "commissioned" work for a client other than oneself... Having a client in the mix can (and does) change dynamic considerably... Just a thought.
As for the imagery? I assist many commercial architectural shooters in my market and they all without fail will take accurate (usually bracketed) exposures of ambient coming into the interior which the seamlessly integrate into the interior for the final deliverable... On two of your posted images I find the over exposed exterior i.e. blown out windows a distraction... Moving forward you might consider achieving exposure continuity across the entire scene... Again just a thought...
"...The most common issue was sunlight entering the cabin top hatches..." Rather than gobos, flags and cutters have you considered using scrims? Once more just a thought...
Thank you for sharing RodB
I wish you well on your journey....
Oct 21, 2017 13:12:05 #
There are a number of methods to attenuate and filter or incoming window light so as to balance it with interior lighting. Some of theses techniques are more easily accomplished than others. The more complex methods go beyond the needs and budget of simple record shots.
One method is to expose for the incoming daylight and the balance the exposure with flash or filtered matching artificial light. The proviso is that the flash or other artificial light be aesthetically correct, in type and placement, for the interior design, layout, materials and furnishings. If however, the incoming light is sufficient to naturally and aesthetically illuminate the interior, the flash or artificial source can just serve as a fill source. I have used ordinary BLUE 250 watt photo-flood lamps for fill or have replaced the regular household type lamps in certain fixtures or table ir floor lamps with theses flood-lamps. They have a color temperature that is slightly warmer that real daylight but the effect is acceptable.
Incoming light can also be filtered with large sheets of Rosco (Roscolux) gels of the appropriate conversion strength. This method entails placing large sheets to the “gels” on the windows. Many of the Rosco materials can be ordered in rolls or larger sheets for this purpose. The daylight can also be filtered to match tungsten interior or photographic lights. A gel such as Roscosun CTO #3407 Converts 5500ºK to 2900ºK and custom white balance adjustments can be applied as well. If the exterior scenery or detail need not be included included in the image the filters can be combined with scrim or diffusion material as well. Some of the colored gels are also available in a frosted form.
It is a bit more changeling if there exterior scenery must be rendered accurately in the image. The same methodology can be used but the windows are no longer just a light source but part of the total scene. The filtering material needs to be transparent and optically correct. Neutral density gels are also an option if filtration is not required.
Yet another method can be applied in post-processing whereby two separate exposures are made in register and combined in editing.
What might look “seamless” in the resulting images can pretty difficult, painstaking and time consuming work at the location and hardly the kind of thing that can be done quickly or casually during a restoration project. I have done interior jobs with mixed lighting that have taken many hours of set up and preparation time and some expendable but expensive materials- the budget and time has to be available.
The critique I offered on this post was given taking into consideration the shooting conditions and usage of the photographs. Also, in marine environments, besides direct sunlight, there is quite a bit of harsh sunlight reflected from the water.
PS: ROSCO manufactures a wide variety of colored gels for photographic, cinematographic and stage lighting as well as a line of great reflective materials. Check them out on the Internet.
Oct 21, 2017 18:37:02 #
Thanks for the technical review of some of the methods to light such situations and to deal with wide angle distortion. I know and have used most, which was not the goal in these pics. I guess my main point was to show some decent images can be made when documenting work etc, with a reasonable amount of effort in composition and lighting. My goals now are to produce good documentary work on projects and for my personal stuff, the suggestions above were not even considered. I appreciate the input and I'm sure many others here will learn something. I'd say unless I was getting paid to do architectural work or these were going to be in a brochure, I would have to consider the photo use to decide if I wanted to use the appropriate methods to achieve that standard. I appreciate the interest and time in offering the suggestions. Photoshop offers much in the way of remedying many issues too.
By the way, my suggestion to avoid "blowout" of bright areas in this situation would be to use a few sheets of Rosco Gel neutral density as its the easiest solution. We used to always keep several sheets of often needed color balance and neutral density sheets in a well protected case for such instances.
R
Oct 21, 2017 20:35:24 #
May 8, 2018 11:15:37 #
Is there a good book out there that explains the various lighting techniques discussed above? If not, E.L. should write one!!!
If you want to reply, then register here. Registration is free and your account is created instantly, so you can post right away.