Hard Time
Aug 1, 2013 20:27:19 #

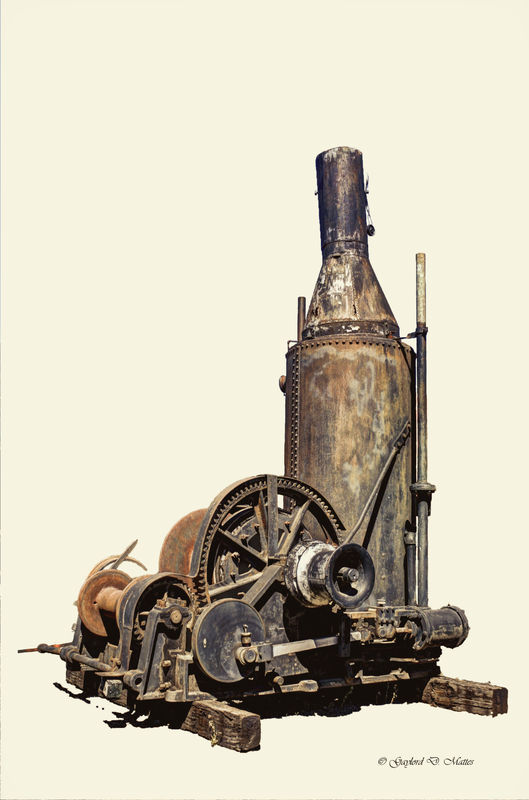
So named as it was a really hard one to work on, and the results are not as good as I hoped for. Any way I decided to at least offer something to the HDR section.
Series of three photo's were processed in Photomatix, then in PS CS5 for editing, and then given a Topaz Adjust final touch of color cast.
Series of three photo's were processed in Photomatix, then in PS CS5 for editing, and then given a Topaz Adjust final touch of color cast.
Combination
Aug 1, 2013 20:30:03 #

Aug 2, 2013 13:05:02 #

SoHillGuy wrote:
So named as it was a really hard one to work on, and the results are not as good as I hoped for. Any way I decided to at least offer something to the HDR section.
Series of three photo's were processed in Photomatix, then in PS CS5 for editing, and then given a Topaz Adjust final touch of color cast.
Series of three photo's were processed in Photomatix, then in PS CS5 for editing, and then given a Topaz Adjust final touch of color cast.
SoHillGuy,
I see two major areas you might want to work on again.
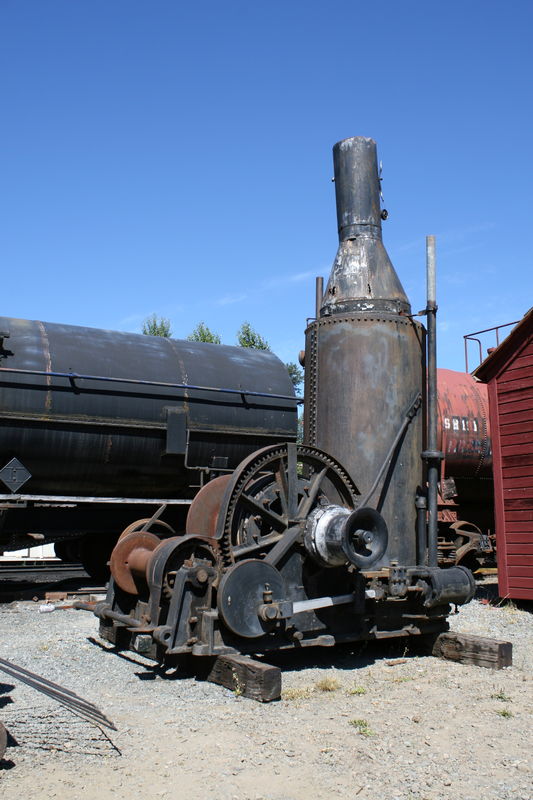
1. In the HDR processing you need at least three images; each image capture needs an exposure compensation of 1.5 EV. When you merge the three images you can reduce the blown out whites, and increase the details in the shadows just enough to see good detail, but no so much to make it obvious.
2. In Post Processing (PP) you have clipped some of the edge details on the engine. This most likely occurred when making a selection on the background, and the selection tool marked too much causing the details that should have been seen to become white.
Using the selection tool to modify backgrounds is a very powerful tool to improve an otherwise nice picture into a great picture. Sometimes you don't need to replace the entire background, just modify it a little.
Michael G
Aug 2, 2013 15:23:14 #
Armadillo wrote:
SoHillGuy, br br I see two major areas you might ... (show quote)
Thanks for the input. I did use three exposures +2/-2. I did get a little over zealous when making the selection, and I also used a quick mask a feature you should acquaint. yourself with. I should have worked on it a little more before posting as I had seen the clipping. I select backgrounds for a certain reason, and as information I did so in this photo as there was a white CA around the edges which I couldn't get processed out using Lens Correction or other methods of brushing, and refinement, and using a white background hid it.
If I had posted the original you would have seen that it would not have been easy to modify it as the object was surrounded by other distracting equipment.
Aug 2, 2013 16:14:20 #
SoHillGuy wrote:
Thanks for the input. I did use three exposures +2... (show quote)
OK. So far, so good.
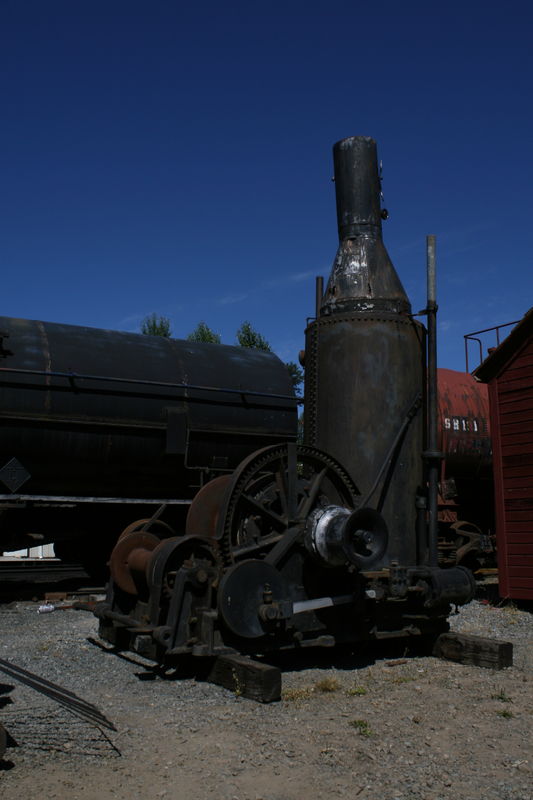
If you used a +2 and -2 Ev exposures how come the dark shadows did not produce some details?
You should have had enough detail in the +2 exposure to illuminate the shadows without making them obvious.
Michael G
Aug 2, 2013 16:47:56 #
Armadillo wrote:
OK. So far, so good.
If you used a +2 and -2 Ev exposures how come the dark shadows did not produce some details?
You should have had enough detail in the +2 exposure to illuminate the shadows without making them obvious.
Michael G
If you used a +2 and -2 Ev exposures how come the dark shadows did not produce some details?
You should have had enough detail in the +2 exposure to illuminate the shadows without making them obvious.
Michael G
I'd like to see your redition
Aug 2, 2013 17:17:06 #
SoHillGuy wrote:
I'd like to see your redition
OK, give me a little time, we're in the beginning of a Dodgr Cubs game.
Michael G
Aug 2, 2013 18:11:12 #
GaryS1964
Loc: Northern California
Armadillo wrote:
If you used a +2 and -2 Ev exposures how come the dark shadows did not produce some details?
While there is some detail visible at +2 there isn't much. Probably should have gone -3 to +3. But hindsight is always 20/20.:-)
I've done the same thing. It's hard to tell on the LCD whether or not you got any shadow detail and how much in your overexposed image.
Aug 2, 2013 20:40:30 #
Armadillo wrote:
OK, give me a little time, we're in the beginning of a Dodger Cubs game.
Michael G
Michael G
I think you inadvertently thru me a curve while watching a Baseball game. The images you sent were of different size; two were 533 x 800 @ 72dpi, one was 2336 x 3504 @ 72dpi.
I first had to re-size the larger image down to match the other two before processing HDR.
The very low resolution of all three images makes is difficult to extract much image data to work with in any tools.
Below you will see the processed result I came up with. Don't fret about image quality, I am sending back the same resolution you sent to me. Look for the detail inder the Capstan.
Michael G
Donkey Engine

Aug 2, 2013 20:50:42 #
GaryS1964 wrote:
While there is some detail visible at +2 there isn't much. Probably should have gone -3 to +3. But hindsight is always 20/20.:-)
I've done the same thing. It's hard to tell on the LCD whether or not you got any shadow detail and how much in your overexposed image.
I've done the same thing. It's hard to tell on the LCD whether or not you got any shadow detail and how much in your overexposed image.
Thanks for the input, I also noticed the same thing. On the down side my Canon 30D only has an auto 2 shift. I'm not much on wanting to do manual adjustments.
Aug 2, 2013 21:03:04 #
Armadillo wrote:
I think you inadvertently thru me a curve while wa... (show quote)
I wonder if something happened during the upload as all three shots read 2336x3504 @72 dpi. Any way you see what I had to work with.
Aug 2, 2013 21:56:04 #
SoHillGuy wrote:
I wonder if something happened during the upload as all three shots read 2336x3504 @72 dpi. Any way you see what I had to work with.
Yes, I did see. Perhaps the one low res image had been optimized for e-mail before linking in UHH.
One thing you can do in future situations like this one is to use your on board flash to fill in the shadows. It probably won't work for HDR captures, but you can take three manually set images each with a different Ev applied.
Michael G
Aug 3, 2013 11:23:20 #
GaryS1964
Loc: Northern California
SoHillGuy wrote:
I wonder if something happened during the upload as all three shots read 2336x3504 @72 dpi. Any way you see what I had to work with.
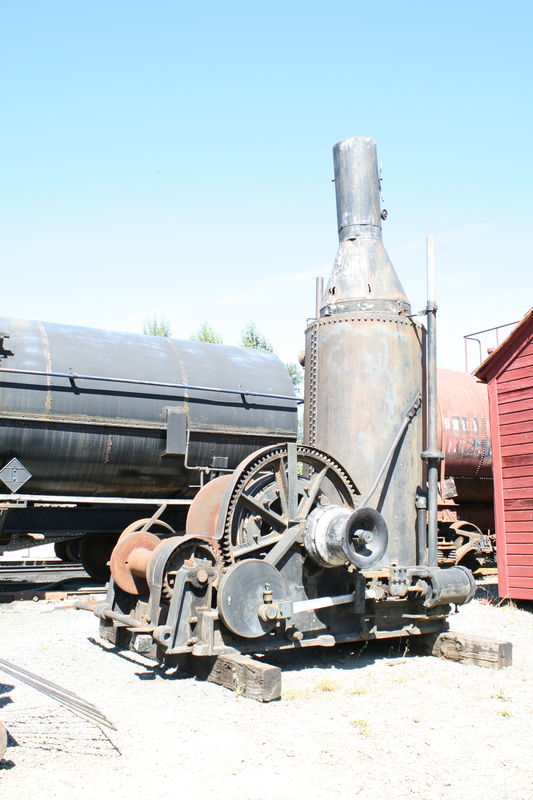
If you open the overexposed photo in Photoshop or some other program that allows you to adjust exposure you can sometimes pull out more detail in the shadows then save the photo and add it to your series of pictures and process them again. You have a better chance if the image is a RAW file but sometimes you can do it with a JPEG.
UPDATE: I opened the image in Photoshop and bumped the exposure to around +3.86 and there is definitely more detail in there. You can see color in the rusty wheel on the far side of the rail car and other stuff. If you have the software play with it some and see what you can get.
Aug 3, 2013 11:59:10 #
GaryS1964 wrote:
If you open the overexposed photo in Photoshop or some other program that allows you to adjust exposure you can sometimes pull out more detail in the shadows then save the photo and add it to your series of pictures and process them again. You have a better chance if the image is a RAW file but sometimes you can do it with a JPEG.
I was thinking of this last night, and will give it a try to see if it could accomplish opening up the shadows. It was a really bright day with just a wisp of a cloud in the sky.
Aug 3, 2013 12:18:35 #

If you want to reply, then register here. Registration is free and your account is created instantly, so you can post right away.