Curious
May 19, 2018 10:47:23 #
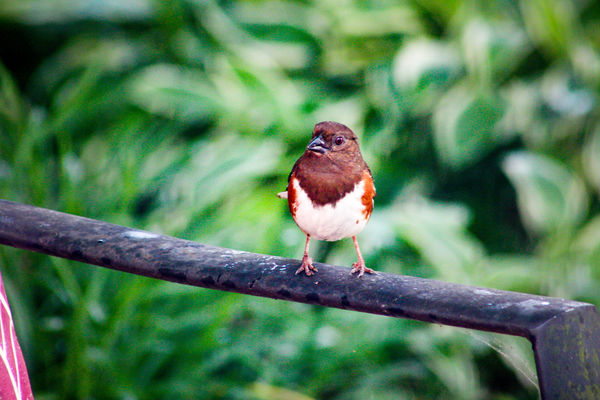
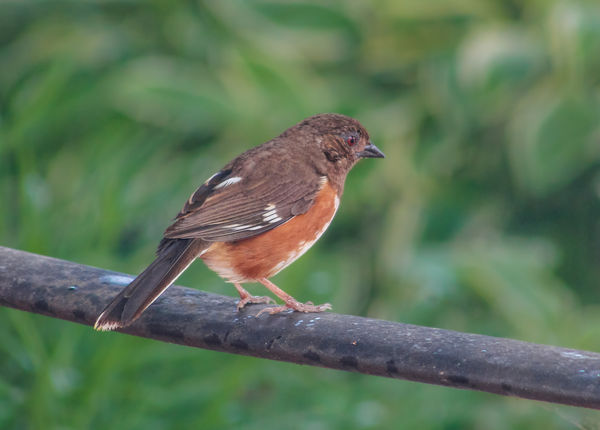
I posted these two photos in the main discussion and it was suggested that I share with you in post processing. I am very new to photography (5 months) but am already suffering from image envy. I understand my images can be improved upon with some creative editing but I have not branched out from minimal cropping and minor adjustments in Lightroom. I wonder if anybody here might have the time and interest to play with these and show me (tell me) what is possible. These were shot with a canon t4i, 75-300 mm kit lens at 300, ss 320, f8, ISO 2000, on a tripod and through the window.
Thanks!
Thanks!
May 19, 2018 11:01:13 #
"Creative editing" can be interpreted so many ways, such as shown by the alligator composite someone posted to your other topic 
Since you mention wanting to improve the image, I'm thinking you are referring more to elements such as clarity, contrast and color. Shooting through a window into flat light are challenges that are difficult to overcome with simple edits. In the other topic you mentioned you would try increasing your shutter speed to 1/800 second, but that will require an additional adjustment: either raising your ISO, which is already high for that camera and lens - meaning overall image quality is likely to be better with an ISO under 1,000 - or changing your aperture to a smaller number (which affects depth of field).
Because the quality of light is such a huge aspect of photography, here is a discussion topic currently in progress in one of UHH's specialty forums, For Your Consideration:
http://www.uglyhedgehog.com/t-529331-1.html
Hope you'll check it out!
May 19, 2018 11:08:35 #
Shooting through the window, causes a slight haze in the photo. In Lightroom there is a haze removal tool. I would suggest that you try that to remove the light grey haze overcast in this photo and it will make the colors pop.
May 19, 2018 14:20:32 #
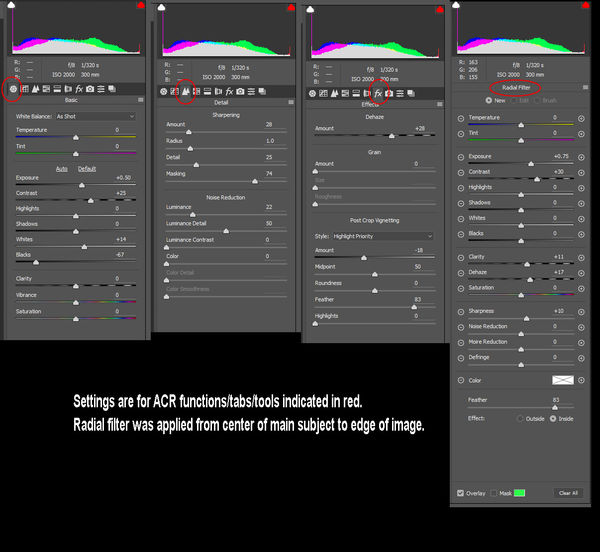
Using these settings in Camera Raw or the equivalent sections of the Lightroom develop module will result in an image that is not so flat and hazy. If it is too saturated or sharp for your taste reduce vibrance and sharpening or increase noise reduction to soften.
May 19, 2018 14:57:28 #
Linda From Maine wrote:
"Creative editing" can be interpreted so... (show quote)
Thank you, Linda! I have been reading it. Very informative.
Marg
May 19, 2018 14:58:19 #
David Kay wrote:
Shooting through the window, causes a slight haze in the photo. In Lightroom there is a haze removal tool. I would suggest that you try that to remove the light grey haze overcast in this photo and it will make the colors pop.
Thank you, David!
May 19, 2018 15:01:40 #
Rick36203 wrote:
Using these settings in Camera Raw or the equivalent sections of the Lightroom develop module will result in an image that is not so flat and hazy. If it is too saturated or sharp for your taste reduce vibrance and sharpening or increase noise reduction to soften.
Wow, Rick! That looks amazing!
I see you are in North Alabama. Me, too. In Muscle Shoals, originally from Canada.
May 19, 2018 16:04:46 #
Marg wrote:
Wow, Rick! That looks amazing!
I see you are in North Alabama. Me, too. In Muscle Shoals, originally from Canada.
I see you are in North Alabama. Me, too. In Muscle Shoals, originally from Canada.
Thanks. I'm not as far North as you. I'm just off Logan Martin, and about six miles from Talladega race track.
May 20, 2018 08:51:54 #
Hi, Marg. The first thing that jumped out at me was the busy background in both pics. It's a bit distracting. And there's a fair amount of noise that's most obvious in the background.
One of the things that can make that type of shot look better is good separation of the subject from the background. If you didn't quite get the bokeh that you were after, one possibility in PP is to work on the subject/s and the background separately, which means making selections (in LR that's done with the Adjustments brush). The trouble with global adjustments is that they affect everything - subject and background.
One possibility is to make global adjustments that will suit the subject/s and then select the background for different treatment (possibly reversing much of what you did for the subject/s). If you don't already know how to use the Adjustments brush with Auto Mask, Erase etc, you should make the effort to find out how (Youtube videos, the Tutorial thread in this PP section etc). Learn how to adjust the brush's size to suit the contours of the edges that you're working to or the size of the spaces that you're selecting. That will typically mean adjusting the brush's size frequently as you go. When you're not using Auto Masking you may also have to make adjustments to the feathering as you go.
To do my edit I did some adjustments in the Basic section, mainly to suit the bird, then I selected the background (the green stuff) for softening etc. I noticed that some parts of the bird's plumage had a purplish tint to them, so I selected those parts and used the Tint and WB sliders to get rid of it (shifting away from magenta with the Tint slider and away from blue with the WB slider - both moderate adjustments).
The procedure that I've just described is fairly typical - some overall adjustments using the Basic section, then selecting the background for different treatment (when needed), then selecting whatever problem areas are left that can't be sorted using global adjustments.
Normally I'd recommend using the HSL section to target specific colours, but if you make large HSL adjustments when there's a lot of ISO noise it can result in the image acquiring a grittiness that won't go away when you denoise (especially noticeable with jpegs). With a very noisy image it's nudges only.
When there's a lot of noise I make good use of the Masking slider in the Sharpen tool. You don't want to sharpen noise if it's at all avoidable. Hold down the Alt key to see what the Masking slider is doing. Only the white bits will have sharpening applied to them. The good news is that if you select the background (where the noise is most visible), you can use very generous amounts of denoise, plus going left with the Sharpen slider and the Clarity slider. With the background sorted you can use sharpening that will suit the subject - or select the subject in whole or in part to apply extra sharpening.
I noticed that parts of the bird's plumage were a bit soft, so I selected them and applied extra sharpening, Contrast and Clarity. Note that sharpening isn't the only thing you can do to tackle softness. Extra Contrast and Clarity won't add any more sharpening, but the extra vividness that they add can create an impression of extra sharpness.
-
May 20, 2018 09:56:09 #
Alafoto
Loc: Montgomery, AL
Marg wrote:
Wow, Rick! That looks amazing!
I see you are in North Alabama. Me, too. In Muscle Shoals, originally from Canada.
I see you are in North Alabama. Me, too. In Muscle Shoals, originally from Canada.
War Eagle!!! And greetings from Montgomery.
If you want to reply, then register here. Registration is free and your account is created instantly, so you can post right away.


