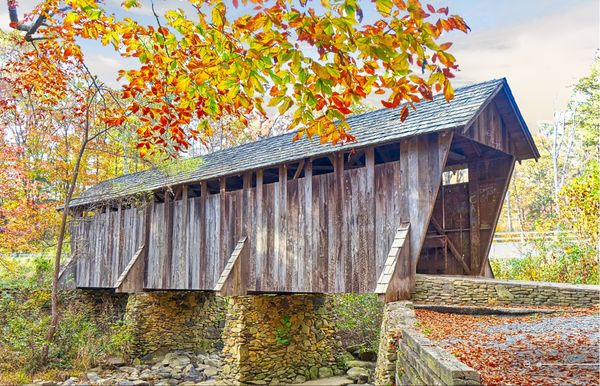
How do you guys change the sky in a complex photo
Dec 5, 2017 11:55:35 #

bsprague wrote:
In Lightroom, you can pull an adjustment gradient down from the top. If there is any detail left in the sky, it can show up.
I agree with mborn - while you can do this in Photoshop, it's tedious. Landscape Pro not only can do it well, but brings some other features like handling clouds reflected onto water, and controlling the angle of the light which makes it appealing.
Dec 5, 2017 12:13:11 #
tomad wrote:
Ok, but I want to learn by doing it myself so I'm looking for suggestions of the best way(s) to do it. I don't just want someone to do it for me... 
For this kind of photo you might try adding a textured background as a layer. When doing this the layer mask can be set to a very low percent. If you know how you can also remove parts of the textured layer. The textured layer will add interest to the sky and enhance the photo. Look for a layer with similar colors. Photoshop is one tool you can use but I believe you could also do this in Luminar. If you don't have a background image to use go out and shoot one; I often shoot for layer backgrounds when I am out shooting other subjects. A wall, a floor, a barn siding, all these things and more will work or you can purchase backgrounds. I like Flypaper Texture. I think you will be happy with the overall look rather than trying to put in a sky with this type of photo. I have put in skies before but I don't think the photo you are showing will lend itself to that as well as to a textured background.
Dec 5, 2017 12:26:32 #
tomad wrote:
Ok, but I want to learn by doing it myself so I'm looking for suggestions of the best way(s) to do it. I don't just want someone to do it for me...
I did a very quick example (not taking any care at all so no need to comment on that from anyone as the layering is obviously not a good job) of putting a texture behind a photo just to show you the possibilities. Using a mask layer you can remove the texture as needed, which I quickly did here on the building. It's often a great way to enhance that dreaded gray sky. So, try it out and have fun. I think the textures are actually from Fly Muse, check their website.
Dec 5, 2017 12:31:01 #
Linary
Loc: UK
tomad wrote:
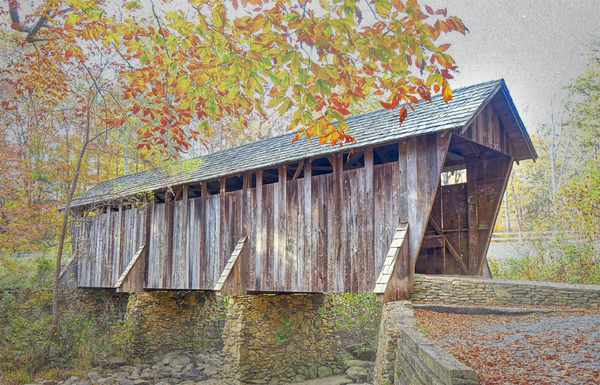
Hey pp experts, I have a photo that has a white (... (show quote)
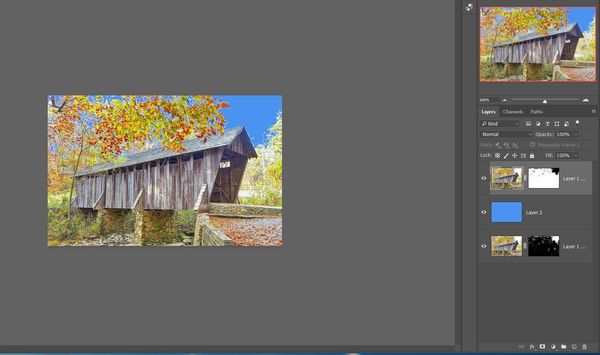
I have not done a thorough job, but using Photoshop:
1 Magic wand tool, Contiguous OFF, click on white area of sky.
2 Create a mask
3 Duplicate image and mask I named this layer "Working"
4 Invert mask
5 Create a new layer below I used a solid blue - you should use a new sky
6 Select mask
7 paint in white over bridge and foreground where the new sky is showing through (and should not), This will be on any white parts of the image that should remain white
8 If you have small white areas in the sky surrounding the new sky, then control click on the mask to bring back the selection, expand the selection a few pixels to bring in
more sky.
This was all done on your thumbnail so just a quickie to show you the principles.
Dec 5, 2017 12:43:28 #
tomad
Loc: North Carolina
Linary wrote:
I have not done a thorough job, but using Photosh... (show quote)
Thank you very much Linary. That's what I was getting at: changing one color so as to get all the areas between the leaves and branches. Well done.

Working for the last 2 hours, I've also managed to do it with LandscapePro but it is tedious and not perfect yet. I think it would take a couple of days to get it perfect but I may buy the software anyway because I can see how it would come in handy on many photos!
Dec 5, 2017 13:37:11 #
tomad
Loc: North Carolina
via the lens wrote:
I did a very quick example (not taking any care at all so no need to comment on that from anyone as the layering is obviously not a good job) of putting a texture behind a photo just to show you the possibilities. Using a mask layer you can remove the texture as needed, which I quickly did here on the building. It's often a great way to enhance that dreaded gray sky. So, try it out and have fun. I think the textures are actually from Fly Muse, check their website.
Thanks, that's another interesting approach!
Dec 5, 2017 13:41:40 #
tomad
Loc: North Carolina
tomad wrote:
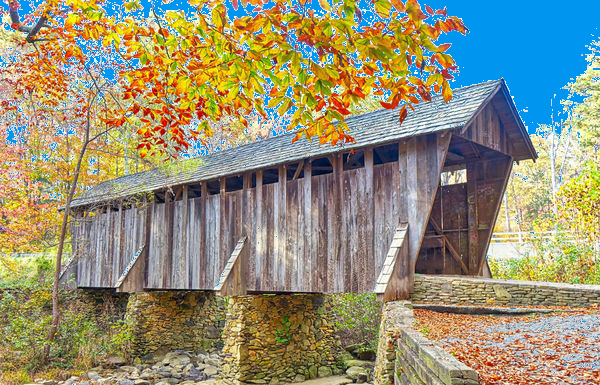
Working for the last 2 hours, I've also managed to do it with LandscapePro but it is tedious and not perfect yet. I think it would take a couple of days to get it perfect but I may buy the software anyway because I can see how it would come in handy on many photos!
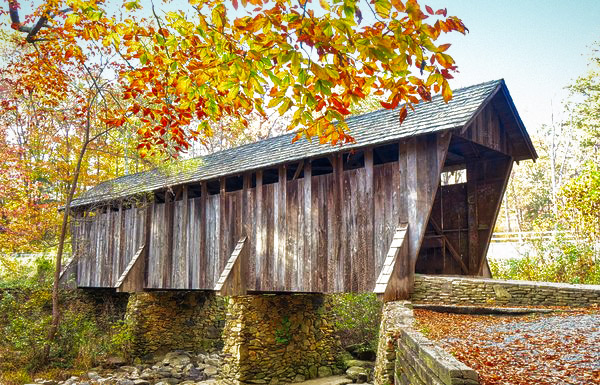
Here's a screenshot (trial version wouldn't save it) of what I was able to do in a couple of hours with LandscapePro. Not perfect yet but better and could get it near perfect I think with a couple of more hours work.
Dec 5, 2017 13:46:57 #
tomad wrote:
Here's a screenshot (trial version wouldn't save it) of what I was able to do in a couple of hours with LandscapePro. Not perfect yet but better and could get it near perfect I think with a couple of more hours work.
If you want to post the original, I can give it a try with Landscape Pro.
Dec 5, 2017 15:22:50 #
Dec 5, 2017 15:55:21 #
tomad
Loc: North Carolina
How did you get the blue between the leaves in 5 minutes? Looks great but painting between all those leaves or painting the leaves themselves to make them not the same as added sky took me 2 hours and yours is better.
Dec 5, 2017 16:57:50 #
tomad wrote:
How did you get the blue between the leaves in 5 minutes? Looks great but painting between all those leaves or painting the leaves themselves to make them not the same as added sky took me 2 hours and yours is better.
In Landscape Pro, I'd use the Object in Sky tool. You basically scribble back and forth across the tree until its silhouette is black on the screen. That part would probably take about 30 seconds.
Dec 5, 2017 17:43:19 #
tomad wrote:
Here's a screenshot (trial version wouldn't save it) of what I was able to do in a couple of hours with LandscapePro. Not perfect yet but better and could get it near perfect I think with a couple of more hours work.
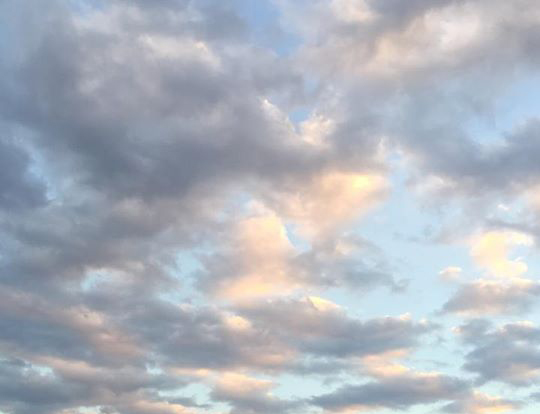
I have some saved cloud photos which I used to insert clouds in to a photo in PP.
I size the clouds to my needs do a copy and paste in to the photo where I need clouds in the sky. I used the clone tool to work it in to the sky until it looks natural you may have to have change the opacity and flow to your liking. Worked for me looked pretty natural, it is done in just a few minutes.

Dec 5, 2017 18:30:19 #
I forgotten some of the instructions there is more to it, it has been a long time since I done this I have to refresh myself again how I really done it.
I recalled one thing you have to go to layers at the bottom you click on the fix for blending options, the rest I have to relay on memories and work with it myself, sorry about the confusion.
Hope someone can use the cloud pictures I do have some more.
I recalled one thing you have to go to layers at the bottom you click on the fix for blending options, the rest I have to relay on memories and work with it myself, sorry about the confusion.
Hope someone can use the cloud pictures I do have some more.
Dec 5, 2017 20:50:25 #

tomad wrote:
Hey pp experts, I have a photo that has a white (... (show quote)
Take a look at this:
https://www.youtube.com/watch?v=Vb620WWpshc
It's not hard with the right tools.
Dec 5, 2017 22:44:28 #

tomad wrote:
Ok, but I want to learn by doing it myself so I'm looking for suggestions of the best way(s) to do it. I don't just want someone to do it for me...
Explore the possibilities of converting to B&W. Might work for you.
If you want to reply, then register here. Registration is free and your account is created instantly, so you can post right away.