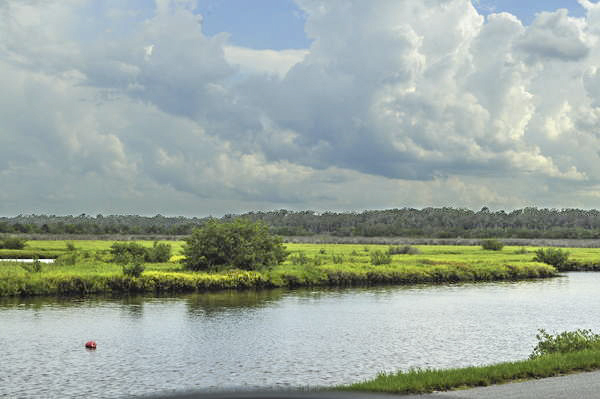
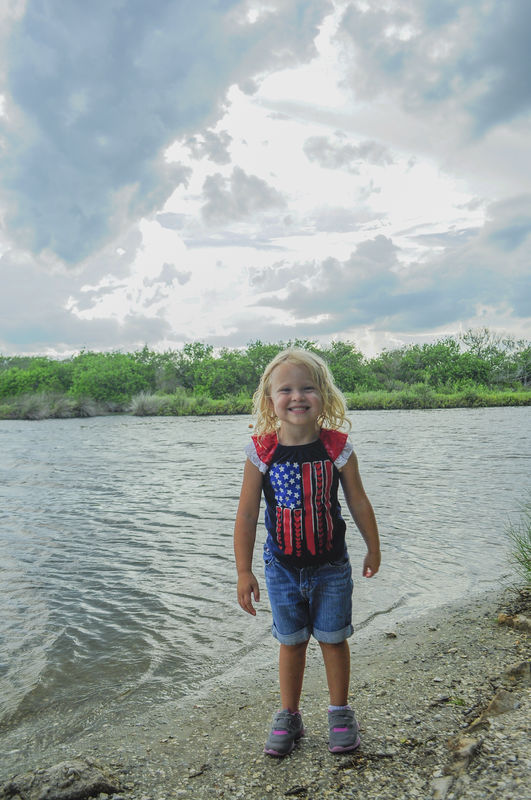
Landscape with overcast
Aug 11, 2017 16:58:38 #

Star_Of_Life89 wrote:
R.G., br br Thank you very much for your long and... (show quote)
You're welcome, SOL89. Glad I could help. Hyperfocal distance is a way to maximise DOF, in particular when you have stuff in the near foreground and the background that you want to be acceptably sharp. The idea is that if you get a focus lock on something that's at the hyperfocal distance, not only will everything beyond that to infinity be sharp, the DOF will also extend towards the camera to include close objects. (Here the word "sharp" is relative, and where DOF is concerned you'll see expressions such as "perceived sharpness" or "acceptable sharpness" being used). How close the DOF comes to the camera depends on the focal length being used and the f-stop, where a wide angle of view and a small aperture both maximise the DOF and its closeness to the camera.
Hyperfocal distance can be used even if there's a main subject in the frame. But instead of focusing on the main subject you focus on something at the hyperfocal distance, knowing that the main subject will fall within the DOF and therefore be acceptably sharp. One way of looking at hyperfocal distance is to see it as the closest focus point that still gives sharpness to infinity.
But if there's nothing up close that needs to be sharp, you don't need to think about hyperfocal distance. That's when you'd want to know what the lowest safe f-stop would be (to give sufficient DOF), which in turn depends on how far the focus point is, where the further the focus point is from the camera, the greater the DOF will be.
Some of this stuff can be a bit daunting, especially when you have two or more variables which turns the right choice of settings into a moving target, but it's easier than you might think to get a feel for it. And usually there's a fair bit of leeway where acceptable results are concerned.
Aug 27, 2017 09:36:15 #

rmalarz wrote:
You are getting a lot of information captured, as you can see. Not optimum, but it's there.
--Bob
--Bob
I saw that you gave the OK to experiment... this was done in less than 5 minutes in Photoshop ($10 a month and worth every penny). I used PS "ACR" (raw adjustments).
Hope my butting in was OK!
Aug 27, 2017 12:02:52 #
I thought I had already replied to these last 2 messages, but apparently not. Terribly sorry for the delay! Thank you for the description of Hyperfocal distance R.G., I'm wanting to get a manual focus lens that has the distances marked on the barrel so it takes out some of the guess work of looking through my view finder and turning my ring until it "looks" like everything is in focus (ruined some good pictures that way). Should also help with night time photography when I can't see anything to determine what's in my DOF. I know there are other techniques out there to help with it that I've started researching, but this seems like rather large helpful step in the right direction.
Cheineck, you are absolutely welcome to "tweek" my photos! Thank you for taking the time to make adjustments to share with me, it looks marvelous. I have been experimenting a little with the post processing since my last post, as well as re-taking some of these photos in RAW. It's remarkable the difference it makes in the PP. Now that I have found how quick and easy it is to make adjustments in post, all my landscapes and portraits will be shot in RAW. Thank you for helping me to "see the light." :D Still having trouble making it look authentic and not obviously enhanced, but I didn't learn to shoot in manual mode over night, so I am sure PP is the same. It's another fun adventure in my hobby of photography!!!
Cheineck, you are absolutely welcome to "tweek" my photos! Thank you for taking the time to make adjustments to share with me, it looks marvelous. I have been experimenting a little with the post processing since my last post, as well as re-taking some of these photos in RAW. It's remarkable the difference it makes in the PP. Now that I have found how quick and easy it is to make adjustments in post, all my landscapes and portraits will be shot in RAW. Thank you for helping me to "see the light." :D Still having trouble making it look authentic and not obviously enhanced, but I didn't learn to shoot in manual mode over night, so I am sure PP is the same. It's another fun adventure in my hobby of photography!!!
Aug 27, 2017 15:25:54 #
Star_Of_Life89 wrote:
I thought I had already replied to these last 2 me... (show quote)
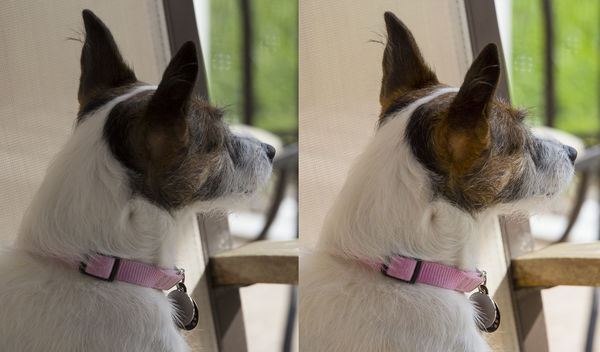
Thanks for not yelling at me! The jpeg of yours was fairly low resolution otherwise it would have been a "cleaner" fix. Photoshop opens jpegs in a 'raw adjust' window, or once in PS just go to "filters" and choose Adobe "Camera Raw"... it does a good job on jpegs but better on raw images. Have fun and experiment!!!! I have attached an example of what Camera Raw can do. Left is the original raw shot, right is about 3 minutes of adjustment. Be aware that raw files will at first look a bit worse than a well exposed jpeg. Most all raw images need adjustment but have much more latitude than jpegs for fine tuning and color correction, etc.
Aug 27, 2017 15:33:38 #

There is certainly a lack of contrast, as well as blown highlights, in this "experiment".
--Bob
--Bob
cheineck wrote:
I saw that you gave the OK to experiment... this was done in less than 5 minutes in Photoshop ($10 a month and worth every penny). I used PS "ACR" (raw adjustments).
Hope my butting in was OK!
Hope my butting in was OK!
Aug 27, 2017 17:24:08 #
cheineck wrote:
Thanks for not yelling at me!
I don't mind at all, in fact I encourage it! Being so new to the art of editing images after the fact, it's nice to see how it can be adjusted to improve it. It also helps give me something to compare my attempts to. I'm also thinking of finding one of the images I consider to be my best RAW photo I have edited and save it with all the layers so someone can see what I have done and maybe point me in the right direction of how I could have done it better. On some of the ones I've tried the blues are unrealistic and almost a turquoise, and the green trees almost neon when the actual scene wasn't even close to that. I've been working on 2 or 3 images and saving about 4 or 5 edits to compare what I liked and didn't like to try getting the picture it is supposed to be.
Thank you for explaining that the RAW images are more dull than, as you put it, a well exposed JPEG. I couldn't figure out why I really liked the picture when it showed up on my LCD, but when I opened it on my computer there was so much color missing and more bland. Minor tweeking most certainly made it vibrant and lively but I didn't realized that went along with being shot in RAW. It's nice to know I'm not losing my vision (or sanity for that matter).
Sep 16, 2017 06:33:58 #
I only have the kit lens on a Nikon D3300,I find that for landscape photos there is too much blue in the far background, for nearer pictures the lens is is very good, if you get a good polarizing filter it helps with the sky but not directly into the sun,also as fellow members have said a good post processing program is a must, especially for amateurs like you and me.if you shoot in raw, then again a program to handle raw files is a must, I have tried raw, it sure works ok, but for me too much messing about, and as the pics are really only for me it does not really matter too much.
Anyway good luck and welcome to the best picture sharing website on the net.
But for my own satisfaction I try to get the best results I can with jpeg photos.
Anyway good luck and welcome to the best picture sharing website on the net.
But for my own satisfaction I try to get the best results I can with jpeg photos.
Sep 16, 2017 11:16:53 #
If you care about your photography, shoot RAW, then off load the images to your PC/ Mac or external HD if your SD card fills up.
Lightroom is a fairly inexpensive image editor that will help you immensely.
If you want to shoot landsapes, get a quality tripod/head.
Shoot when the light is good (not in the middle of the day with a cloudless sky).
Lightroom is a fairly inexpensive image editor that will help you immensely.
If you want to shoot landsapes, get a quality tripod/head.
Shoot when the light is good (not in the middle of the day with a cloudless sky).
Sep 16, 2017 13:03:02 #
Thank you Ozmon and 8by10. I too have noticed the extensive amounts of blue from my kit lens. In the near future I plan on replacing it with a better lense for landscape, especially since the focus ring wobbles horribly often ruining a shot. I have a few new photos where I attempted HDR and also using Post processing to enhance. I just haven't had much time to post them.
Sep 16, 2017 14:10:14 #

Star_Of_Life89 wrote:
That is absolutely remarkable!!! I'm glad to see that with just my kit lens and some basic knowledge of photography I was able to capture enough detail to make it rather decent. I can't wait to have a better selection of lenses and a little more knowledge (and the experience that goes with it) to capture even better quality. You definitely have me sold on getting some software and perhaps even attending a class to learn how to use it. I'm am utterly in awe my friend!
Your lens isn't the problem. It's a problem of exposure. Read a few articles on proper exposure and you'll get closer to what you want. Any decent kit lens will give good results if properly exposed. Sometimes you can't get everything there is in a scene because of the lack of dynamic range of the sensor. Look into HDR to fix that.
Sep 16, 2017 14:12:09 #

Oct 17, 2017 19:13:44 #
rmalarz wrote:
Here's a very quick rework of your image. However, this takes some photo editing software. There is issues of blown highlights in the clouds. However, as you can see, some editing is required. Until you can obtain some editing software, and time to learn and become proficient with it, it would be best to try my first suggestions and obtain the best in-camera image that you can get.
--Bob
--Bob
Bob... never saw yours when I did this... less than a minute in PS. Lightened shadows, decreased whites and highlights, and decreased blacks. You're right...needs more work in the sky and her face!
Oct 17, 2017 22:39:35 #
gvarner
Loc: Central Oregon Coast
Star_Of_Life89 wrote:
Bob, sir, my jaw just hit the floor!!! Thank you for showing me just what a little photo editing can do. I always strive for the best possible image I can get in-camera first both to save time, and so I can get an even better end-result. All the suggestions I have gotten so far are immensely helpful!!!! I will take a few shots in RAW next time for comparison.
Some computers can't display a RAW image, and if you can display them, they may look a bit flat compared to a JPEG of the same subject. RAW does not use any of the camera's settings that can make a JPEG look sharper or with more vibrance or contrast. It's just the RAW digital photo data. What you see when looking at a RAW file either in the camera or on a computer is an embedded JPEG image.
Oct 18, 2017 07:26:26 #
Thank you gvarner, I had never thought to look into why it was called RAW. A simple and seemingly obvious reason, but honestly it had never occurred to me. Thank you for the explination!
Nov 20, 2017 11:02:08 #
gvarner
Loc: Central Oregon Coast
You're a bit limited in dynamic range with the 12 MP sensor so you're really pushing it with the dark for grounds and bright sky. Gonna either blow out the sky or lose detail in the shadows. Fill flash with the on-camera flash on the last one would have saved it. Yongnuo makes a nice TTL flash with a reasonable price if you want to add a flash to your gear. Or look for a used Nikon model. I've had my Nikon SB600 TTL for a few years now and am happy with it.
If you want to reply, then register here. Registration is free and your account is created instantly, so you can post right away.