Tutorial - Detailed Workflow for "Low Key - Chateau"
Jan 3, 2015 00:16:47 #

A lot of folks have asked me how I create my Low Key b&w images, so I thought I would create a rather lengthy tutorial, complete with step-by-step illustrations to explain the workflow as I go along.
The photo is of a house I affectionately call the "Chateau" because it looks like something I might see in the French countryside.
Workflow:
1. Unretouched photo, imported into LR 5.7.1 as a DNG file
2. Photo cropped, leveled, with modifications to Color Basics section included in illustration
3. Image as it appears after calling 2 filters; Photo>Edit In>DxO ViewPoint 2, then Piccure+ (pre-sharpening)
4. Opened image in Photoshop - Photo>Edit In>Edit in Adobe Photoshop CC 2014. Used Lasso Tool to highlight distractions in grass and roof, then deleted with Edit>Fill with Content Aware, Color Adaptation checked, Normal, 100% Opacity. Immediately afterward, executed Filter>Nik Collection>Viveza 2. Boosted Structure and made other changes in lighting values, then clicked OK
5. Created selection around house using Quick Select Tool, and further refined using Polygonal Lasso tool. Saved the selection using Select>Save Selection> New Channel, and named it "Chateau"
6. Created a new layer using Ctrl-J, and in the Layers window named this layer "Chateau"
7. Clicked on the Background layer in the Layers window and executed Layer>New>Layer, and when the Layer window opened, I named this Layer Black Background. Made all other layes inactive by toggling off the "eye" icon. Selected Black Background layer, ensured that the Set Foreground Color box was set to black and used the Paint Bucket Tool to fill in a completely black background
8. Toggled the "eye" icon to the left of the Chateau layer to make it visible above the Black Background layer, then flattened the image by executing Layer>Flatten Image
9. Executed Filter>NIK Collection>Silver Efex Pro 2 to convert the color photo to black and white. Used the Low Key I preset, clicked on the Red Color Filter, set Burn Edges to "All Edges (Soft) 2", set Vignette to "Lens Falloff 2", and moved center of vignette just to the right and below center. Clicked OK
10. Used the Burn Tool to blend in the corners of the image so that the main subject seemed to be emerging from the black background. Executed Image>Auto Tone, then immediately executed Image>Fade Auto Tone to lower opacity to about 30%. Executed Image>Auto Contrast, then immediately executed Image>Fade Auto Contrast to lower opacity to about 30%. Executed Image>Adjustments>Brightness/Contrast until pleased with the levels presented on screen
11. Executed Layer>Duplicate Layer, then Filter>Anthropics>Smart Photo Editor and selected the "Smart Glow" preset. Made changes in Merge Levels and Radius until pleased with the levels presented on screen
12. Increased canvas size to have more black area for an appropriate presentation level crop. Selected the Background layer, then executed Image>Canvas Size, changed the units to pixels and added 400 pixels to both Height and Width. Clicked OK. Once the box had cleared, flattened the image by executing Layer>Flatten Image
13. Cropped the image. While not complying strictly with the Rule of Thirds, offset the image to the left and the top of the screen. This allowed a wide expanse of "lawn" in the bottom right of the photo. Executed Filter>NIK Collection>Color Efex Pro 4 and selected the Darken/Lighten preset to change lighting levels to impart a 3-dimensional look to the image. Clicked OK. Saved the image as "LowKey_Chateau_Original.tif
14. Resized the image by executing Image>Image Size, set resolution to 230 Pixels/Inch, Height to 4 inches with the contstrain proportions box checked. Clicked OK. Saved the File as "LowKey_Chateau_EditedResized.jpg" Closed the file. Opened FastOne Image Viewer, selected "LowKey_Chateau_EditedResized.jpg, then executed Effects>Border Effects and applied a border design. Executed File>Save As> "LowKey_Chateau_EditedResized.jpg" and when asked for overwrite existing file, answered "Yes"
/End Workflow
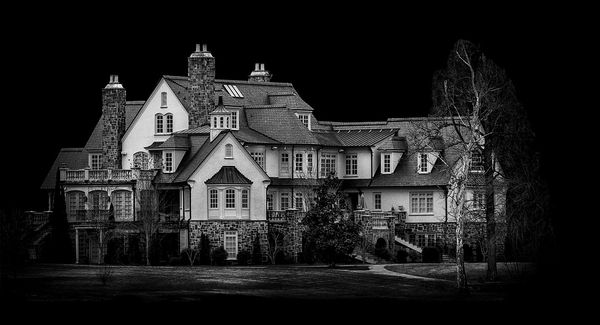
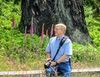
1. Unretouched photo, SOOC, Canon 7D with Tamron 16-300mm f3.5-6.3 II, f/8, 1/125.sec, ISO 640
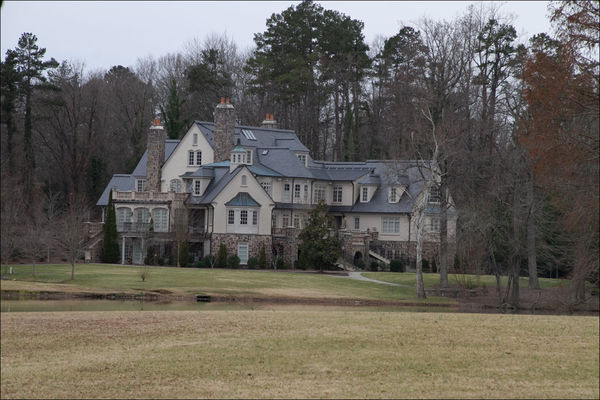
(Download)
2. Leveled in LR 5.7.1, light and color modifications
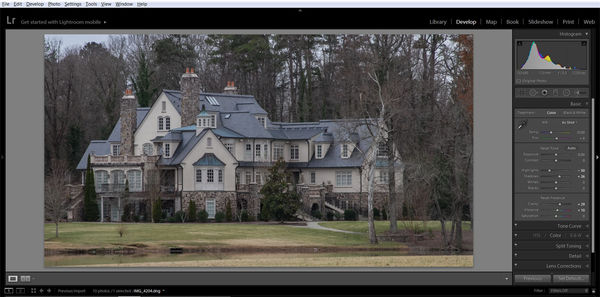
(Download)
3. Photo "Edited In" DxO Viewpoint 2 and Piccure+
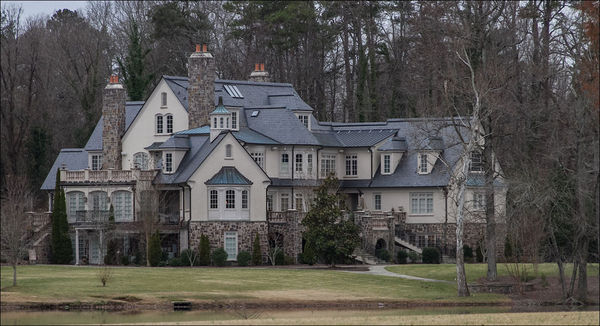
(Download)
4. Removed distracting elements in lawn and roof. Imported into NIK Viveza 2 to increase structure, modify lighting levels
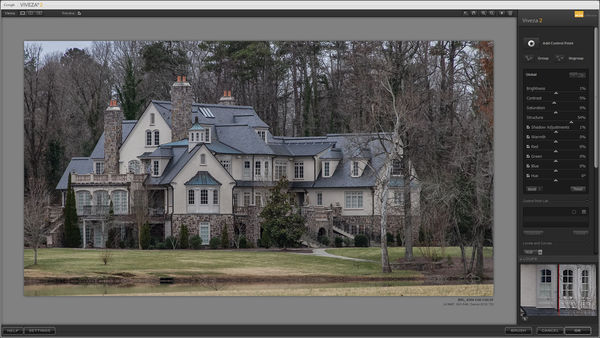
(Download)
5. Created selection around house and portions of trees and lawn for later refinement
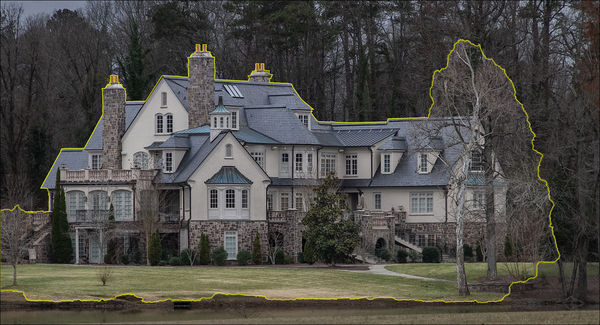
(Download)
Created New Layer named "Chateau"
(Download)
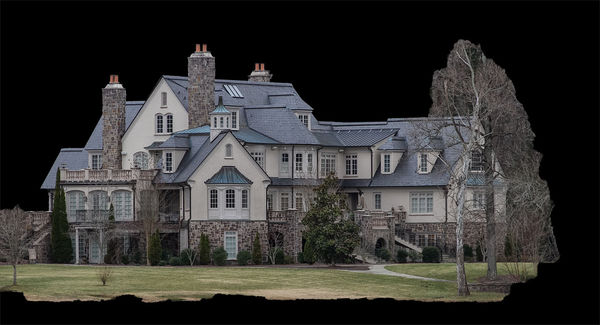
7. Created Black Background layer

(Download)
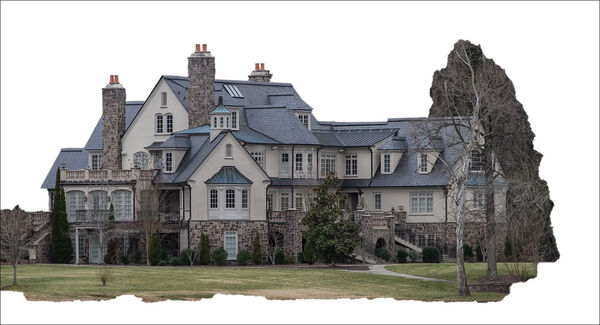
8. Flattened Image
(Download)
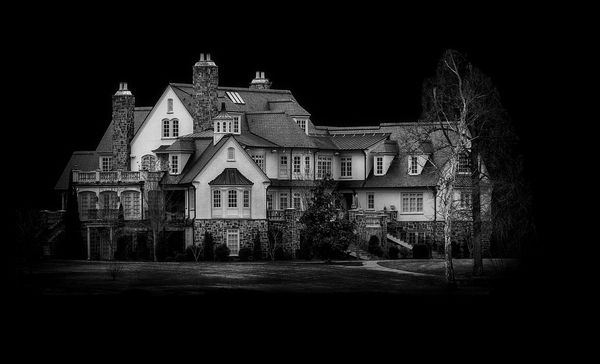
9. Edited with Silver Efex Pro 2 to convert image to Monochrome
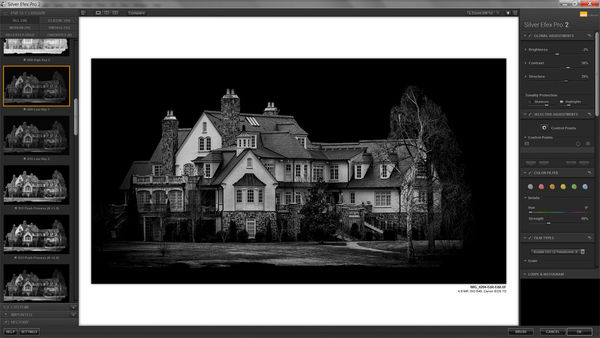
(Download)
10. Used Burn Tool, Auto Tone, Auto Contrast, and Adjust Brightness/Contrast
(Download)
11. Edited with Smart Photo Editor "Soft Glow" preset
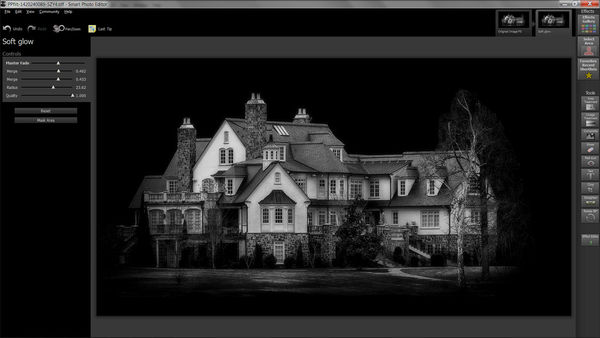
(Download)
12. Increased Canvas Size
(Download)
13. Cropped the photo so main subject was off-center
(Download)
14. Resized image, added border. This is "Low Key - Chateau"
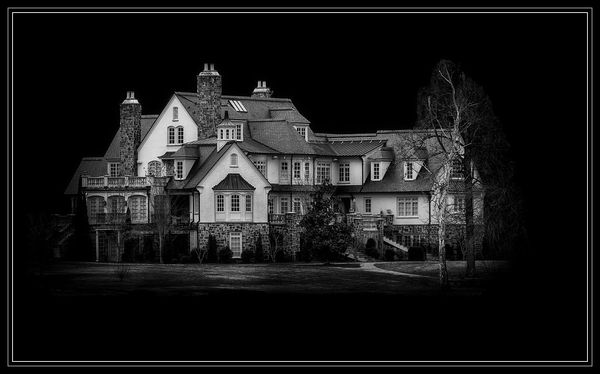
(Download)
Jan 3, 2015 07:48:22 #

Thanks for sharing your technique, Bob. They really turn out awesome!
Jan 3, 2015 09:08:56 #
Treepusher wrote:
Thanks Randy. I even revealed the ingredients ins some of my "secret sauce" with this one. This process will work on a very wide range of subject matter.Thanks for sharing your technique, Bob. They really turn out awesome!
Jan 3, 2015 16:27:00 #
Beautiful Bob. Thank you for sharing some of your techniques :thumbup: :thumbup: :thumbup:
Jan 3, 2015 16:39:10 #
artar wrote:
Thanks artar. I suspect if anyone wanted to try one of these on their own, there is enough here to keep them busylBeautiful Bob. Thank you for sharing some of your techniques :thumbup: :thumbup: :thumbup:
Jan 4, 2015 07:01:35 #

Jan 4, 2015 08:24:45 #
ejrmaine wrote:
You're welcome ejrmaine. I'm happy to help.Thanks for the work flow.
:thumbup: :thumbup:
:thumbup: :thumbup:
Jan 4, 2015 10:12:51 #
Bob Yankle wrote:
A lot of folks have asked me how I create my Low K... (show quote)
You are awesome! Thanks for sharing this workflow. I now feel I am the dirt beneath the first rung of the ladder! I will improve but just to get better snapshots. That's ok. Some people become stars and some people work in community theatre and lead very happy lives.
Jan 4, 2015 10:12:52 #
Jan 4, 2015 10:18:54 #
ediesaul wrote:
Edie, thou art not dirt! Stand up, dust yourself off, and get out there with a camera. Try stuff. The thing I love most about digital photography is that I can shoot literally hundreds of images and maybe not keep even one of them. That's OK ..... I just go out and shoot hundreds more and am lucky to find one or two keepers.You are awesome! Thanks for sharing this workflow. I now feel I am the dirt beneath the first rung of the ladder! I will improve but just to get better snapshots. That's ok. Some people become stars and some people work in community theatre and lead very happy lives.
Jan 4, 2015 10:21:53 #
346pak wrote:
Thanks much 346pak. Although I don't pretend that this tutorial will lead to a full table, I've always been fond of the parable which says something to the effect "If you teach a man to fish, he can feed himself and his family forever."Thanks Bob, your work is always spectacular and appreciate the helpful tutorial.
Jan 4, 2015 11:24:51 #
John_Central_FL
Loc: Orlando, FL
Bob,
Thank you for sharing your workflow. I have been wondering since I have really enjoyed your low key photos and your work. Appreciate - have been trying some low key processing in Nik Silver Efex when I get a chance yet this will also help my thought process (I use LR4, and may consider LR6 when it comes out I believe in March).
Thank you for sharing your workflow. I have been wondering since I have really enjoyed your low key photos and your work. Appreciate - have been trying some low key processing in Nik Silver Efex when I get a chance yet this will also help my thought process (I use LR4, and may consider LR6 when it comes out I believe in March).
Jan 4, 2015 11:44:03 #

thanks Bob for sharing this the results are awesome! Was wondering exactly how you did the selection. Will you share that as well? thanks!
Jan 4, 2015 11:58:10 #
John_Central_FL wrote:
Thanks John. I look forward to your work once you're happy with the outcome.Bob,
Thank you for sharing your workflow. I have been wondering since I have really enjoyed your low key photos and your work. Appreciate - have been trying some low key processing in Nik Silver Efex when I get a chance yet this will also help my thought process (I use LR4, and may consider LR6 when it comes out I believe in March).
Thank you for sharing your workflow. I have been wondering since I have really enjoyed your low key photos and your work. Appreciate - have been trying some low key processing in Nik Silver Efex when I get a chance yet this will also help my thought process (I use LR4, and may consider LR6 when it comes out I believe in March).
Jan 4, 2015 12:02:38 #
lloydl2 wrote:
Lloyd, I start out with the Quick Selection Tool for the broad outlines, usually going a bit wide. I then use the Polygonal Lasso Tool to subtract portions I do not wish to include in the final cut. I find it gives me almost exact control over the selection process as it allows me to click in reference points as I go along ..... I can rest my hand in between clicks, and then start in again where I left off. A Photoshop guru friend of mind showed me how to use the mouse to go wide of the mark, then move it back in until it's right where I want it, click to set a reference point, then go on to the next point. This allows for very precise selections.thanks Bob for sharing this the results are awesome! Was wondering exactly how you did the selection. Will you share that as well? thanks!
If you want to reply, then register here. Registration is free and your account is created instantly, so you can post right away.