Pleas help me understand
Oct 9, 2013 23:55:20 #
rook2c4 wrote:
When in doubt (about exposure), bracket. Later you... (show quote)
that's kinda what I did, but only took 2 shots... should've taken a few more at different settings, might have gotten it right in 1 then... thanks for your help...
Oct 10, 2013 00:00:55 #
Rongnongno wrote:
What you really need to do is to control your ISO ... (show quote)
thanks for your help.. are you saying I should use a different file format?.. if so, what do you suggest ??
Oct 10, 2013 00:51:32 #

country wrote:
yea, I know it was a bad time of day, around 1:00pm, but these days I have to go shooting when I get the chance... time is very limited between work and family... and I did use a tripod... thanks for your input, all help is appreciated and taken into consideration...
I understand. Family comes first. I realize you are trying to use manual more, but there is no shame in using one of the "Creative Zone" modes until you have more time. Perhaps get used to using Shutter priority, then move on to Aperture priority. This way you only have to worry about ONE corner of the exposure triangle at a time. When you use these modes, make sure you note the other settings your camera is automatically setting for you. Practice, practice, practice when you have more time. Good luck.
Oct 10, 2013 05:51:19 #

country wrote:
took these two photos, but changed settings... one is ok, the other not so.. im trying to learn to use manual more, although I did leave iso on auto.. the one that is not so sharp and has noise( I think), is that because the iso is much higher ?.. is it better to have iso as low as possible ?.. the only change I made was shutter speed, which changed iso.. any advice will be appreciated as I am still a work in progress... thanks...
the first thing i would say is get your ISO off of auto. It is possible for the Iso to change with each photo taken, so to get consistent get off all the auto stuff. As bright as the light is in these photos an iso of 100 or 400 would be as high as you need to go. pick an aperture say f8 and work with your shutter speed to get your exposure right. on a bright day like this you may want to bracket some shots to see what works better.
Oct 10, 2013 06:53:55 #
country wrote:
took these two photos, but changed settings... one is ok, the other not so.. im trying to learn to use manual more, although I did leave iso on auto.. the one that is not so sharp and has noise( I think), is that because the iso is much higher ?.. is it better to have iso as low as possible ?.. the only change I made was shutter speed, which changed iso.. any advice will be appreciated as I am still a work in progress... thanks...
Why leave ISO on auto. Read articles on ISO and understand it. It has been around for a long time. I leave mine on 100 all of time, and only change it when necessary.
Oct 10, 2013 07:08:58 #

It is always best to avoid settings at the extreme ends of available ranges. The middle range of available ISO, f-stop and to a lesser extent, shutter speed, generally result in better photographs. Even owners of very good fast lenses, for example, find that stopping the lens down a little sharpens up the photograph. Your camera is programmed to find a compromise setting in the middle ranges. If you think you can improve on the camera settings make small adjustments and compare the results. Moving to the extreme end of any range will require moving an offsetting setting to it's extreme, and likely degrading the result.
Oct 10, 2013 09:05:23 #

country wrote:
took these two photos, but changed settings... one is ok, the other not so.. im trying to learn to use manual more, although I did leave iso on auto.. the one that is not so sharp and has noise( I think), is that because the iso is much higher ?.. is it better to have iso as low as possible ?.. the only change I made was shutter speed, which changed iso.. any advice will be appreciated as I am still a work in progress... thanks...
In my opinion you need to turn off auto ISO. Learning to use manual settings requires that you control all three legs of the exposure triangle. I find that my D7000 tends to over expose in a lot of situations, especially middle of the day in full sun. Also, the camera metering system talks to the CPU in the lens to obtain exposure information. A third party lens may no be communicating properly so you may need to compensate for this.
Oct 10, 2013 09:38:26 #

Oct 10, 2013 12:49:57 #

country wrote:
what settings should be different to offset the intense light that is causing it to be blown out... or maybe a polarizing filter??.. thanks...
I agree with country. The harsh front lighting of the bridge can be helped by using CPL and cloudy WB. Noise can be helped with most post-processing programs.
Oct 10, 2013 22:26:27 #

country wrote:
I cannot tell you what metering mode I was in because im not sure what you mean by that... I look at the bars in the view finder and keep it in the center, if that's what you mean... guess I need to get to that part in bryans book... thanks for your help...
Do you have the user manual for your camera? If not see
if you can download it. At this point the manual might be your best friend. Most everything you need to know will be in it.
Oct 10, 2013 23:10:48 #
thanks to everyone for your input... I think we have concluded that I need to take iso off of auto...
Oct 13, 2013 21:47:47 #

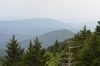
country wrote:
first one is iso 6400...
That's the main reason you have high noise levels. An outdoor shot need not be more than ISO 400 and in this situation I'd say ISO 200 is more than enough in bright sunlight.
You MUST use a fixed and NOT auto ISO if you're going to operate your camera in manual mode. If you hold aperture at a fixed amount, then move shutter speed, the auto-ISO will change itself to bring the exposure back to where it was. If you hold shutter at a fixed amount, then move aperture, the auto-ISO will again change itself to bring the exposure back to where it was.
You could use a high aperture f/number (small aperture hole) and a high shutter speed and auto-ISO would keep climbing as high as it could go to get back to the same exposure again. That's likely how you ended up at ISO 6400.
To be fully manual all three functions; aperture, shutter, and ISO must be set to manual.
I spend most of my time in aperture priority and let shutter speed roam around but I also use a fixed ISO of 200 outdoors and 800 indoors so that only shutter can change. That's a form of semi-manual operation.
Shutter priority is another kind of semi-manual mode which allows the aperture to roam around while the shutter is fixed but it still has to be used with a fixed ISO.
Personally, I've never liked auto-ISO because it complicates things unnecessarily.
Oct 13, 2013 22:26:11 #
Oct 16, 2013 10:32:52 #
rich808
Loc: Honolulu
I recommend that you slow down, use aperture priority center focus on the brightest spots, notice how the dark areas will be too dark (always look to see what speed the camera selects) then shoot one center focus on a darker area and see what speed the camera selects. What do you need to do to balance the two?
Do this for a week or two and you'll get a handle on aperture and shutter speed. Leave your ISO at 100, once you feel somewhat confident about the above, then play with ISO.
Do this for a week or two and you'll get a handle on aperture and shutter speed. Leave your ISO at 100, once you feel somewhat confident about the above, then play with ISO.
Oct 16, 2013 22:51:20 #
rich808 wrote:
I recommend that you slow down, use aperture priority center focus on the brightest spots, notice how the dark areas will be too dark (always look to see what speed the camera selects) then shoot one center focus on a darker area and see what speed the camera selects. What do you need to do to balance the two?
Do this for a week or two and you'll get a handle on aperture and shutter speed. Leave your ISO at 100, once you feel somewhat confident about the above, then play with ISO.
Do this for a week or two and you'll get a handle on aperture and shutter speed. Leave your ISO at 100, once you feel somewhat confident about the above, then play with ISO.
thanks, I will definitely try that... sounds like a good idea...
If you want to reply, then register here. Registration is free and your account is created instantly, so you can post right away.